
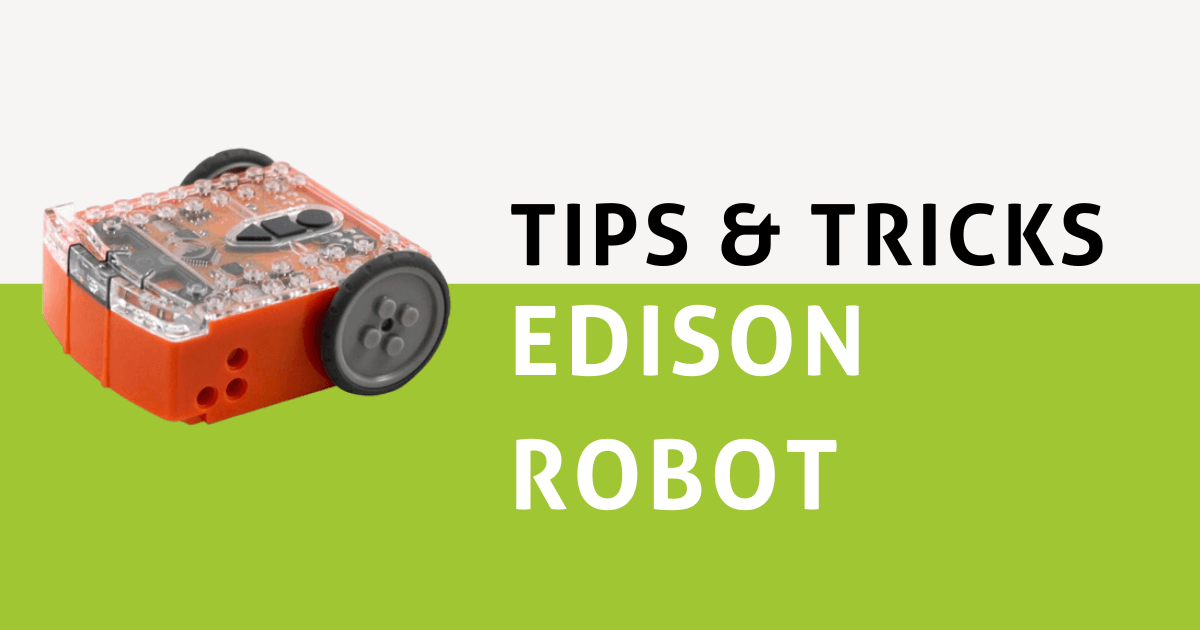
| The Edison V3 Robot is a versatile, sturdy robot that K–12 educators can use to teach coding to students at all grade levels. 1. The Edison arrives fully assembled with an integrated charging cable. |
Getting Started with the Edison Robot
The Edison comes wrapped in reusable orange cardboard, which students can fold back up to safely store their robot between lessons. The package also includes some sample barcodes for students to get started programming the robot. Although previous models of the Edison use AAA batteries, the new Edison V3 comes with an internal rechargeable battery connected to a USB-A cable—the same type of cable you can plug into the USB ports on your computer. That means students can easily download programs to the robot from their computers or charge it with any USB-A powered source.
The new rechargeable battery provides up to 60 minutes of continuous driving time, meaning teachers won't have to stop in the middle of class to change the batteries. Between classes, teachers can use the new EdCharger to simultaneously charge up to five Edison Robots at once, further streamlining the classroom experience. Keep in mind that an Edison will turn off after five minutes of non-use, but it's better to turn it off manually when done using it to save battery. Students can do so via the ON/OFF switch on the bottom of the Edison Robot.
The Edison Robot's sensors
Despite its small size, the Edison Robot is equipped with a number of key sensors. These include a sound sensor, light sensor (which also detects infrared), clap detector, and line tracking sensor. These sensors enable kids to incorporate all sorts of creative elements within their Edison programs—no matter which coding environment they're using. Kids might program Edison to respond to loud noises or play a song with its built-in buzzer. Using the light sensor, they could code Edison V3 to follow or avoid visible light or sense obstacles with its infrared light. In simple terms, the sensors enable the robot to interact with the world and provide more input for students to incorporate into their programs.
Programming the Edison on paper
The easiest way to introduce students to Edison V3 programming is via its specialized barcodes. Even with no experience, students can scan a barcode with Edison and set the robot off on a pre-programmed adventure. This method introduces kids to the idea that robots can follow commands, preparing them to write their own code later on. Edison can read about 20 different printed barcodes. These include the six main modes (line tracking, sumo wrestling, bouncing in borders, avoiding obstacles, following light, and clap-controlled driving). There are also other barcodes that kids can use to program Edison to move via remote control. About 75 percent of common household TV remotes are compatible with the robot, though a dedicated EdRemote is coming soon!
To program the Edison into a certain mode using a barcode, students should place the Edison next to the barcode on a printed sheet of paper. It’s best to use non-glossy, matte paper, especially if you're planning to laminate the barcode set. First, place Edison over the orange arrow next to the barcode. Then, quickly tap the Edison’s record button (the circle) three times. The Edison will then drive over the barcode and beep once reaching the other side, indicating successful programming in that mode.

Setting up your device
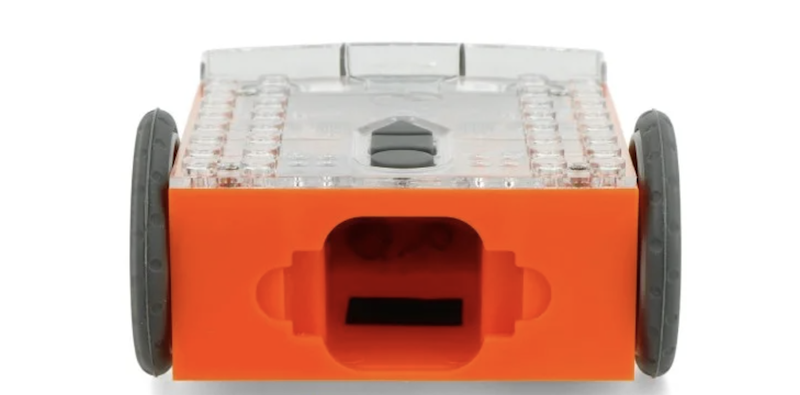
Because the Edison can read these barcodes, it's not necessary to use a device for coding with the robot. However, once students progress, integrating a device for on-screen programming is a logical next step. To connect your robot to a device, plug the included cable into a USB port on your programming device. The USB cable is always attached to the Edison V3, so there's no fear of losing it, and it tucks away neatly into a divot on the Edison's body for storage. For older Edison 'bots, plug an EdComm cable into the robot and into the audio jack on your programming device. Be sure the volume is turned up so the robot can "hear" the program downloading.
Edison coding options
There are three main digital environments kids can use when coding with the Edison Robot: EdBlocks, EdScratch, and EdPy. All of them are completely free to use and accessible directly on a browser, so there is no need to download additional software. Students can choose from pre-created programs or design their own. In either case, once they're ready, they can simply transfer the program to their Edison V3 Robot using the attached USB cable.
To transfer their EdBlocks and EdScratch programs, students can download them as local files on a computer. This means they don't have to create an account linked to an email address. Those who would still like to set up an account, however, can do so through the cloud version of the coding platforms. In terms of coding, EdBlocks is the easiest Edison Robot programming language, designed for younger students just starting out. It is fully icon-based and features drag-and-drop functionality for creating programs. In fact, children as young as seven can use EdBlocks with the Edison Robot thanks to this simplicity.
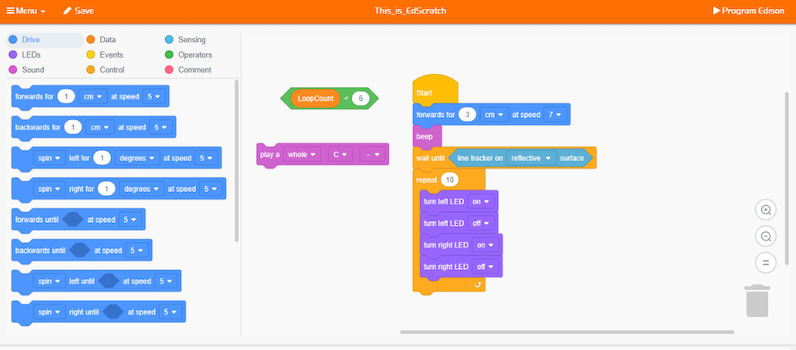
Next, we have EdScratch, which is slightly more advanced and based on the Scratch coding environment. EdScratch displays programs in a vertical format, whereas EdBlocks displays them horizontally. Kids can still drag and drop blocks to add them to their Edison Robot programs, but in EdScratch, the blocks display words that indicate their unique functions rather than icons. Also, the functionality within EdScratch is more advanced, meaning students can use more in-depth computer science elements in their Edison programs. While EdBlocks is a great intro for younger elementary kids, EdScratch is perfect for students aged 10 and up.
Finally, there's EdPy, which students can use to program the Edison Robot in Python. Like Python, EdPy is a text-based programming environment, meaning children type all the code out themselves. Then, they can watch as their code comes to life while learning key strategies for exploring this real-world language. It is the most advanced option for coding with the Edison Robot and is designed for children aged 13 and up who have prior programming experience.
Hybrid or remote learning with the Edison Robot
Of course, STEAM learning sometimes happens at home, as well. Fortunately, the Edison Robot V3 is conducive to both remote and hybrid learning due to its compact size and plentiful digital learning materials. If students have their robot with them at home, they can find simple Edison Robot projects and activities on the Microbric website. There are coding activities, STEM lessons, and projects that help maximize time out of the classroom or during summer learning experiences.
Teacher training
Another amazing service that the Edison team provides is educator training. There aren't any formal training sessions required to teach Edison Robot programming, but their team has provided many helpful resources. Whether teachers need insights on integrating the Edison in classroom STEAM lessons, tips for programming, or help connecting Edison activities with curricular standards, there are trainings available.
Edison Robot programming tips
Once students are up and running with the Edison Robot, it's important to follow certain tips to get the most out of learning. Kids should avoid using Edison in direct sunlight, since this confuses its sensors when it's trying to read barcodes, track lines, avoid obstacles, or follow a light. When using its line tracking feature, the No. 1 rule is to start the robot on the white background—never on the line itself! If drawing barcodes instead of printing them out, make sure the lines are dark (black), approximately 1.5 cm or 0.6 inches wide, and drawn on a white surface. If children are coding with EdScratch or EdPy, they'll also need to include a command in their programs that tells the Edison to be looking for lines to track.
As for obstacle detection, the Edison can only detect obstacles that are at least as tall as it is and opaque (but not too dark). If the Edison still isn't detecting obstacles, you may need to scan the obstacle detection barcode to re-calibrate it. Just as they did with the line tracking feature, if students are using obstacle detection with EdScratch or EdPy, they will need to include a command that tells Edison that it should be looking for obstacles to avoid.
Drive calibration
If the Edison won't drive straight, it could mean that its wheels aren’t moving at the same speed. To fix this, try an acceleration calibration. Print and scan this barcode, then hit the play button (the triangle) on the robot twice. Make sure the Edison has plenty of room away from obstacles and drops (like the edge of a desk). The Edison will drive back and forth at different speeds while performing the calibration. If it hits something or falls, you can simply re-scan the barcode. Calibrating your Edison Robot should take only a couple of minutes, and the robot should move only a few feet in any direction while doing so. If Edison is struggling to read the calibration barcode, removing its wheels and trying again could help.
We certainly hope this helps answer your questions about the Edison V3 Robot! To purchase an Edison Robot, classroom packs, or accessories, visit the Eduporium store or click below. Follow us on Twitter and Instagram for more EdTech Tips & Tricks. And, if you have a robotics program that needs funding, we recommend applying for one of our EdTech grants!


1 Comment