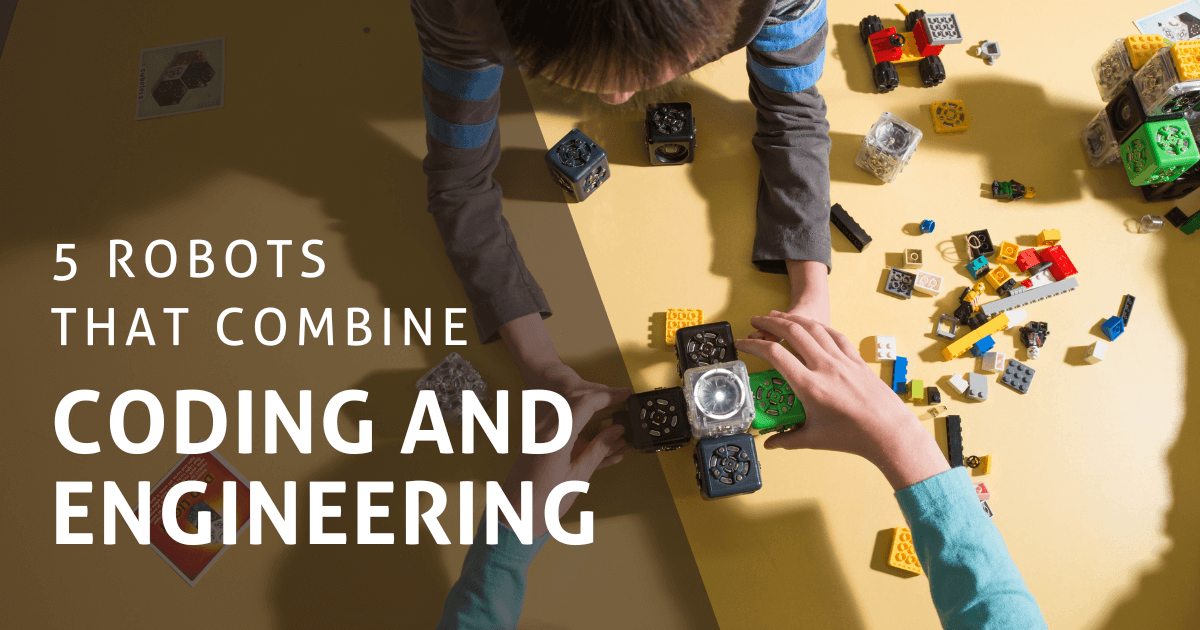
Coding and robotics make up a large part of STEM education in K-12 schools—for good reason. But there are three other letters in ‘STEM.' And it's important to recognize that the ‘E’ is just as valuable as other STEM disciplines. Many robotics tools not only help educators teach coding and computational thinking but also include an engineering component. It’s awesome that teachers can combine these two major areas of STEM by providing robots that kids can both build and program. So, we’ve compiled some of the best robotics kits with which students can practice engineering and coding at the same time. Build these kits from the ground up, then program your creations!
The mBot-S
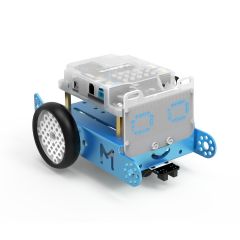
The mBot-S is an entry-level robot appropriate for students as young as eight years old. This robot is part of Makeblock's dedicated STEAM line, and its latest version has some serious upgrades. The main change is the addition of an interactive LED matrix board, which adds an extra element to programming. The built-in LED matrix enables kids to code and display customizable images. But that's not all. The mBot-S teaches a number of other innovative concepts, starting with engineering.
Before kids can program with the mBot-S, they first have to build it. In the 30-minute building process, students will quickly come to understand each of the robot's parts and their functions. The center of the robot is its chassis, which allows students to visualize the mBot's final shape. To the chassis, they'll add wheels, tires, the mCore, brackets, nuts, bolts, and the LED matrix. Although the kit comes with over 100 pieces, the included instructions demonstrate each step with accompanying visuals, helping students assemble the mBot-S easily and effectively.
The mBot-S also comes equipped with five different sensors that kids can put into place during assembly. The sensors include a light sensor, button, IR receiver, ultrasonic sensor, and a line following sensor. By placing these components in the correct places, kids can gain a feel for engineering and design. Like the LED matrix, the sensors are also programmable, so students can incorporate them into code after building their robot. They can also observe how the robot's components work together, demonstrating the functionality of a full robotic system. To learn more about the mBot-S and get a quote, head on over to our store!
The GoPiGo Robotics Kits
The GoPiGo Robot shares a similar structure with the mBot, but its power source is different. While the mBot relies on Arduino technology to power and program it, the GoPiGo is dependent on the Raspberry Pi. The tiny Raspberry Pi motherboard is at the heart of every GoPiGo Robot. As children assemble the robot, they'll also have an opportunity to learn more about the Raspberry Pi technology. Like the mBot, the GoPiGo should take only about 30 minutes to fully assemble. And once students finish building it, they’ll have a functioning robot that drives, senses, and is fully programmable.
The various GoPiGo packs contain different quantities of robots and components, so teachers can get exactly what they need. No matter the size, however, each kit includes these parts: the Raspberry Pi 3, a GoPiGo Servo Package, a rechargeable battery, a microSD card, a power supply, and an ethernet cable. Be sure your students insert the microSD card during the building process. The cards are outfitted with the custom DexterOS software, which students will need to program the GoPiGo Robot. After installing the software, students can program various robotic components, like the distance sensor, multi-colored LEDs, and Raspberry Pi camera. So, as is the case with each robot in this post, learning starts with engineering.

Cubelets Robot Blocks
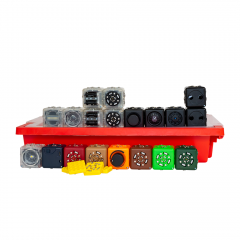
Unlike the first two robots we've discussed, Cubelets blocks have a less traditional form. Cubelets are sets of robotic blocks that each have their own unique function and snap together with a magnetic connection. This means that students can configure them in many different shapes, each of which creates a different robotic invention. Some Cubelets blocks have wheels on the bottom, for example, so students can engineer a robot that moves based on an internal or external trigger! That’s just one of the engineering and programming possibilities students can explore with the Cubelets kits.
There are over a dozen unique Cubelets blocks, and children routinely find creative ways of attaching them. Cubelets might inspire students to design robot models such as animals or geometric shapes. As they build their inventions, students become completely engaged in the design process and learn about engineering along the way. They need to be aware, for example, of not making their robot top-heavy, which could result in it tipping over. They also learn the best ways of constructing cool structures using an engineering mindset.
As students build Cubelets inventions, they activate their computational thinking skills by looking for the most efficient and sturdy ways of putting robots together. Plus, once they build their robot systems using the Cubelets hardware and their engineering skills, the STEM practice doesn't stop. They can then use the Cubelets software to create programs on any compatible device. The Cubelets kits are one of the most versatile sets of STEM tools available on our store, and engineering is at the top of the list of skills they help students develop.
The Robotics Smart Machines Kit
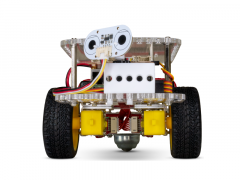
There are many different Thames and Kosmos kits that illustrate important topics and disciplines for kids. One of those is the Robotics Smart Machines Kit, which is part of the Thames and Kosmos signature series. Children simply follow the step-by-step manual that comes in the kit to construct eight different robot models. The kit is ideal for both upper elementary or middle school students, as it contains well over 200 pieces. Although the assembly can be a bit challenging at times, this kit demonstrates a variety of engineering principles. Some of the components, like the ultrasonic sensor, give children a glimpse into real-world robotics applications. This kit is also great if you're starting a school robotics club!
The eight different models kids can build with the Smart Machines kits are all different sizes and styles and highlight each of the individual components in the kit. The eight projects are the Bipedal Android, Spy Bot, Beetle, Crocodile, Tiltrotor Aircraft, Robo Dog, Robotosaurus, and a catapult. Each project could take an hour or more for your students to build, but each one provides experience with engineering and problem solving. And not to worry, the detailed diagrams and instructions that come in the kit's manual will offer plenty of engineering guidance for children. Then, like with the mBot, GoPiGo, and Cubelets robots, students can program the projects they create.
Assembling and coding these projects gives students the opportunity to learn how robotics devices are used in the real world. With just a little guidance, they will start to see why robots need to be a certain shape, for example, or why they might need to be nimble if they’re going to be used in tight spaces. This underscores the importance of assembling these machines correctly so that there are no errors when they deploy the robot in a real-world situation. To control the robots they build, students can download the Robotics Smart Machines app on either Apple or Android devices. Students can then create visual programs on their screen and pair their robot with their device to take control of it.
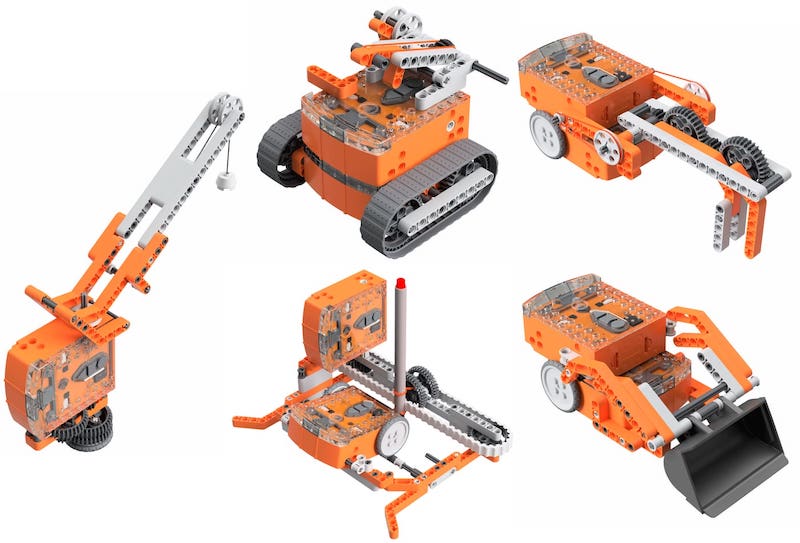
The Edison Robot
Although each of the robots we’ve discussed involve some element of engineering, they're all unique. And the last one on the list is no exception. The Edison Robot is a small orange 'bot from a company known as Microbric. This robot stands out in a number of ways, beginning with its shape and its superb durability. It’s very compact, making it great for the classroom because it’s easy to store and tough to damage. While students won't get to build the Edison Robot themselves, there are still opportunities for engineering. If you look at the robot, you’ll notice small holes on the bottom side and small grooves on its top. If those markings look familiar, that’s because they're a classic indicator of LEGO block compatibility.
So yes, students can add LEGO blocks and other accessories to Edison to design and build creative structures. They can add on to a single Edison or use LEGOs to connect more than one. This enables them to build much bigger bots, providing a more exciting coding experience and a unique opportunity for engineering. By adding LEGO blocks onto the Edison, kids can learn some basic but important engineering skills. They'll have to consider how many blocks they can add before the structure becomes unstable, how to add the strongest blocks to the base of their structure, how to safely connect their robots, and more. All of these are factors that real engineers have to consider as well.
Once kids try different engineering possibilities, they can move on to the programming side of Edison. They can program the robot in different ways—both with and without a screen. The robot can read pre-programmed barcodes that command it to avoid obstacles, stay within borders, sumo wrestle with other Edison Robots, follow lines, and more. More advanced students can program Edison using Blockly, Python, and Scratch! Students at this level can also try programming two or more robots attached with LEGO blocks. This method is tricky, since students have to program each individual robot to work together. With the Edison, the engineering opportunities are great, but they’re really only the start of what students can learn!
For the latest EdTech, STEM, and 21st century education news, follow us on Twitter and Instagram. Like us on Facebook, too, or sign up for our newsletter for our latest product announcements and offerings. If you have an idea for an Eduporium Weekly theme, send us a message on social media or comment below.