
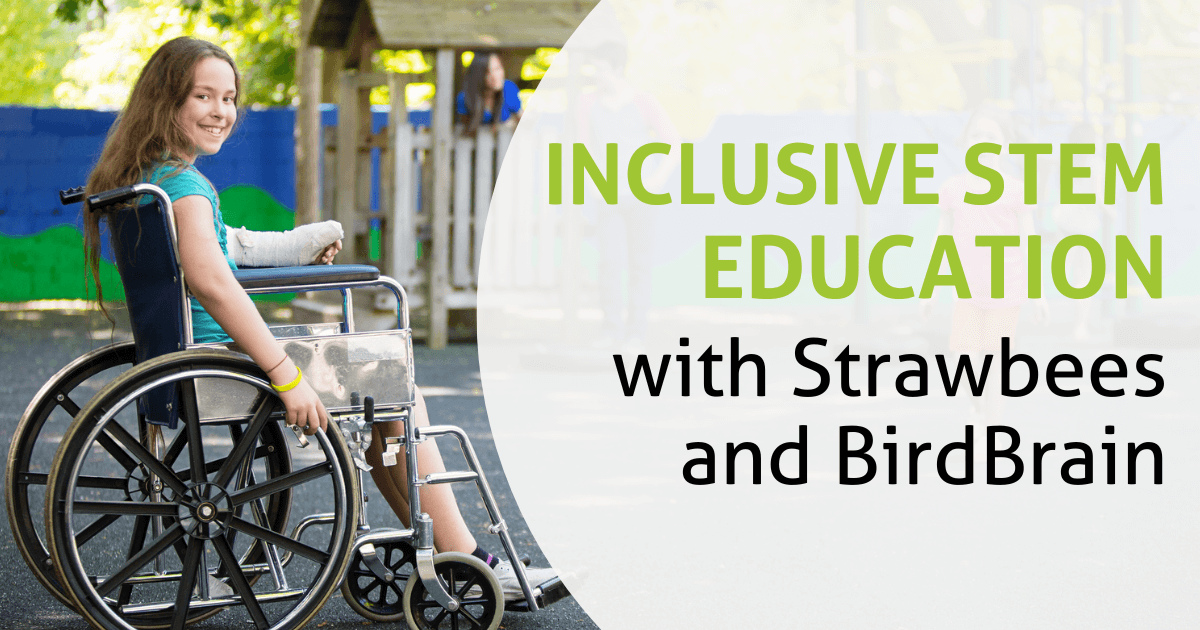
What obstacles might students face in STEM education? For students whose first language isn’t English, language barriers may prevent them from fully participating in classes. Others may be limited by cost if their school or family can’t afford technology tools. And still others encounter school buildings that are inaccessible to their disabilities. In fact, over seven million students with disabilities are enrolled in K–12 public schools in the United States, but many school facilities lack accommodations. One 2023 report found that two-thirds of public schools in New York City are not fully inclusive for people with physical disabilities, with issues like too-narrow doorways and broken elevators among the most common. Apart from physical disabilities, many neurodivergent children struggle with school environments that are inaccessible due to sensory barriers, like bright lights, loud noises, and unclear social expectations. STEM education, while essential, is not always an inclusive place.
Bringing accessibility to STEM education
But Strawbees and BirdBrain want to change that. These two trusted STEM partners have collaborated to create prototypes of accessible playgrounds, bringing equity and inclusion to the forefront of STEM education. If you’re not familiar with either organization, we’ve got plenty of blogs on both Strawbees and BirdBrain products. Took a little detour to check them out? Great! If not, here’s a quick overview. Strawbees are bendy straws that kids can attach together with special connectors. They’re sturdier and more durable than regular straws, and students can even make their own connectors with recycled materials! On their own, Strawbees help kids practice engineering, but they also pair with micro:bit to add a computerized element to some constructions.
Meanwhile, BirdBrain’s Hummingbird kit (hence the “bird” in BirdBrain) develops kids’ computer science skills. Its sensors, lights, and motors allow students to connect electronic components to materials like cardboard or clay. They might draw a robot on a piece of cardboard, then attach wheels and motors to make it roll around. And in this case, the craft materials attached to the Hummingbird components are the Strawbees straws themselves. So how do these tools come together to promote inclusive education? Read on or watch the webinar below to find out.
Combining Strawbees and Hummingbird Bit
If you want to make an accessible tool, start by creating a prototype. To make their prototypes, Strawbees and BirdBrain stuck their products together in a bunch of different ways, with tape, plastic adapters, and even 3D printed parts (see below). All the files to print your own connectors are on Thingiverse and should work with most popular educational 3D printers. Don’t worry about buying a 3D printer, though—tape also works just fine. Either way, the resulting structures are modular enough to repurpose.
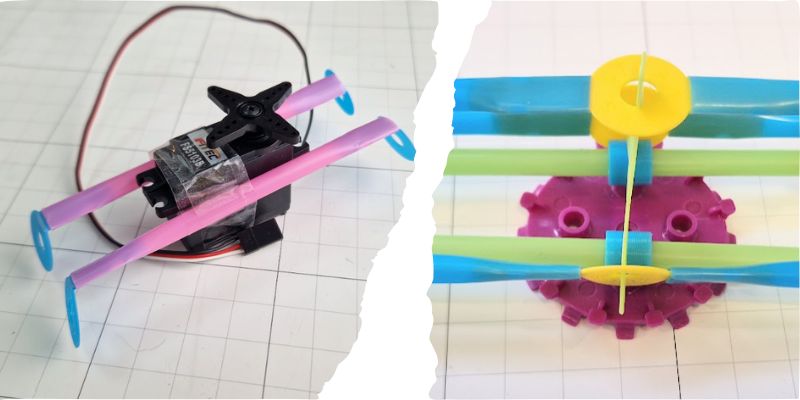
Check out these examples of ways to connect the two tools. On the left, two Strawbees straws are taped onto a Hummingbird motor. The straws might provide the framework that holds a spinning robot part or add stability to a moving robot. On the right, 3D printed parts (yellow) attach Strawbees to a Hummingbird component. Both methods have value, and students can find a use for each, depending on the product. One benefit of both tools is their reusability. Students can build something differently as many times as necessary before landing on a final product, thereby boosting their creative confidence.
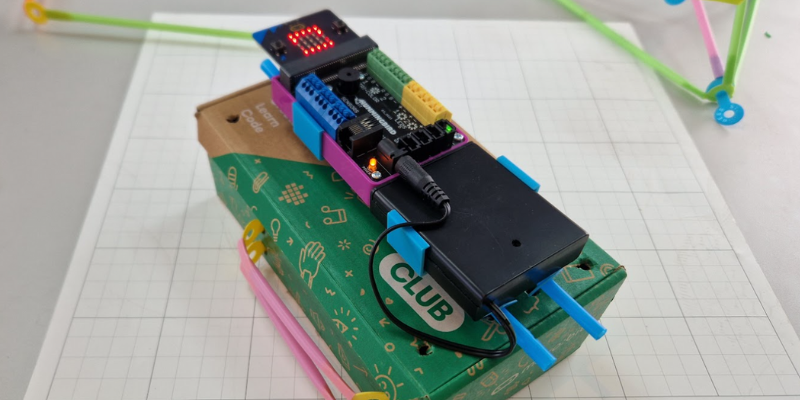
Above is an example of how students can use Strawbees as a framework for Hummingbird parts. The team used an empty micro:bit Club box as a base, but your students can use any spare box or other materials to make their own. By poking pencil holes in the cardboard, the team could insert Strawbees connectors and straws to make “rails” for the Hummingbird computer. Hummingbird remained secure and easily accessible while they added other accessories like motors, wheels, and more. Combining Strawbees and Hummingbird allows students to experience an expansive creative process with more opportunities than either tool provides alone.
Play for All Design Challenge
Now that you’re familiar with methods of combining Strawbees and Hummingbird, it’s time to think about using them to promote more inclusive education. The Strawbees and BirdBrain teams created the Play For All Design Challenge, a guided lesson that educators can use to teach students about accessibility by prototyping inclusive school environments. Throughout the lesson, students will work together towards increasing accessibility by designing a playground. They’ll use Strawbees and Hummingbird parts to model inclusive toys and equipment, practicing design thinking and engineering principles along the way.
Background: Who can play on the playground?
Center the lesson around the following question: Can we design a playground where everyone can play? Ask students to think of their favorite playground. Then, ask whether everyone can play there. Why or why not? Students might immediately answer, “Of course everyone can play!” But for many playgrounds, this isn’t the case. Could someone using crutches or a wheelchair use the equipment? If you have any disabled and/or neurodivergent students, allow them to share about equipment that they can’t access. (NB: Don’t single out particular students for this question. Rather, extend an open invitation for students to contribute.)
After assessing kids’ knowledge of accessibility, explore more perspectives to prompt discussion. Try showing a video like this one, in which disabled children show their inaccessible local playgrounds. What did students notice about these playgrounds? Along the way, teach students to use respectful language and listen to disabled voices. For example, many people prefer using the word “disabled” instead of “special needs,” but students can usually ask what their classmates with disabilities like best. Students may have been taught they’re not supposed to talk about disabilities. However, talking about accessibility “breaks down unconscious biases” about disability and creates an inclusive environment that prioritizes education and discussion.
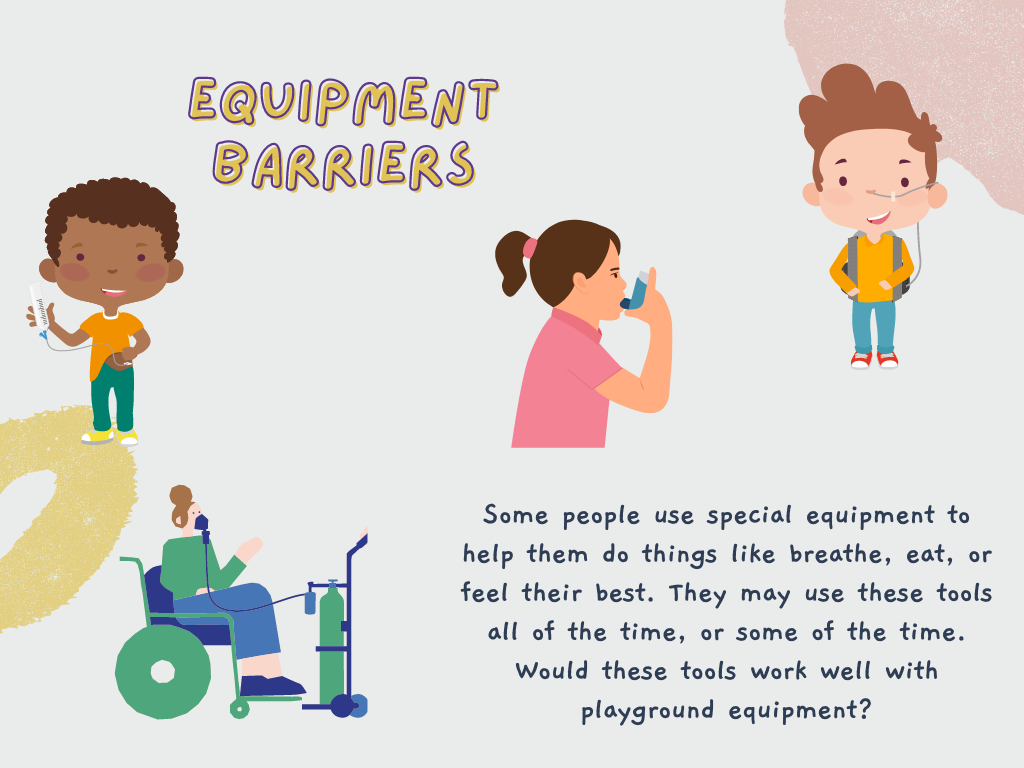
Once students have had time to discuss and learn, check out these slides shared by the Strawbees and BirdBrain teams. The slides summarize various types of disabilities or barriers that may prevent kids from enjoying a playground, from physical disabilities to a lack of transportation. Then, leave kids with the question: What would a playground for everyone look like? They can ponder this question while preparing for the next part of the Play For All challenge: the design stage. You can find the full lesson plan here for further guidance.
Set a goal: What is the purpose of your design?
Pit stop! Before starting the Play For All challenge, narrow down the purpose of the project and how you’ll evaluate the final products. What materials will students be using (aside from BirdBrain and Strawbees tools)? Providing a wide variety of materials enables students to imagine big ideas, but limiting their materials pushes them to think creatively—what you choose depends on your learning objectives. How long do students have to work? What robotics components (sensors, motors, etc.) should be included? These considerations will help you create a rubric with which to grade the quality and success of their projects.
Meanwhile, students should consider the intended audience of their creations. Are they convincing a city board to add inclusive equipment to the local playground? Or are they presenting ideas to their own school administration? Keeping an audience in mind will help students prepare for the final presentation of their work. Students could also pick a specific accessibility challenge for their prototypes to address. Equipment that is accessible for one student’s disability might not work for another, so it’s important to have a wide variety of accessible equipment to include everyone. Some students might make Braille letter blocks to include blind students. Others might consider wheelchair users by making an accessible see-saw, like the one below. Although not every design can include every child, putting multiple accessible prototypes together should create an inclusive playground.
The challenge:
You should already be familiar with the Strawbees and Hummingbird tools from the tutorial above. In class, have students play with and connect Strawbees for a few minutes, then practice a couple coding exercises from the BirdBrain portal. See the lesson plan for more detail. Once students feel comfortable using the tools, challenge them to create a moving prototype of an inclusive piece of playground equipment. Start by having them draw their planned design and make a list of desired materials. Next class period, they’ll use those materials to build their idea.
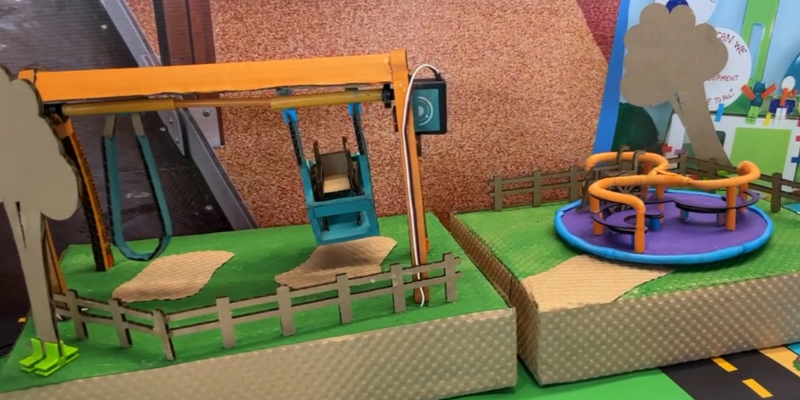
Above are two examples of student-created prototypes of inclusive equipment. On the left, you’ll see a wheelchair-accessible swing made of cardboard and Strawbees, with a Hummingbird attachment to make it move. On the right is a merry-go-round (powered by Hummingbird) which is also accessible to wheelchair users. These are only a couple of the amazing prototypes students have made! For your students, making a design may be enough, or maybe you’ll have them present it to the class. You could even have the class vote on a design to implement at your school! Depending on your rubric, grade level, and available materials, the results of your lesson may vary—but that’s good. When it comes to inclusive education, it’s better to have too many ideas than not enough. Having plenty of ideas means we’re making accessibility a priority, not putting it on the back burner.
What does this challenge teach about inclusive education?
Design thinking is human-centered and compassionate. In other words, a good design considers how the tool can best meet the needs of its users. Students might be familiar with using left- or right-handed desks in their classrooms, but it would be bad design thinking to make only right-handed desks. That leaves left-handed people out! In the same way, students can understand why certain playground equipment leaves out kids with disabilities (both visible and invisible). Considering multiple perspectives is the starting point for many useful, accessible designs. The Play For All challenge demonstrates the need for empathy and active listening when creating a design, developing valuable SEL skills that kids will use throughout their lives. It's also a great starting point for increasing inclusivity in an entire school. As we discussed at the beginning of this article, many schools are inaccessible places, but by starting a conversation about equity, we can change things for the better.
Designing inclusive equipment also broadens students’ perspectives. Although they aren’t building life-sized accessibility tools, the process of designing inclusive prototypes centers accessibility in education—for their peers, their classmates, or even themselves. By bringing accessibility to the forefront of students’ minds, we can ensure that they consider how to include their peers in other aspects of their lives, whether that’s on the playground or at home. In the future, when they make policy, build our homes and offices, and plan our cities, accessibility will always be a priority.