
After DJI discontinued the Tello EDU and RoboMaster drones in the spring of 2023, the world of educational coding drones experienced a profound shift. Many educators scrambled to find a suitable replacement for the trusted Tello. However, CoDrone EDU drones quickly swooped in to save the day. Outfitted with as many cool features as the Tello EDU drones, the CoDrone is the perfect solution for teaching coding and piloting simultaneously. Before we chose to offer CoDrone EDU, we put it through our usual in-office vetting process to ensure its quality. After only a couple hours using the CoDrone, we were impressed with its unique capabilities—and we had fun! If you're ready to try it out as well, we've put together these tips for how to pair CoDrone EDU with the controller, write and transmit code to the drone, and make sure your students fly safely.
The basics: What’s in the box?
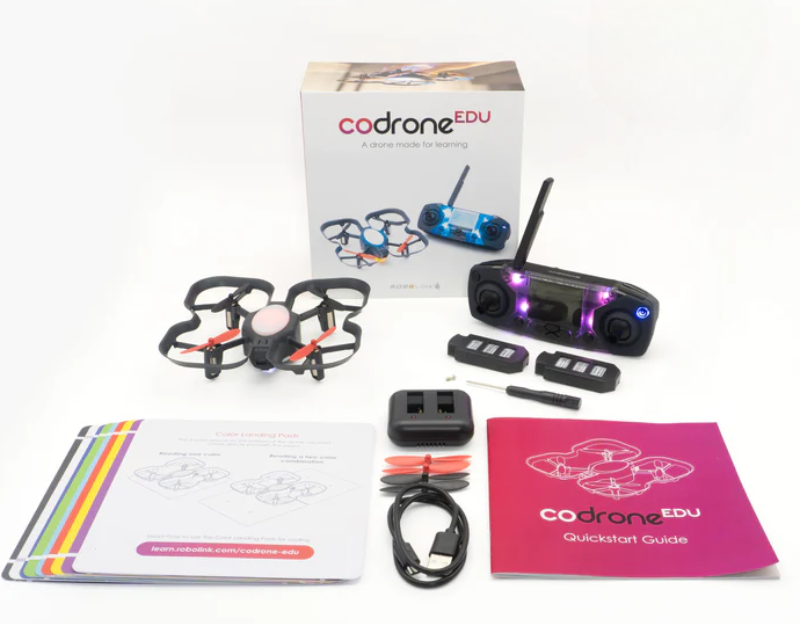
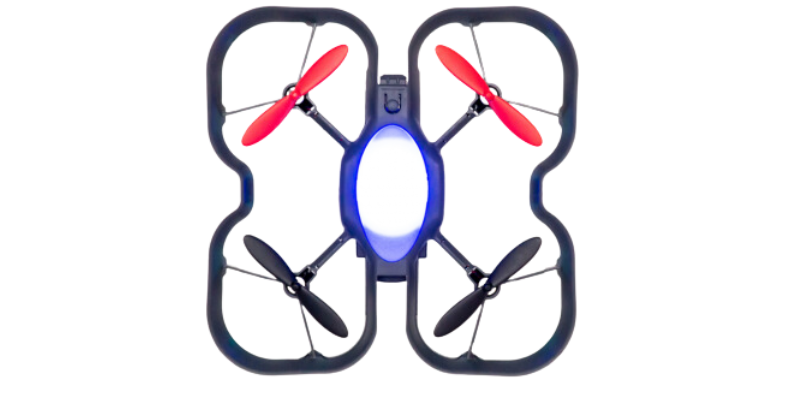
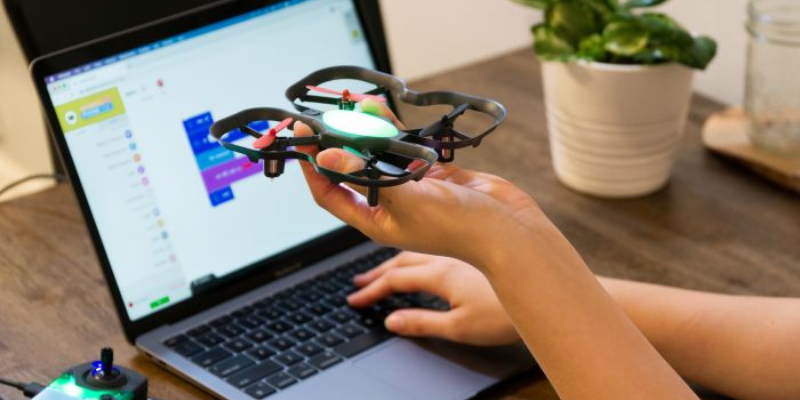
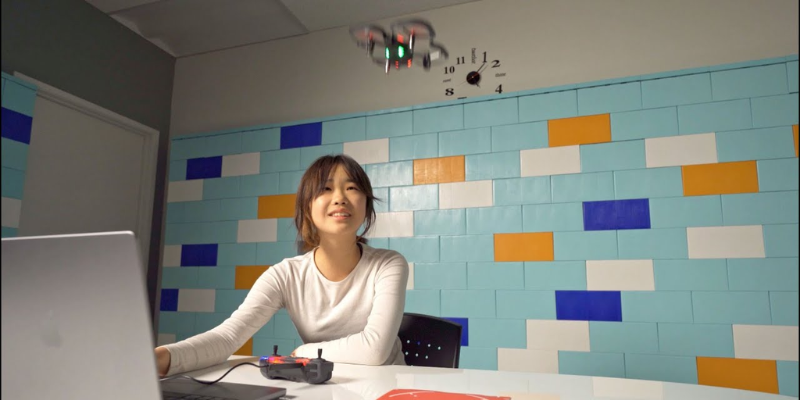
When you open your CoDrone box, the first thing you’ll see is the drone itself. It's about five inches across—roughly the size of an adult hand with fingers extended—and has four color-coded propellers. Red propellers indicate the front of the drone, so users can see where it's headed while in flight. If you can’t see the red propellers when they’re spinning, you can use the green running lights on the bottom to see which direction it’s facing. The oval LED in the middle of the drone indicates different states and functions. When CoDrone EDU pairs with the controller, for example, the LED cycles through all the colors of the rainbow. It's also programmable, with ten different color options. I changed the color to light blue on both the controller and the drone, noting that this feature could help students differentiate between drones while several are flying at once.
The CoDrone EDU's sensors
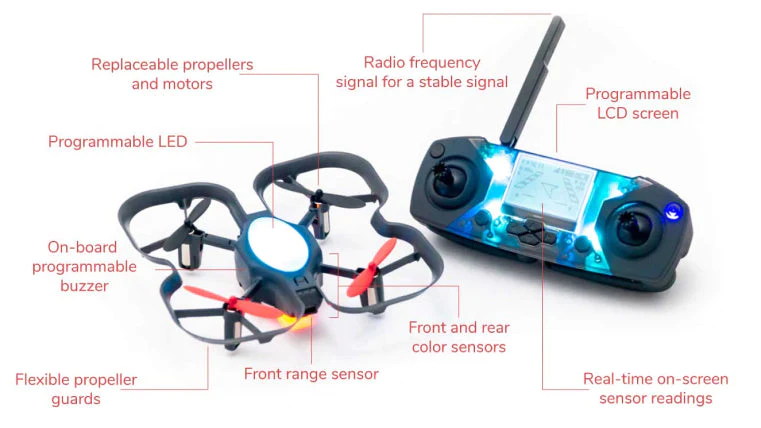
On the body of the drone are several sensors and buttons. There are two color sensors underneath the drone, so it can detect and land on the included color-coded landing pads, and an optical flow sensor so that it can determine its position in the air. Optical flow is the appearance of relative motion between objects. In other words, when a camera (or an eye) detects changes in the position of an object, it uses that information to measure distance and movement. CoDrone EDU uses light to estimate its distance from the ground, so flying over dark or reflective surfaces can cause inconsistencies in flight. We flew the drone over a dark carpet and didn't have any issues, so the optical flow sensor should be reliable enough for most classrooms.
Besides these, the CoDrone features an accelerometer, a gyroscope, a barometer, and front and bottom range sensors. Why does a drone need a barometer? To measure its altitude! The barometer measures air pressure, which, as you probably know, changes at different altitudes. By measuring the air pressure around it, the drone can maintain a stable altitude. Between the barometer, gyroscope (which measures the drone's orientation in the air), and optical flow sensor, CoDrone is a pretty stable little machine. Students can reset the gyroscope and accelerometer by pressing an action button on top of the drone. This button can also be programmed to start an action, like taking off, when pressed, so students can incorporate it into their code.
CoDrone features and accessories
Also in the box are replacement propellers and a mini screwdriver with which to attach them. The CoDrone team intentionally created a modular drone whose parts—specifically the frame, motors, and propellers—are easily replaceable. Teachers save money, since they don't have to replace the whole drone, and the environment gets a break from excessive plastic waste. It's a win-win! CoDrone EDU also comes with two removable batteries, a charger, and a micro USB cable. Although the micro USB cable connects easily to a port on the drone, you'll rarely use it. The drone only needs to connect to your computer for firmware updates; otherwise, all communication with the computer goes through the controller.
The batteries charge simultaneously in a Power Pack, and it takes about an hour for them to both reach full charge. Since the drone comes with two batteries, it’s easy to extend flight time by replacing drained batteries with charged ones. Simply insert the new battery into the slot on the bottom of the drone with the smaller tab facing downward. Younger students may need help removing the batteries, since they require some strength to take out. Despite this minor drawback, we found the CoDrone's battery system to be very intuitive. Although some drones lose connection with their controllers when the battery dies, CoDrone quickly pairs with the controller again when a new battery is inserted. This way, students can continue using the drone almost immediately.
CoDrone's controller
Once your drone is charged and ready to fly, check out the included controller. It’s a little smaller than the controller of a PlayStation or Xbox, and its design resembles that of an RC car remote. You’ll see a built-in antenna at the top, which you’ll need to extend to get the best connection with your drone. At the bottom of the controller are two handles, which fold up behind the main part of the controller to make it easier for smaller hands to hold. And in the middle of the controller is an LED screen that displays continuous live information from the drone’s sensors.

To either side of the LED screen, you'll find two joysticks which control all the drone’s movements. Moving the left joystick left and right controls the drone’s yaw, which changes the side-to-side direction of the drone, while moving the joystick forward or back controls the throttle. With the right joystick, you can control the roll, or how much the drone will tilt from side to side, by moving the joystick left or right. Moving the right joystick forward and back will change the drone’s pitch—how much its nose points up or down. Although both joysticks are pretty sensitive, you’ll sometimes need to control your drone even more precisely. To do this, use the arrow pad to “trim” the drone’s movements and stabilize it.
Controller buttons
Besides the joysticks, the controller also has four buttons labeled H, S, P, and on/off. Each button has two functions that you can access by holding the buttons for different lengths of time. You can click the H button to turn the screen’s backlight on and off—great for seeing the screen in brighter areas. If you hold the H button down, it will send the drone to its designated home location. Pressing the S button enables you to access settings, while holding it takes you back to the previous screen. To pair your controller with the drone, press and hold the P button. Finally, you can press the on/off button to enter flying mode or hold it to turn controllers on or off.
But wait, there’s more! There are four more buttons on the front of your controllers, labeled R1, R2, L1, and L2. The ones you’ll be using most are R1 and L1, which also have two functions depending on whether you simply press or press and hold. With the R1 button, you can cycle through LED colors by pressing quickly. Holding the R1 button down, however, tells the drone to prepare to flip. You can then use the right joystick to choose a direction for it to flip—forward, back, left, or right. Pressing the L1 button changes the drone's speed, while holding it tells the drone to take off or land.
How to pair CoDrone EDU
To pair CoDrone EDU and its controller, first make sure both devices are on. When turning on the controller, be sure to keep holding the power button until it’s all the way on, otherwise the controller may turn off while it's powering up. Flip over the drone and find the small reset button on the bottom. Press the reset button to enter pairing mode, and the LED on top of the drone will blink yellow. Then, hold the P button on the controller to pair.
When the LED stops blinking, CoDrone EDU has successfully paired with the controller. You’ll hear a chime and see the LED begin to automatically cycle between colors. Additionally, the controller screen will indicate its paired status with a set of bars toward the top of the screen (or the text 'disconnected'). After the two have paired, the drone will automatically pair with the same controller next time, so teachers can add matching stickers to keep track of which ones are already paired.
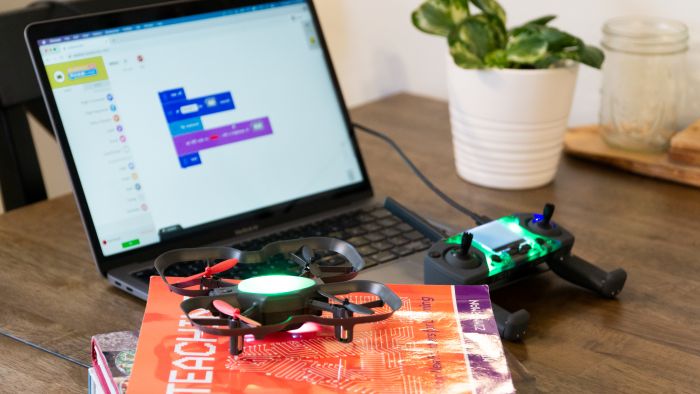
Coding with the CoDrone
As an educational drone, the CoDrone is best used for teaching students to code in Blockly and Python. Robolink, CoDrone’s manufacturer, has its own Blockly coding environment on the web—no apps needed. Block coding is an approachable introduction to the basics of programming, teaching kids how to solve problems, write a working program, and even create loops and variables in their code. For more advanced programming in Python, you'll need to download the official coding application off the Python website. No matter which language you're using, the code must be transmitted over the controller. We’ll go over how to do that once you’ve written some code.
Writing your code
First up is Blockly. There are two levels in Blockly coding for CoDrone: junior and senior. Young pilots can control their drone’s flight path, do tricks, and create logic sequences in both junior and senior Blockly, but some of the functions are only available in the senior mode. In junior mode, students might set the drone’s color, make it flip, and more. Senior Blockly coders, however, can also set the drone’s pitch, yaw, and roll to a specific percentage. They can also access data from the drone’s sensors to find its temperature, height, acceleration, and more.
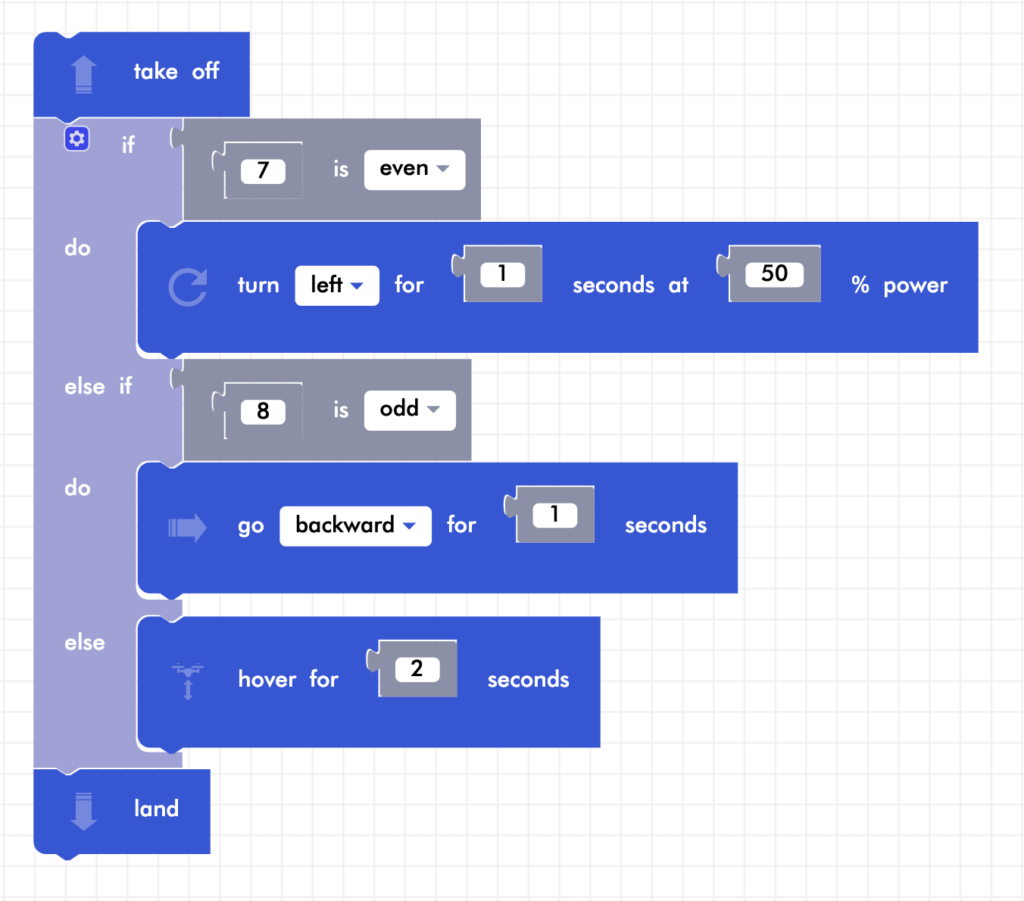
Within both levels, the code can include events that depend on variables, like hitting backspace on the computer to trigger a sound. Unique to Robolink’s Blockly coding, however, is the Math function (above), which you can use to introduce equations into student code. Kids can try equations in if-then functions to reinforce mathematical concepts. For example, they might program the CoDrone to only take off if one number in their equation is greater than another. Besides building math skills, Blockly teaches the basics of code and trains students' brains to think in the logical progression required for programming. When coding in Blockly, students can even see what their code would look like in Python, so they’ll be more prepared to advance.
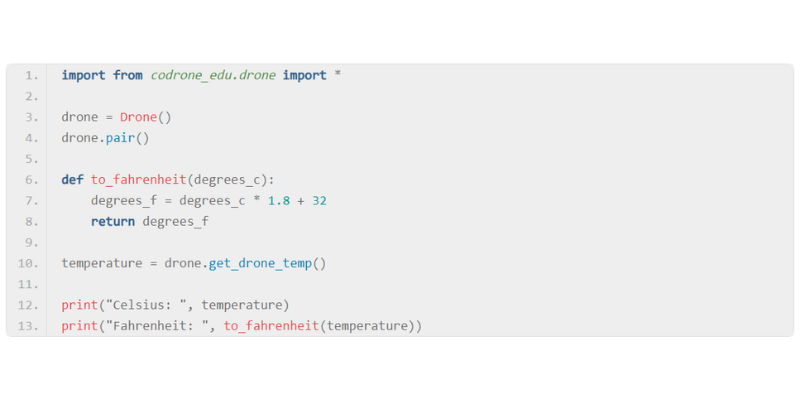
Writing Python code for the CoDrone is also accessible thanks to Robolink’s free lessons. Students can start with pre-written code from the beginner lessons to become more accustomed to the Python syntax and interface. Then, further lessons take them through simple flights and increasingly complex variables before they’re ready to explore the drone’s sensors. Each of the 30+ lessons takes about 30–45 minutes to complete, so there are hours of Python experience to gain. Along the way, students learn logical reasoning, critical thinking, and problem-solving skills while also building relevant coding skills.
Running the program
Once you’ve written your code using either Blockly or Python, you’re ready to hook up the controller to the computer. Some early CoDrone EDU controllers would not turn on while connected to the computer, so the Robolink team advises removing both AA batteries from the controller before plugging it in. I connected the controller with the batteries in with no issues, so this may be a problem of the past. However, if you want to transmit code with the controller, it's important to make sure the controller is in the LINK state while connected. You’ll see the word LINK automatically appear in the center of the controller’s screen. Alternatively, to fly a drone manually while the controller is connected to the computer, press (but do not hold) the power button until the flight screen appears.
For coding, you'll want to leave your controller in LINK mode. In the Blockly environment, you will see the “Pair” button in the bottom left corner of the screen. Clicking the button will allow you to pair CoDrone EDU to the connected controller. Then, hit the “Run code” button at the top of the screen. Note the emergency stop button next to the “Run code” button in case you need to stop the program suddenly. In Python, it’s a little more complicated. You’ll first need to import CoDrone EDU’s library of commands. Then, students can manually write code to pair their drone and controller. Don’t worry—Robolink has a helpful tutorial for how to do this. Finally, after writing all commands, right-click anywhere in the code and select “Run” while controllers stay connected to the computer.
Your code in flight
To test out the CoDrone’s abilities, I wrote a short program in Blockly. The drone was very responsive to the program, promptly taking off, hovering, and moving from side to side. I also successfully executed a flip via Blockly, although students should note that they cannot program the drone to flip twice in a row. After some experimenting, I also made the drone play “Happy Birthday.” For any longer sequence of code, like playing a song, you can copy and paste commands to save time.
Flying with the controller
After testing out my code, I then manually flew the drone for several minutes with the controller. The Robolink team estimates eight minutes of flight time per battery, which I found to be accurate, although I didn't fly the drone continuously. When doing multiple short flights, the flight time seemed to be longer than eight minutes, especially with fresh batteries. To take off, simply press L1, the button on the left front side of the controller, for three seconds. You’ll see a progress bar labeled with the word “Takeoff,” which fills until your drone rises into the air. Like most drones, the CoDrone flies with a loud whirring, so you may need to raise your voice a little while the drones are in flight.
As explained above, the main controls for flying the CoDrone are the left and right joysticks. I found these controls intuitive, especially using the right joystick to move the drone forward and back. Moving both joysticks simultaneously took a little getting used to, but it soon became second nature. When using both joysticks, you can turn the drone or make it go up and down while flying forward. This way, you can avoid obstacles without losing momentum. My only difficulty with using the joysticks came when turning the drone. Since both the vertical and left-to-right movements are controlled with the left joystick, I sometimes made the drone go up and down when I wanted it to turn. It was actually easier to pause the drone midair and hover while turning it towards a new direction. However, I am sure that with more practice, the turning function would become easier.
The CoDrone's sensors and speed
While in flight, the screen on the controller displays live data from the drone’s sensors. Kids can easily see its temperature, position, and gyroscope statistics when glancing toward the screen. The drone’s speed is indicated at the top left corner of this screen. After some practice flying, I tested out three different speeds: 30%, 70%, and 100%. At 30% speed, the flight felt a bit slow. I would recommend this level for beginners or those who may not be able to react quickly to obstacles. The default speed, 70%, is a very comfortable running speed. The CoDrone’s top speed of 100% felt quite fast and might be better suited for wide open spaces like gymnasiums or theaters, since the drones should not be flown outside.

Fun and function
The CoDrone successfully completed a flip thanks to my Blockly program, but I wanted to attempt flipping it manually, too. To flip the drone using your controller, hold R1 and pull the right joystick in the direction you want it to flip. On my first attempt, the drone did not flip since its battery was at less than 50%, but after switching to a fully charged battery, it flipped perfectly.
Although I didn’t run into any issues while flying, I tested the emergency stop function just in case. Hold L1, pull down on the left joystick to shut off the motors, and the drone will immediately fall to the floor. I was pleased that I didn't have to hold the button for long, since the emergency stop should only be used in situations needing a quick response. Despite the drone taking a long fall, it worked just fine afterwards, with propellers and other parts all still intact. But even if it had taken damage, it would have been easy to replace one of the parts, so don't be too worried about trial and error when students are learning to fly.
In fact, I found the CoDrone to be quite sturdy. As I learned to fly, I accidentally hit some obstacles, like ceiling supports, but the drone adapted nicely and kept flying. The wind from the office air conditioning did affect its flight somewhat, but I was able to counteract this by trimming with the arrow pad. If your class is flying multiple drones at once, you'll want to account for air currents by moving to a larger space or taking turns. CoDrone EDU uses radio signal to pair with its controllers, meaning up to 15 drones can fly at once without connection interference, but that doesn't mean they won't bump into each other!
Landing the CoDrone
To land the drone, simply hold the L1 button again for three seconds. As a challenge, I decided to land on top of a small stool about one foot in diameter. Using the arrow pad to make minute adjustments, I landed successfully within the designated area! The arrow’s adjustments are so small as to be unnoticeable while flying, but the ability to trim is quite helpful when the drone is up against an obstacle or about to land. And if you're participating in the REC Aerial Drone Competition, trimming the drone's movements might be the key to successfully navigating an obstacle!
The CoDrone and STEAM Education
After spending a few hours with CoDrone EDU, we’re confident in recommending it as a coding drone for the classroom. It's clearly made with educators in mind, and the modular design, fast-charging replaceable batteries, and durability of the drone make it a long-lasting and effective solution for even the liveliest STEM classroom. Using two popular coding languages, Blockly and Python, students can easily transition from beginners to advanced programmers as they practice. And the library of free lessons familiarizes educators with drone piloting and coding, even if they have no prior experience.
So, despite the discontinuation of the Tello EDU, drone users can seamlessly transition to the CoDrone, with its intuitive controller and versatile coding options. As educators and learners embark on their new drone journey, we’re committed to providing valuable guidance with tips and tutorials. Stay up to date with EdTech developments by subscribing to our newsletter and following us on Twitter (X) and Instagram. And, if you need help getting drones or other STEM products in your classroom, apply for our monthly EdTech grant.
2 Comments