Whether it's JavaScript, color coding, or maybe even Python, coding education truly offers something for everybody. That includes Blockly—one of the most popular introductory programming languages and great for students who are new to coding. Educators can use Blockly to teach their students all about inputs and outputs starting in the early grades. It even involves slightly more advanced elements of programming, like loops and logic. And, best of all, there are a bunch of different EdTech tools teachers can use to introduce Blockly programming. Among others, some of our favorites include the Dash Robot, the Ozobot Evo, the Finch Robot 2.0, the Tello EDU Drone, and the Edison Robot.
Wonder Workshop's Dash Robot
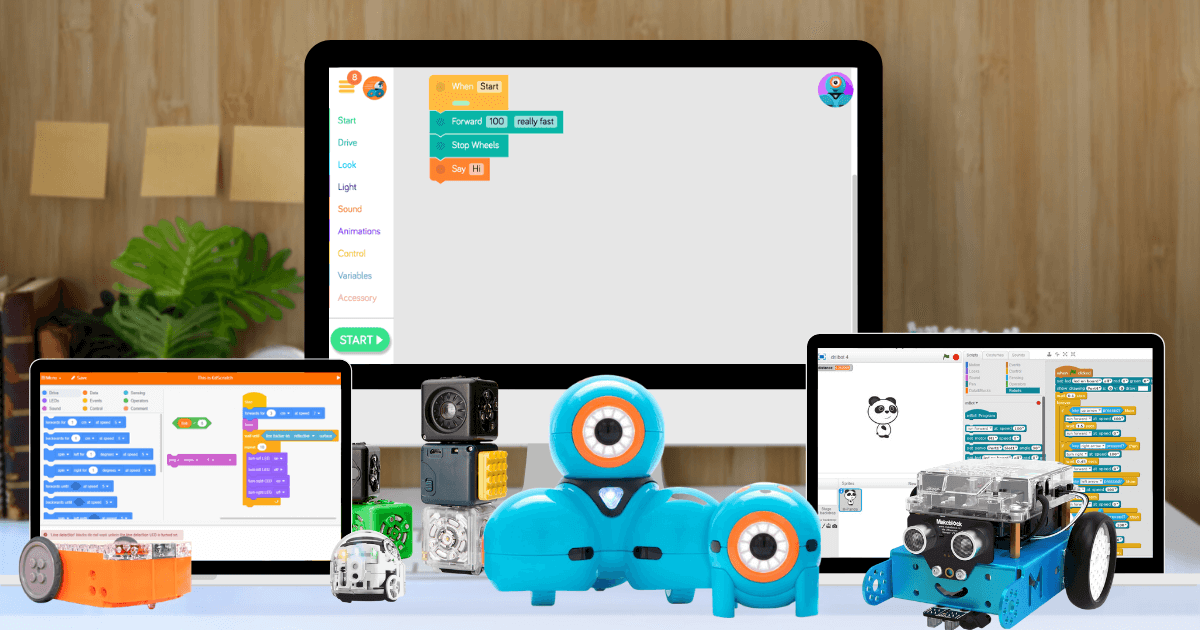
Created by the Wonder Workshop team, children can use the Dash Robot for learning about programming, problem solving, and computational thinking. One of the most effective and popular ways to program the Dash is with their Wonder Workshop Blockly app. Since Blockly is a great getting-started coding language, the Dash is a very popular first coding tool for children. It's perfect for kids in second to fifth grade and can help students learn coding at their own speed. The Dash is friendly, engaging, and compatible with a slew of iOS, Android, Kindle, and Chromebook devices. Plus, it's intuitive for younger students and can help reduce the learning curve for both kids and educators.
The Dash Robot and Blockly.
There are a bunch of mobile apps children can use with the Dash Robot and most incorporate the Blockly language. One of those apps is simply known as ‘Blockly.’ It is probably their most beneficial and in-depth option for introducing students to Blockly programming and for coding with the Dash in general. Using the Blockly app, students can create programs and teachers can check to make sure they have applied sound logic. As for the coding experience, it's visual and very simplistic thanks to its drag-and-drop features. It is definitely simple enough to allow students to learn key programming fundamentals from as young as eight years old. Plus, as they get more comfortable with Blockly, there are additional lessons and activities they can try, including introductions to algorithm design, sequences, conditionals, loops, and more.
What can elementary students program?
This version of Blockly helps kids realize that they need an event to trigger the start of their program. They can use any of the code blocks to create that event. It can be something like the sight of another robot, the sound of their voice, or pressing the play button. All event blocks appear in the ‘Start’ section on the left of your Blockly interface. After that, students can control the Dash’s wheel speed and direction (among other things) with precise values. Other block categories include look, light, sound, animations, control, variable, and accessory. They can incorporate accessory blocks when connecting something like the launcher and get the Dash to shoot out a ball. The Blockly app and Class Connect platform even include puzzles and fun projects or students can create their own. They can even practice Blockly coding with a digital Dash Robot using the Dash's Neighborhood platform!
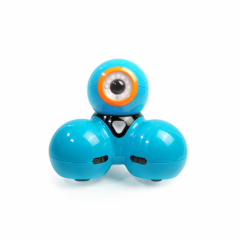
Ozobot Evo
Like the Dash, the Ozobot Evo also has its own block programming language. It’s called OzoBlockly and children can access it on the web or through the Ozobot website. Normally, Ozobot robots travel over flat surfaces, following lines and reading blue, red, green, and black color codes. Using OzoBlockly, however, students can program the Ozobot Evo to move without the need for a line. They can fully control both the movements and behavior of their robots with the blocks, too. Also, the five levels of programming provide something for everyone from Pre-K students up through middle school. OzoBlockly is based off Google’s Blockly and features icon- and text-based blocks like those in the Wonder Workshop Blockly app. These blocks include everything from low-level functions to advanced programming concepts, allowing kids to experience many properties of coding.
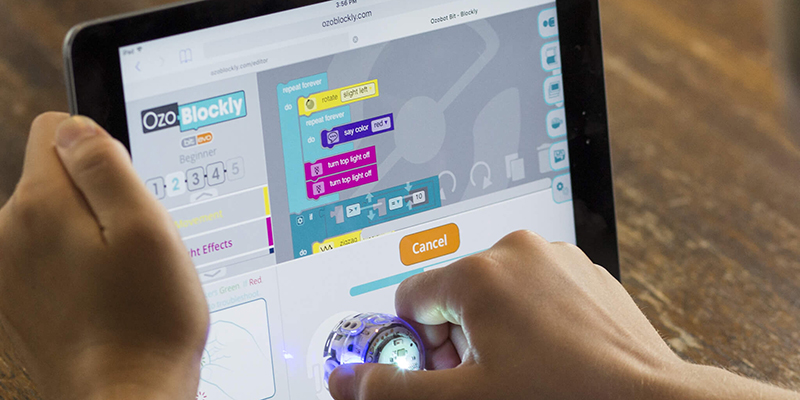
The different levels of OzoBlockly.
The five levels within OzoBlockly break down as follows: pre-reader, beginner, intermediate, advanced, and master. Students could use the pre-reader level as early as preschool since the icon-based blocks are easy to assemble. The beginner level is an extension of the pre-reader level and introduces kids to simple loops using blocks that are now text tiles and icons. The intermediate level allows students to control the robot's ability to follow a line and includes some additional logic blocks. In the advanced level, its programmability expands significantly and kids can add advanced loops, logic, integers, variables, and functions. Finally, in the master level, they can take full control of more extensive low-level functions and even utilize advanced programming features. Students can also get help anytime with any level of OzoBlockly simply by clicking the Help tab within the platform.
Programming with OzoBlockly.
Before beginning, watch the pop-up tutorial to help yourself and your students learn how to drag and drop the blocks to create programs. On the OzoBlockly site, you will also find games and classroom lessons for incorporating the Evo and OzoBlockly. Among the elements students can control with OzoBlockly are their robot’s movements, light effects, timing, and loops. The movement options include simple forward motions but also zigzags, skates, spins, small circles, and big circles, all of which they can program in detail. By the time they progress to Level 5, students will also be able to work in logic and variables, too. They can name those variables and set them to repeat forever or for as long as they'd like. To wrap things up, OzoBlockly offers students an introduction to Blockly that’s not intimidating or complex. Plus, they could also try the Ozobot coding simulator or AR-enabled Ozobot MetaBot.
Tello EDU Drone
If you're unfamiliar, the Tello EDU Drone is not only meant to help children learn about drone piloting. It's also 100 percent programmable and perfect for combining two continuously growing areas of our modern workforce: coding and drones. In their own right, drones provide a ton of value in many different industries. They are common in everything from military operations to same-day deliveries to capturing all-new angles for photography pieces. Most drone pilots, however, maneuver these drones using some kind of controller. Whether it's a physical joystick or digital, on-screen interface with directional keys, flying is often a manual operation. With the Tello EDU, however, students can learn how to create simple programs for controlling a drone's height, direction, and flight path—while starting out simple with Blockly.
Blockly and the Tello EDU.
The connection between the Tello EDU and Blockly comes in the form of Scratch coding. The Tello EDU is compatible with three programming languages: Scratch, Swift, and Python. Scratch is block-based and it's the simplest of the three. Swift is more of a hybrid coding language, while Python is completely text-based. Since we are staying on the simpler side and discussing opportunities for jumping into coding experiences using Blockly, we'll focus on how students can use their Tello EDU with Scratch. It's important to note that the Tello EDU is only compatible with Scratch 2—not Scratch 3, which is a newer version of Scratch. First, students should download the Scratch 2 Offline Editor as well as Node.js and this zip file from the Ryze Robotics site. Once they have everything downloaded, they're ready to go.
Creating Scratch programs for the Tello EDU.
To get started, students can launch Scratch 2 on their computers. First, they need to install the Tello EDU code blocks. They'll do this by holding down the shift key and clicking File then Import Experimental HTTP Extension. When the window opens, they will select Tello.s2e. Then, back within the Scratch coding blocks section, clicking on More Blocks reveals the Tello EDU commands they have available. Students can create block programs with the various control blocks and get their drone to move in certain directions, ascend or descend, and even input the precise distances for each specific portion of their programs. There are some additional steps to ensure students get the optimal experience, but the final step is pairing their computer with the drone via Wi-Fi.
Finch Robot 2.0
With the Finch Robot 2.0, educators can access all sorts of innovative opportunities for engaging students. The Finch 2.0 is arguably the most versatile robotics solution we offer and one of the most versatile STEAM tools in general. As the BirdBrain Tech team will tell you, it's a true K-12 robotics solution and it even works great in college courses. This is due largely to the six programming options associated with the Finch 2.0. Starting with FinchBlox, which is an icon-based language, students can begin coding with the Finch 2.0 as early on as kindergarten. This particular language is block-based and designed specifically for pre-readers, helping them learn how certain graphical inputs lead to a corresponding output or action the robot does.
The Finch 2.0 coding languages.
Unlike the original Finch Robot, the Finch 2.0 is powered by a micro:bit V2. As such, students can access additional block-based coding opportunities thanks to this integration with the BirdBlox, MakeCode, and Snap! programming languages. In addition to FinchBlox, which is technically only icon-based, these three languages are each block-based. Students could utilize BirdBlox on iOS, Android, or Fire OS devices and MakeCode is accessible on Chrome, Mac, Windows, and Linux devices while Snap! is accessible on Mac and Windows devices. BirdBlox is the simplest one and designed for children aged 9-14. MakeCode and Snap! are each a bit more complex but easy for kids to pick up if they have previous coding experience.
Block programming and BirdBlox.
In terms of Blockly programming with the Finch 2.0, BirdBlox is the main language we'll focus on. Within BirdBlox, students can drag and drop coding blocks into the field and create programs for controlling the robot's movements and also incorporate its sensors. Kids can access the BirdBlox app on any compatible device (iOS, Android, or Fire OS) and pair it via Bluetooth. In addition to the various control blocks, children also have access to math, logic, variables, and other types of blocks as well. BirdBlox, in particular, is great since it is built for beginners but, once kids get comfortable, there are lots of options for creating programs that are more complex. To learn more about the Finch 2.0 and its wide-reaching versatility, visit our store.
Edison Robot
The Edison Robot provides educators and students with four different ways of programming, including a language known as EdBlocks. The three others are EdPy, EdScratch, and EdWare, which is mostly phased out. EdBlocks is fully graphical and the blocks are a bit larger than those in the other Blockly environments. Like the others, however, it is fully drag and drop and very intuitive. EdBlocks is for students 8-12 years old and accessible on the Web. It's also downloadable on computers or tablets if students ever cannot access the browser version. Once open, they have access to over 150 unique programming blocks that they could mix and match when designing both simple or more complex programs to run on their robot. Perhaps most importantly, EdBlocks is intuitive enough that kids could just open it and get going but the Edison team has also created tutorial videos just in case.
Getting to know the EdScratch platform.
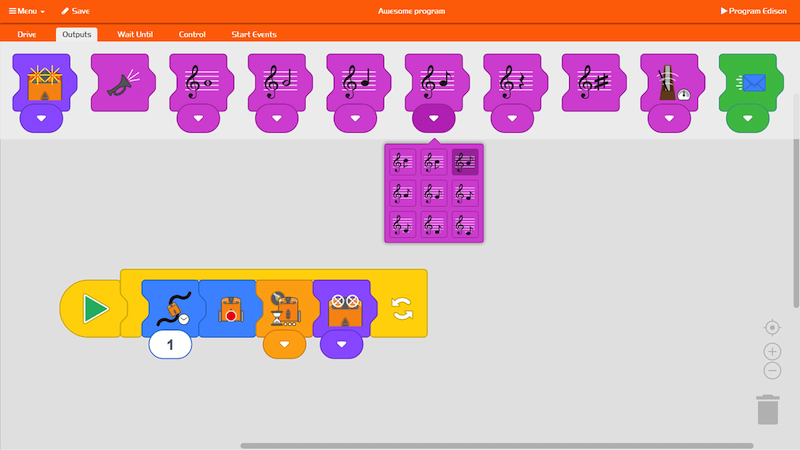
When launched, children should see five categories near the top of the programming field labeled as drive, outputs, wait until, control, and start events. They represent their five block categories—all of which depict different shapes, colors, and designs on them. The start block is automatically part of their programs since students need one of these to make each program activate. On the EdBlocks web page, teachers can also access helpful videos, activity worksheets, and the teacher’s guide to using EdBlocks. The worksheets can help kids complete activities independently as they learn about the Edison Robot and EdBlocks through 23 different lessons. The teacher’s guide offers activity extensions and other information to support educators when introducing EdBlocks in the curriculum. Teachers also get the curriculum linking guide, the EdBlocks block guide, and ideas for additional projects on the Microbric website.
How to build block programs for the Edison robot.
Creating programs with these blocks is, unsurprisingly, easy. The blue 'drive' blocks tell the Edison to drive forward, drive backwards, make turns, drive forward or backwards for a set amount of time, and more. The purple blocks are outputs, which students can use to turn on the robot’s LEDs, turn only one on or off, play musical notes, and more. There are also green output blocks, which allow students to send messages. The orange blocks are wait until blocks, telling their Edison to wait until it detects a trigger, like a clap, to launch the program. The yellow blocks with slots are loop blocks. Students can enclose programs inside them and tell the Edison to loop the program forever, a certain number of times, or until some event happens. Finally, the start events blocks tell it to start programs when detecting an obstacle, a clap, or a button is pressed.
For the latest EdTech, STEAM, and 21st century education news, follow us on Twitter and Instagram. Like us on Facebook, too, or sign up for our newsletter for our latest product announcements and offerings. If you have an idea for an Eduporium Weekly theme, send us a message on social media or comment below.