
STEM education with drones is pretty cool in itself as students can learn about everything from controlling the drone, creating a flight path, capturing photos and video, and even getting more familiar with federal flying regulations while potentially preparing for a 21st century career. Well, we think it’s even more cool when they can use a programmable drone and combine flying and coding while creating programs that control the drone’s aerial moves, direction, and flight time! There have been a few programmable drones around for a bit now, but we were recently able to add the Tello EDU drone to our store and its incredibly affordable for also being programmable. So, our next step was to take it for a test flight and see what STEM learning in the classroom would be like with this compact but powerful tool!
The first thing you need to do with the Tello EDU is charge it. It comes with a USB cable that plugs into a slot on the drone and into a traditional USB computer slot or power adapter. The battery comes outside of the drone, so all you need to do is place it in the battery slot and then connect it to a power source. When the battery is charging, a blue light will appear on the drone (make sure the battery is not upside down when you slide it into the slot). Once charged and powered on (the power button is located on the side of the drone), controlling the Tello EDU is as easy as downloading the Tello EDU app, which is supported by a number of iOS and Android devices. The Tello app is also supported by both iOS and Android devices and either of them can be used.
After the drone charges sufficiently, it can be unplugged. Opening the Tello EDU app reveals that the drone needs to be connected to the Tello Wi-Fi network, which can be done in the same way you connect to any wireless network. In your device’s settings section, the Tello Wi-Fi network should now show up as an option (as long as the drone is still powered on—if not, switch it back on). For me, it was called ‘TELLO-C53869’ and it took a minute or two to fully connect to the device. The light on the drone began flashing orange after I got it connected to the Tello Wi-Fi network and displayed a message of ‘successfully connected’ within the app as well as the drone’s battery percentage.
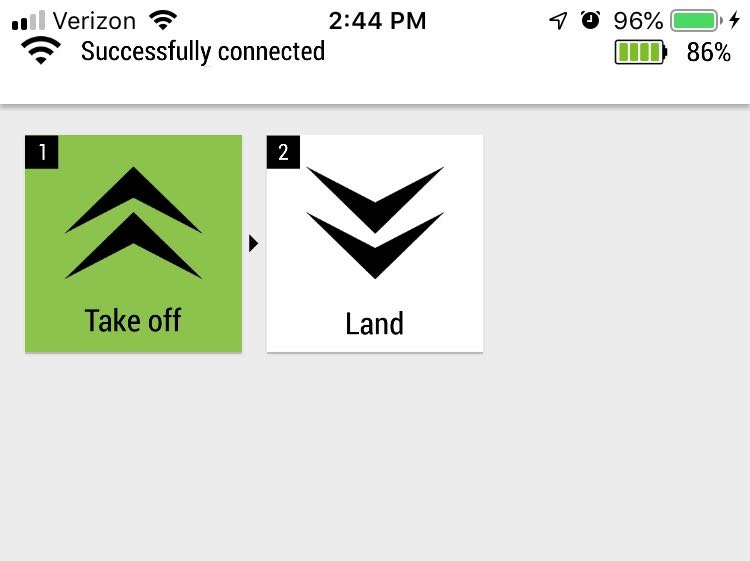
On the app’s home screen, there are two initial options displayed for students to use to build a program—take off and land (above). By selecting the ‘Plus’ icon in the bottom right of the screen, they can add additional elements and create a custom program right out of the gate. With the basic version of the Tello EDU app, students can get the drone to move forward or backward while controlling how far it goes (up to 500 centimeters in either direction), make it fly left or right (up to 500 centimeters in either direction, or make it rotate to the left or right (up to 360 degrees in either direction). The PRO version gives students the opportunity to include commands that get the drone to change altitude, change speed, flip, wait, and go to a specific step in the program. It is available to be purchased from within the Tello EDU app and costs $2.99, though this does result in being dropped from the Tello Wi-Fi network.
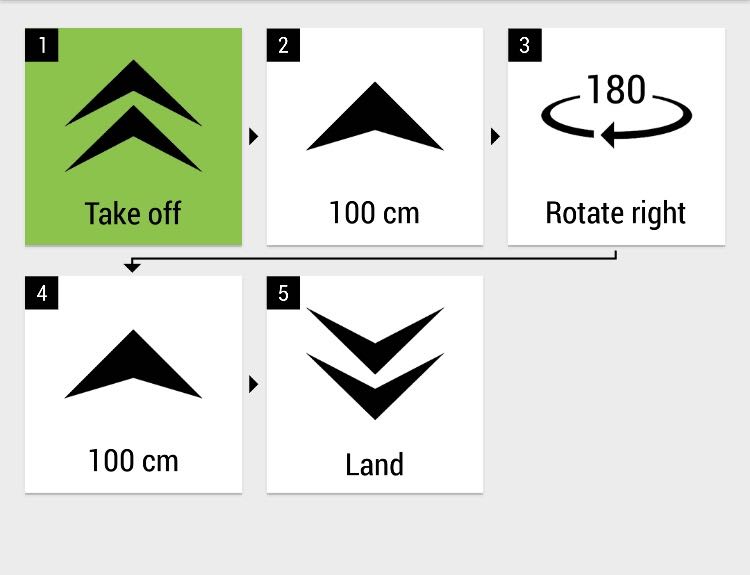
I was inside when I built my program for flying the drone, which is what DJI recommends for this model. It is very light and should only be used outside in completely windless conditions. So, I placed it on the floor and ran the program. The first step of the program (Take off) is highlighted in green before it begins and tapping that box sets the program in motion. The drone began to rise, flew forward, spun around, and then flew back to where it began before landing beautifully! I was not sure what to expect from this first basic flight, but there were no issues at all! The motor is a bit loud, so that’s the only thing educators might have to consider if flying the drone in a classroom environment.
Also, students can see on the app which step in their program the drone is currently performing. As it goes through the program, it highlights which step in the progression it’s on and I must say that it rises and lands very gradually—with no herky-jerky bursts at all! Like with any drone, the battery does die relatively quickly and, with the free version of the Tello EDU app, users are limited to just six steps in their program, including the Take Off block (No. 1) and the Land block (No. 6). One thing that is great about the app, however, is that there is an option to land the drone at any time. It got a little too close to the wall, for example, so I was able to just tap this option while the drone was in flight and it immediately began descending—a great feature for use in schools with students who may just be starting out piloting drones!
Another thing I would recommend being aware of is just how far 500 centimeters is. Although it might not seem like a whole lot, just be sure there are no walls in the way of the drone that it could run into before traveling the full 500 centimeters. After my first few flights, I then switched over to the Tello app to give that a try. It downloaded quickly onto my phone, but also needed a couple of minutes to fully connect. When first launching the app, students are greeted with some helpful instructions and then a display on the screen from the drone’s camera.
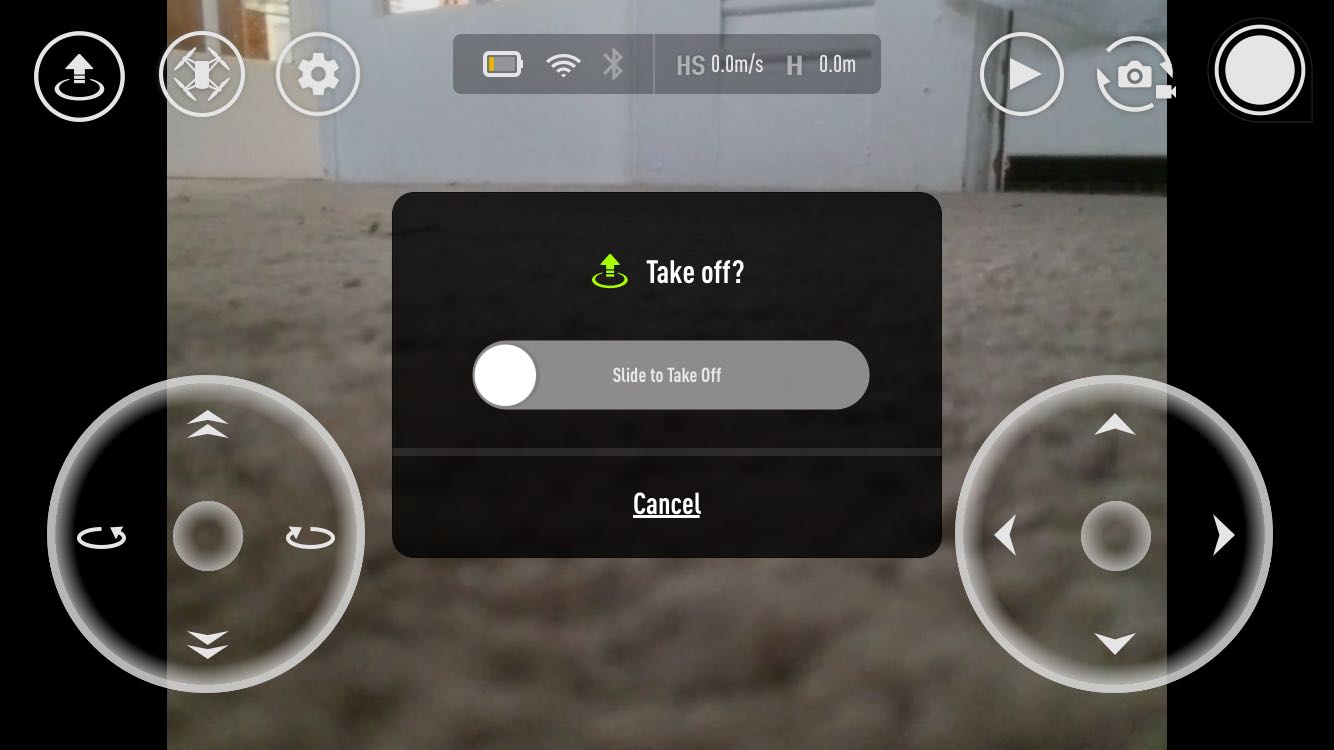
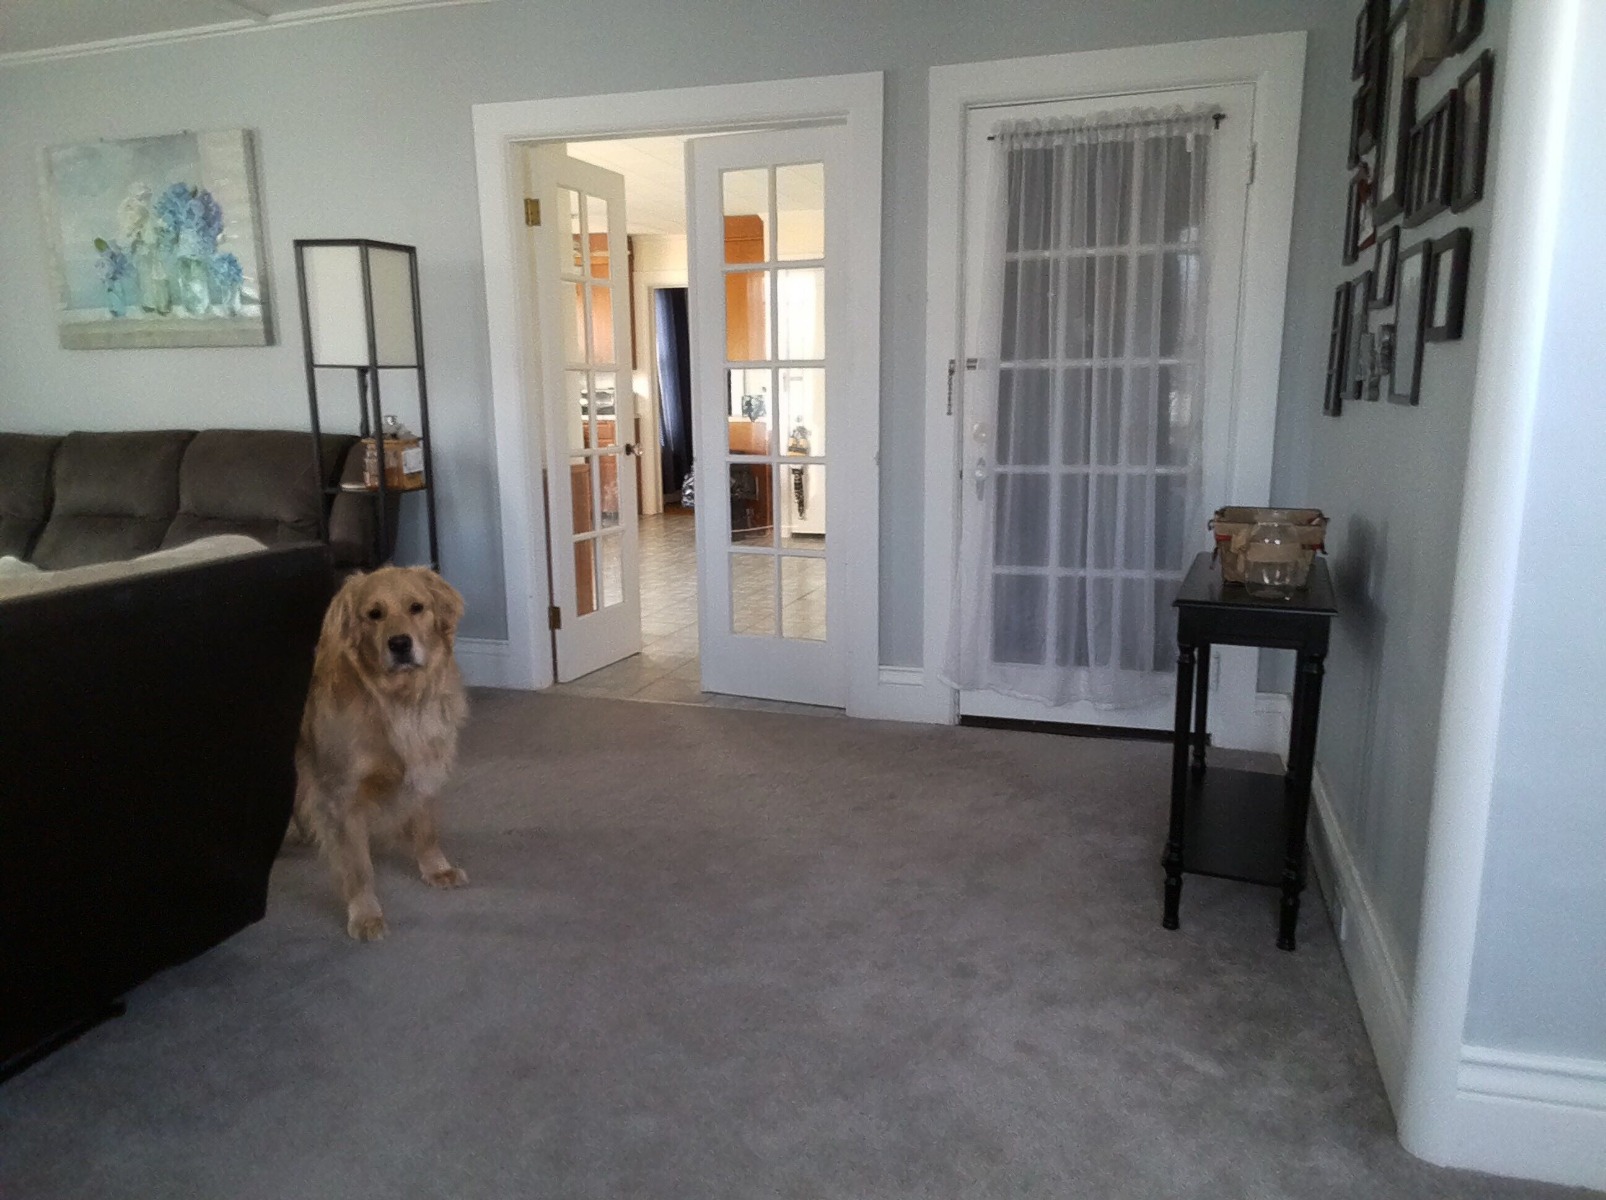
There are definitely more capabilities with the regular Tello app, including on-screen controls to launch the drone and control its movements in the air in real time. The two different sets of controls allow users to control the drone’s height and rotations (left side) and the direction it’s moving (right side). I even accessed its camera function and snapped a few photos of my dog from the airborne drone. If you are wondering, no, he was not a fan of the aircraft buzzing around above him.
While I didn’t get into programming with Scratch, Swift, or Python during my experiment, obviously those are all options as well. To learn more about coding with Tello and Scratch, check out our post on Tello EDU Tips & Tricks. To get started programming with Tello and Swift, you must have an iPad with iOS 10.3 or later and search for the Tello Space Travel program within the Swift Playgrounds app. Finally, check out more about programming the Tello with Python if you're teaching more experienced computer science students.
We offer the single unit Tello EDU drone on our store as well as three different classroom packs in small, medium, and large sizes. Plus, for a limited time, we are offering a special introductory deal for educators to purchase two Tello EDU drones for just $210.00 (normally $258.00), so be sure to take advantage of that while you can! If you’d like to check out our other drones and accessories for STEM education, you can find them on our store, too. And, don’t forget to follow us on Twitter and Instagram for more updates and helpful content when it comes to innovating with technology in your classroom!
Thank you the opportunity to leave a note.
The drone is quite nice.
Meant to ask if the drone kit includes a drone guide, book etc. or if you know a book on your drone published by someone else.
This helps with building a class curriculum.
Appreciate it.
Have a pleasant day.
Bijan