Whether your school has a formal makerspace or not, the benefits of MakerEd for students are extensive. Hands-on exploration promotes collaboration, creativity, design thinking, perseverance, and many other key 21st-century skills. While high-tech tools aren't necessary to start a makerspace, having the right equipment is essential for students to bring their ideas to life. Your makerspace could include anything from educational 3D printers to hands-on design equipment—many of which come with lesson plans to help educators integrate MakerEd into the curriculum. This week, we'll walk through some less common makerspace supplies and evaluate their applications within the makerspace.
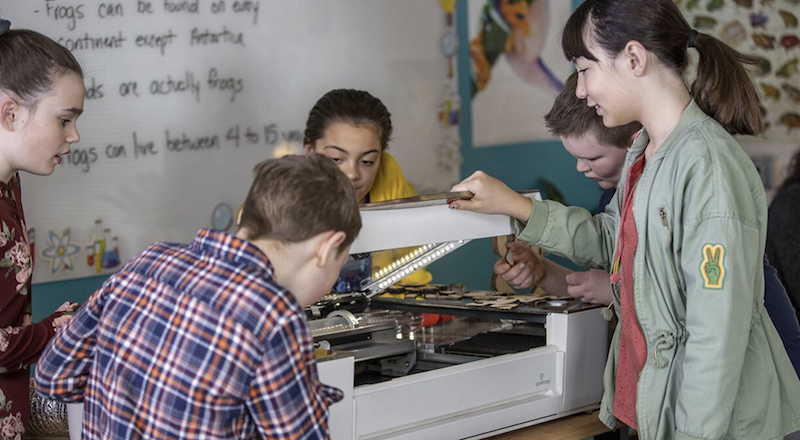
Using Glowforge 3D Laser Printers in a Makerspace
While makerspace learning is awesome for students of every age, some supplies are best for older kids. As students become more capable and inventive, many seek opportunities to hone their newfound skills. Plus, because high-school makerspaces are so interactive, hands-on, and collaborative, they create an environment in which teachers can easily introduce new types of technologies. In this case, we're talking about 3D printers. With Glowforge 3D laser printers, students can print and engrave custom designs right in the classroom. There are two Glowforge printers to choose from, and each empowers students to create a limitless number of designs.
The Glowforge Pro vs. Glowforge Plus.
Since they're safe and easy to use, the Glowforge machines make the perfect classroom 3D laser printer. Teachers can choose between the Glowforge Pro and the Glowforge Plus (or both, if you feel like splurging). The Glowforge Pro features faster cutting and engraving speeds, though it's concomitantly more expensive. And thanks to its Pro Passthrough feature, students can print infinitely long projects. The Glowforge Plus is not quite as powerful—but also not quite as costly. This makes it a more viable option for school makerspaces with a tighter budget for supplies. The Plus still provides a fast engraving speed, though, so students can use it for complex designs and MakerEd projects.
Creating high-quality 3D printed makerspace projects.
Using these 3D laser printers, students can bolster their STEAM and interdisciplinary thinking, learn design fundamentals, and experience what it's like to create tangible projects from their initial ideas. After an easy 30-minute setup, students can connect the Glowforge printer to a Chromebook, Mac, PC, tablet, or phone—they're quite versatile. We also recommend using a Glowforge Air Filter to keep students safe by filtering out emissions. Then, it's on to projects! Glowforge has plenty of free project samples on their community board. Students might make a personalized puzzle, engrave a wooden solar system, or print a custom ruler. All of these Glowforge projects challenge them to create functional items, building empathy and design skills that will translate to many future fields.
LulzBot 3D Printers in the Makerspace
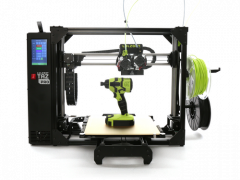
Among the most dependable makerspace supplies, LulzBot 3D printers are powerful, precise, and accurate, which makes them ideal for advanced printing projects. Each LulzBot 3D printer is hand-tested by the LulzBot team before being shipped to their new owners, ensuring their reliability. These printers' sweet spot is at the high school and college level, but with a bit of guidance, middle school students can also use them. For makerspaces of any grade level, though, we recommend the LulzBot Mini V3. Although the LulzBot TAZ line contains some great 3D printing options, the Mini V3 is the most versatile, with a small desktop footprint but a powerful output. With this printer, kids can create top-notch designs and learn about key elements of the design thinking process.
Using the LulzBot Mini in a school makerspace.
Students can comfortably use the LulzBot Mini as early as sixth grade, though this printer inspires innovators of all ages. In high school makerspaces and even college classrooms, the LulzBot Mini provides students with incredible versatility and high performance. Despite its compact size, the Mini provides a generous build volume and advanced calibration algorithms, ensuring perfect prints every time. Plus, the Mini 3D printer arrives calibrated so that students can use it right out of the box. They can send print jobs to the LulzBot remotely over Wi-Fi or use the new touchscreen panel to monitor their projects during the printing process. The printer is incredibly quiet (perfect for classrooms), and it can print both rigid and flexible materials. It even comes with the LulzBot toolkit and a small amount of PLA filament to get students started.
Snap Circuits Kits for Students
We also love using the Snap Circuits kits in makerspaces. With a few dozen kits to choose from, students can explore hands-on tinkering and engineering while learning about specialized areas of science and technology. The whole Snap Circuits platform is built around a simplistic system: circuit blocks arranged on a grid foundation. Each of the kits come with a plastic grid, an in-depth guidebook with as many as 500 projects, and the electronics components that kids need to construct circuits. All they have to do is follow the color illustrations to place the pieces in the proper spots on the grid. The illustrations also have small numbers next to each piece, indicating which level it should occupy in the structure. The detailed instructions make these kits approachable for beginners, yet the hands-on experience students gain goes beyond beginner-level.
Snap Circuits kits for the makerspace.
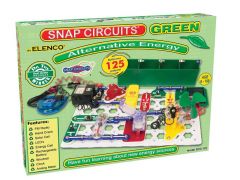
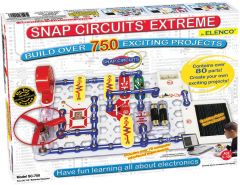
All of the Snap Circuits STEM kits are open-ended, making them great for makerspace exploration. Some of them, like the Extreme Kit, are quite robust and come with cases and trays for organizing the pieces. Then, there are other Snap Circuits kits dedicated to specific scientific concepts. These include the Snap Circuits STEM Kit, the Snap Circuits Motion Kit, Snap Circuits Green Energy Kit, Snap Circuits Arcade Kit, Snap Circuits Light Kit, and a lot more. These kits teach students about sustainable energy, video games, physics, and more—all concepts that they can apply in future careers. There's also the 3D Illumination Kit, which features pieces for constructing 3D structures they can light up. Students can incorporate the various electronics components and learn about what makes circuits work.
Snap Circuits projects for students.
Because of the variety of Snap Circuits kits, students can complete so many creative STEAM projects. With over 15 kits on our store alone and up to a few hundred circuitry projects associated with each pack, kids have plenty of opportunities to enjoy MakerEd. The Snap Circuits 300 Kit, for example, includes instructions for completing 300 STEM and circuitry projects. Kids will complete such projects as building an old-style typewriter, a whining fan, and a two-finger touch lamp, among others. Electronics components in this kit include an antenna coil, microphone, capacitors, transistors, resistors, and more. If kids finish the projects or want to experiment on their own, they can use the components to create their own ideas, embodying the innovative spirit of MakerEd.
Making Experiences with the Mayku FormBox
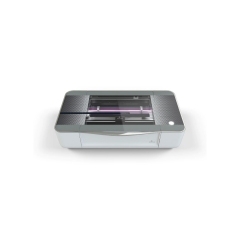
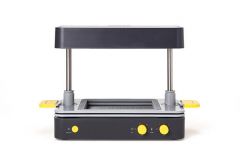
While 3D printing in makerspaces is a popular STEM activity, there are additional avenues for students to design unique projects. One of those other avenues for creation is the process known as vacuum forming. Vacuum forming involves heating up plastic sheets, then forming them around an object to create a mold. Students can then recreate the object using the mold in a hands-on experiment with production and design. This unique creative opportunity encourages students to maximize resources and consider the ethics and process of producing the items we use every day. The Mayku FormBox, a desktop vacuum former, is the perfect addition to a makerspace.
Using the FormBox in makerspace lessons.
The FormBox is compact yet versatile, allowing educators to set it up in almost any location. First, students should sculpt, find, or 3D print any object and place it onto the FormBox bed. The FormBox will form a sheet of plastic around the material, creating a mold in seconds! Next, kids can fill the mold with any compatible materials—from chocolate and resin to plaster and concrete. Finally, they can take the material out and bring their product collection to life. Not only can students creatively design just about any item, they will also learn about key product design principles and manufacturing methods as they go.
Mayku vacuum forming examples and benefits.
With the Mayku FormBox, students can design helpful products for all sorts of applications. They could create a stationary organizer, a container for storing makerspace supplies, custom coasters, and a lot more. More importantly, these creative classroom projects inspire students to create useful items right from their desk. Educators can also enhance STEM engagement and expose students in CTE programs to design, manufacturing, and perhaps even business concepts. Plus, the FormBox is easy to use and safe for students aged 12 and up to use independently.
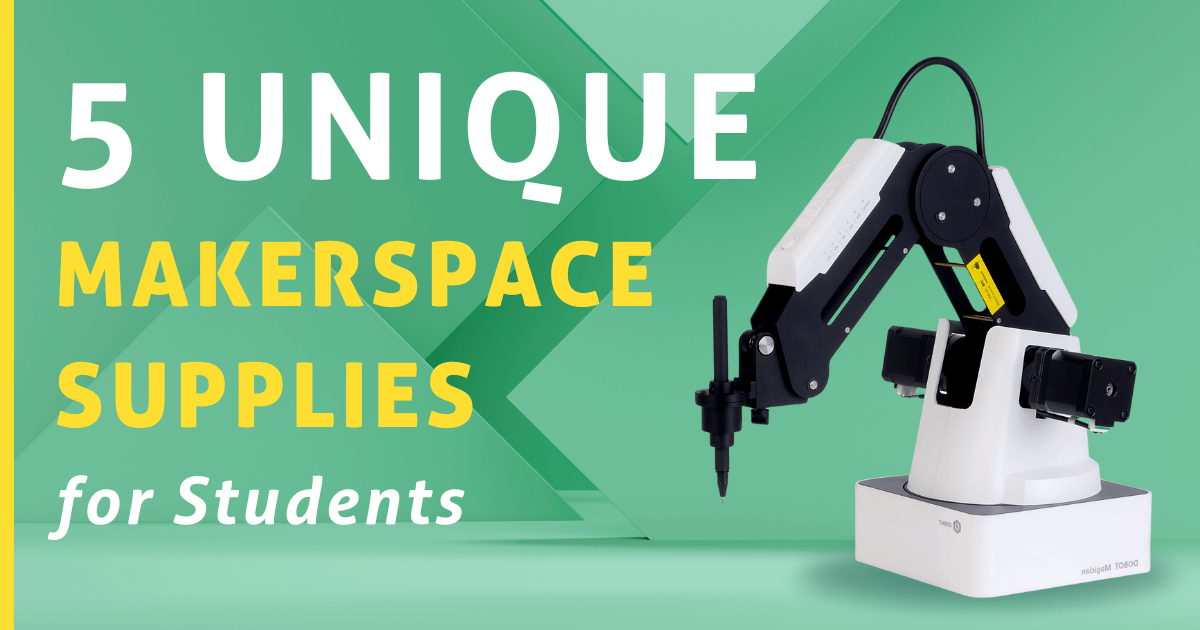
Adding a Dobot Arm to Your Makerspace
Like the other innovative learning tools on this list, the Dobot Magician Educational Robot fits perfectly into school makerspaces and helps educators advance the key tenets of the Maker Movement. The Dobot Magician is a sturdy, four-axis robotic arm that students can use to automate and assist MakerEd projects. Like the Mayku FormBox, the Dobot Magician increases students' awareness of the production process while challenging them to think outside of the box as they create. It comes with accessories and software that enhance its capabilities without being too challenging for students to use. Read on to find out how to use the Dobot Magician in a makerspace.
Incorporating the Dobot Magician into a makerspace.
The Dobot arm comes with a gripper attachment that can grab objects, hold a pen for writing and drawing, laser engrave, and more. It can even hold a 3D printing pen or extruder! These add-ons make it one of the most versatile makerspace supplies available. Students could command Dobot to 3D print a part for a project or hold an extra tool. They could use Dobot's robotic precision to place electronic components on a circuit board. Or they might use Dobot's image recognition technology to teach it to sort items into categories. It's like having a third arm and a robot companion at the same time!
Programming the Dobot Magician.
For Dobot to perform all of these helpful feats, students must learn to program it. Luckily, there are multiple programming options. The most intuitive way to program Dobot is through the drag-to-teach feature. Users simply drag the Dobot through the desired movement path to program it. For more detailed programming, though, students can use Dobot Blockly to create sequences of commands. But Dobot also has perhaps the most interesting control method we've ever seen—mind control. By connecting an EEG to the user and to Dobot, you can make the arm move and perform actions, such as initiating a domino sequence. It's a unique and exciting way to teach students about the medical field while integrating MakerEd.
For the latest EdTech, STEM, and 21st century education news, follow us on Twitter and Instagram. Like us on Facebook, too, or sign up for our newsletter for our latest product announcements and offerings. If you have an idea for an Eduporium Weekly theme, send us a message on social media or comment below.