
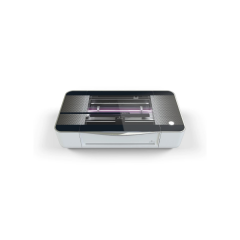
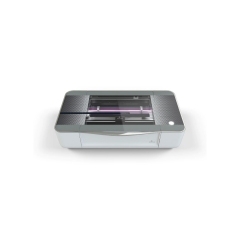
| The Glowforge 3D laser printers use a focused beam of light to enable makers to cut and engrave tons of different materials with exceptional precision. 1. The printers are available in two different options known as the Glowforge Plus and Pro models. |
The reliable line of Glowforge 3D laser printers are among the most powerful makerspace tools in STEAM education. They make a great addition to any school makerspace, library, or classrooms where educators are offering engaging STEAM instruction. Much faster than 3D printers, these Glowforge 3D laser printers feature a built-in laser that cuts and engraves objects to any specifications with the average print job taking only about 12 minutes to complete. As you'll see in the video below, students can use these machines with teacher supervision as early as the fifth grade. Plus, older high schoolers (juniors and seniors) can typically explore the design and fabrication process independently. They can make their own digital designs to print or use a hand-drawn illustration with the Trace function. Plus, each Glowforge printer meets the latest UL standards for safe classroom use.
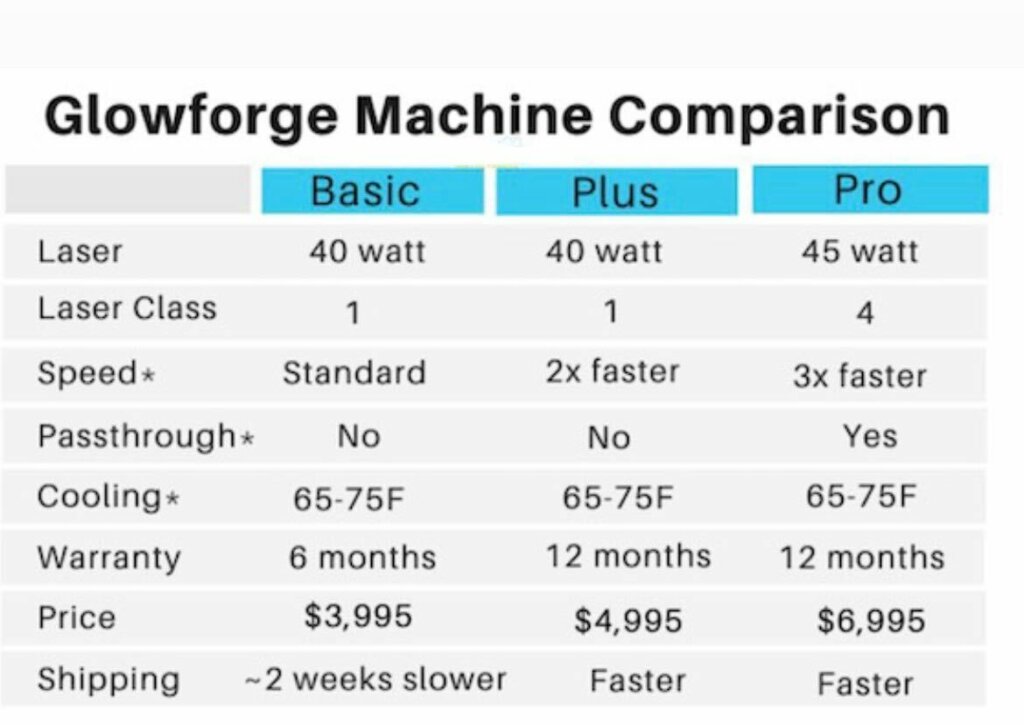
The Glowforge Plus vs. Pro.
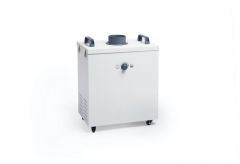
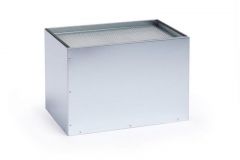
There are two main Glowforge options available to teachers: the Plus and the Pro as well as the Air Filter, which we will highly recommend for students using either printer. As for deciding between the Plus and the Pro, educators should consider the frequency of student use as well as the materials they're using. The Pro can run in back-to-back classes, print continuously all day, and has the Passthrough function, which allows for students to create prints of any length. Both of the machines require Wi-Fi and venting, which also does work when done out of a window but the Air Filter is extremely convenient. It allows educators to run either Glowforge machine wherever they are in the school and anyone can move it around.
Since fabrication with the Glowforge machines requires this digital component, students need a Glowforge account to begin. Educators can create accounts for their students or students could do so themselves by navigating to the Glowforge setup page. From there, it takes just a few minutes to set up by providing an email address and a password. Once logged in, there is some helpful information they may want to review (or educators may want to review it with all students). The video above is also super helpful and we would definitely recommend watching it before starting out. Plus, there are a bunch of helpful Glowforge tutorials from members of their community and a very in-depth FAQ page should students need more support.
Additional Glowforge features.
A few other key features of the Glowforge machines include its two cameras, autofocus technology, and a lighting system. There are two cameras: a wide-angle camera and a macro camera. First, those wide-angle cameras are mounted on the machine's lid and provide a view of the entire print area. Your macro cameras are mounted on the heads of the machines and provide extremely close-up looks as well as autofocus and much greater accuracy. That autofocus system is incredibly precise and scans the surface of each printing material to determine its exact height. It's completely internal and also includes the option to revert back to manual focus. Then, there's the lighting, which includes dual high-efficiency LED strips on the inside of the machine. There are also headlights under the lid to supplement the illumination and increase precision.
The Glowforge machines are ready out of the box with just a few simple set-up processes outlined in your manual. Its web interface features point-and-click software along with simple hardware (just one button for printing) for a very simple user experience. That online interface is free and accessible on Macs, PCs, Linux computers, and most mobile devices with an up-to-date browser, including Google Chrome, Firefox, Apple Safari, and Microsoft Edge. Students can create designs with any software that saves a PDF and, with their Glowforge machine, they can print JPG, PNG, SVG, PDF, and other file formats. To print a file, students can simply drop it into the interface and move the images where they want them.
Options for printing materials.
As mentioned, students could use many different materials when creating with the Glowforge laser printers. These include wood, fabric, paper, plexiglas, coated metals, foods, electronics, and more. Also, proofgrade materials work specifically with machines like this and enable super easy setup and printing, however, they are not required. Makers can use any laser-compatible materials from online or local suppliers as well. Just make sure you check that they are marketed as laser-compatible because various plywoods, for example, could have glues that make them difficult to cut. Also, unknown plastics and other materials could contain additional elements beyond what we can see. They could damage the machines or, in some more serious situations, be detrimental to student safety.

When it comes to using the Glowforge printers, there's also some measurements students should keep in mind. The cutting area on the Plus and Pro laser printers is approximately 11 inches deep and 19.5 inches wide. This means printing materials and your final products should fit within that range. Also, the maximum material height in the work area is two inches (0.5 inches with the tray included). From there, the maximum material depth can be no more than 18 inches if using the Plus printer (unlimited depth range with the Pro). And, the maximum material width is 20 inches for both printers.
Students also should consider the material's thickness since these machines perform best with those that are one-quarter inch thick or less on a single pass. They can accommodate materials as much as one-half inch thick, however, but this could require multiple passes or flipping the material over. For engraving, you can remove the tray and insert objects as high as two inches thick. It can then engrave the surface up to a half inch depending on the material. Also, with these machines, cutting and engraving are slightly different. For example, they can cut and engrave wood, paper, Delrin, cork, fabric, cardboard, mylar, leather, rubber, sandpaper, plexiglass, and foods. With glass, stone, titanium, marble, ceramic tile, corian, rubber stamps, anodized aluminum, and others, however, only engraving is possible.
Whether you are already using these machines or researching if they are right for you, we hope these tips help. If you have any questions about the Glowforge products on our store (more below), please reach out to us. We’re happy to provide you with a quote or help you place a new order for your school. You can also find a whole bunch more Glowforge tips and tricks in their online community. And, don't forget to follow us on Instagram and Twitter as well for more EdTech Tips & Tricks!
1 Comment