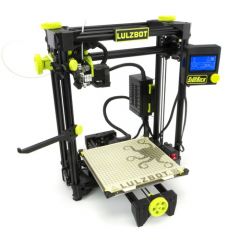
When it comes to 3D printing in education, the LulzBot 3D printers are some really popular options. Their unique builds combined with its exemplary power help students design precise prints and experience truly purposeful STEAM learning. To go along with their popular LulzBot TAZ 3D printers, the LulzBot Mini V2 is beneficial for learning in its own ways and it's truly a reliable 3D creation tool. The latest LulzBot Mini ships fully calibrated and ready for students to use out of the box. Plus, despite its compact size, it provides kids with a 20 percent larger build volume than the original and comes with a bunch of other upgrades as well.
The LulzBot Mini enables students to print with two types of filaments: rigid and flexible. This multi-material printing is a feature that was new to the V2 and one that's very valuable in STEAM education. It also boasts both better print quality and faster print times, helping to keep the LulzBot Mini consistently among the top 3D printers for education purposes. In the box, the Mini ships with a printer, tool kit, documentation, and a small bit of their PLA filament. Educators will, however, need to purchase additional filaments separately but this is helpful when getting started.
Getting started with the LulzBot Mini.
Since 3D printing might be brand-new for some educators (and some students), the included LulzBot Mini documentation is super valuable. It contains an SD card with source files, the LulzBot Quick Start Guide, a quality assurance record, and more. And, the included tool kits each include a bunch of helpful 3D printing accessories for your classroom. Among them are a hangable bag, replacement wiper pads, a part removal tool, the scrub pads, a glue stick, a precision knife, long nose pliers, a 7-piece hex key set, a metric ruler, a dental pick, and tweezers—just about everything students would need for LulzBot 3D printing projects.
As you might imagine, there's a lot of technology within the LulzBot Mini and we'll try to explain some of it though you can also learn a lot from the LulzBot Mini manual. First, the LulzBot Mini utilizes fused filament fabrication in its 3D printing process. This means the printer uses filament continuously as it is fed through a heated extruder and deposited back out in layers. It takes less than two minutes for its nozzle to heat up to a warm enough temperature and the extrusion rate is slightly under 14 millimeters per second. Also, the LulzBot Mini's operating noise ranges from 42-50 decibels, which is pretty quiet for classroom 3D printers.
Physical dimensions and LulzBot software.
As for the size of the LulzBot Mini, it's about 24 inches tall, 18 inches wide, and 13 inches long. With these measurements, it's a pretty compact 3D printer (as its name implies). Students could also choose between different filament spool sizes to use. The Mini is compatible with PLA, ABS, polycarbonate, PC-Max, nGen, and a bunch of other cool filament types. Whatever type they choose, they just need to ensure the spool is either 1 kg or 3 kg in size. Speaking of size, the printer itself weighs under 20 pounds, making it easy to set up, store, and transport in a school or makerspace.
In terms of the LulzBot Mini V2's software, students can use a program known as Cura LulzBot Edition. It's compatible with Mac, Windows, and Linux/GNU computers and it'll support various types of files, including .stl, .obj, .x3d, .3mf, .png, and .jpg. Students can download the Cura for LulzBot software from the LulzBot downloads page—just confirm it's Version 3.2 or newer. For any Mac users, they need Mac OS X 10.14 or newer and Windows users need Windows 7 or newer. The software provides students with a user-friendly interface, a variety of slicing options, and all the latest firmware updates. The LulzBot team recommends updating firmware as it becomes available to maximize long-term compatibility as well.
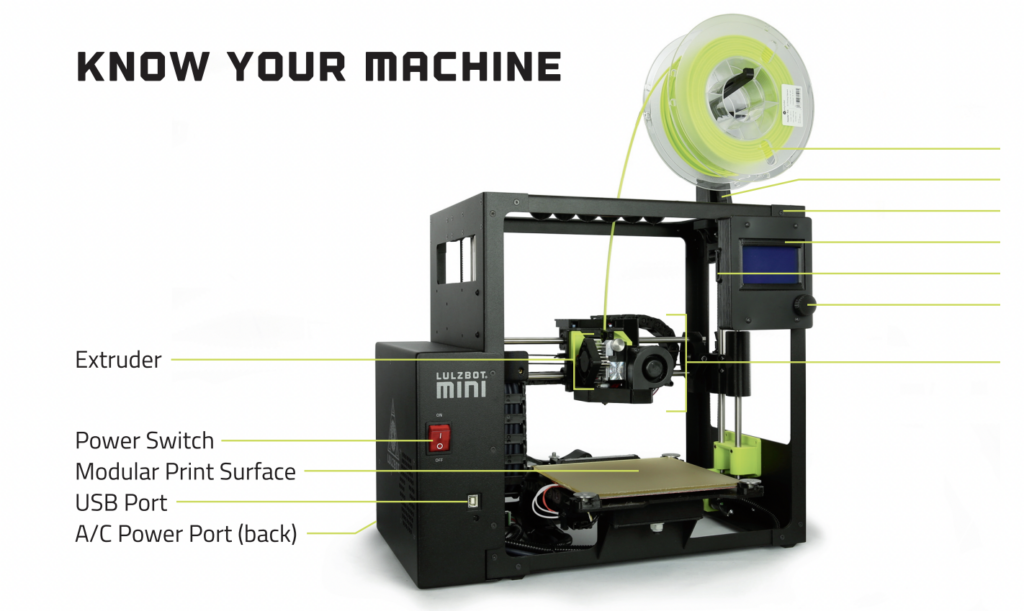
LulzBot Mini components and features.
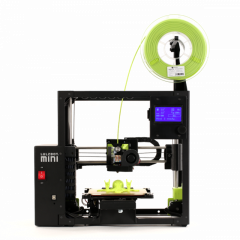
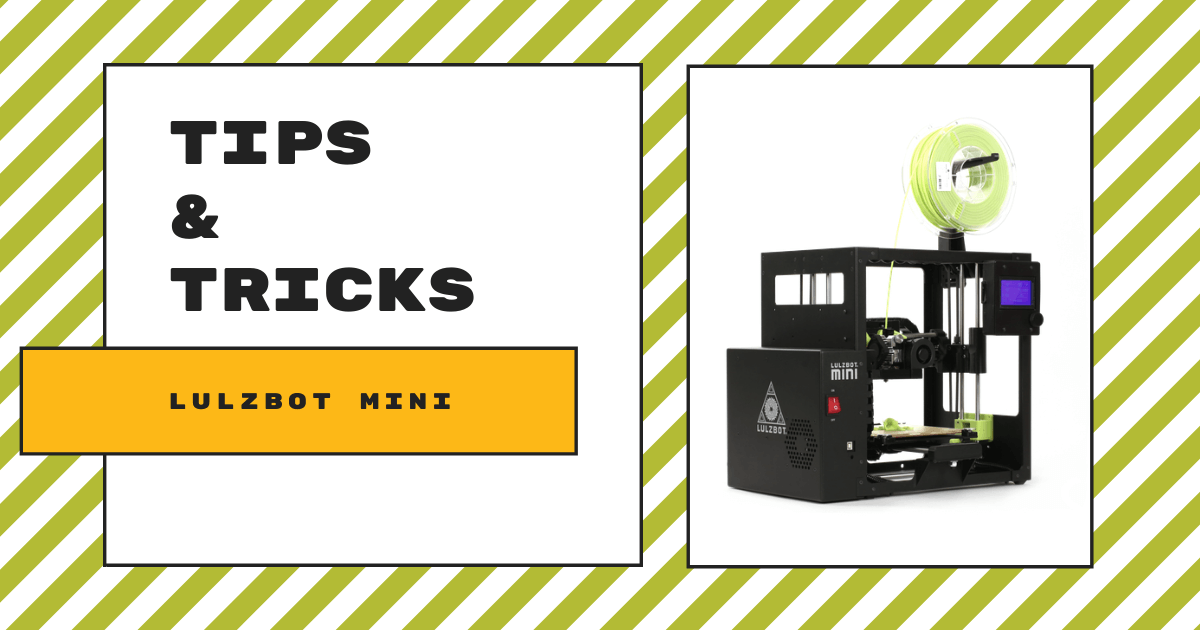
The LulzBot Mini is very easy to use—even for students who are completely new to 3D printing. Thanks to its high-powered Cura software and their detailed set-up guides, getting started is far from intimidating. As for the printer's functions, those are fairly easy for many students to grasp, too. Starting with the font of the printer (below), you'll see the extruder, power switch (red), and a USB port. You'll also see the filament reel, SD card slot, tool head, nozzle, and more when looking closely at the printer. Once your students are fairly comfortable with where each component is, they can move on.
When unboxing the LulzBot Mini, you'll notice there's a bright green 3D printed octopus in the box. That is because the LulzBot team hand tests every 3D printer they manufacture on-site before shipping them. This helps ensure that everything is running smoothly and the octopus that they include perfectly illustrates their confidence in these machines. Once it is out of the box, students can download the Cura LulzBot software from the LulzBot site. And, if they don't have Internet access, students could simply insert the SD card to find all the Cura installation packages. Check out these instructions for configuring the LulzBot Mini with Cura for more guidance.
Powering on and preparing projects.
Once they're ready, students should connect the USB cable to both the LulzBot Mini and to their computer or laptop. Then, they just need to connect the printer's power cord to their power source. Hitting the power switch will then power on their printer. Once they have their computer on and the LulzBot software opened, their first print should appear on their screens. Known as the rocktopus 3D print, the model appears on the virtual printing bed when students first launch this software. Since the LulzBot software comes pre-loaded with a sample project, it really helps students jump in to 3D printing. It also helps reduce intimidation since they can easily see what they should do for this print and future prints.
In the Cura platform, there are two main sections students will find at the top: prepare and monitor. Within the prepare section, they can set up their prints and take care of any specifications during the pre-printing process. Then, once the print begins, they can monitor its progress using the monitor section. In preparing their print, students must select the material they're using (usually PLA or ABS) and also the profile of their object (usually standard). In the monitor section, they can control the printer's temperature and display the time remaining, which updates after prints begin.
Setting up the printer and LulzBot Mini software.
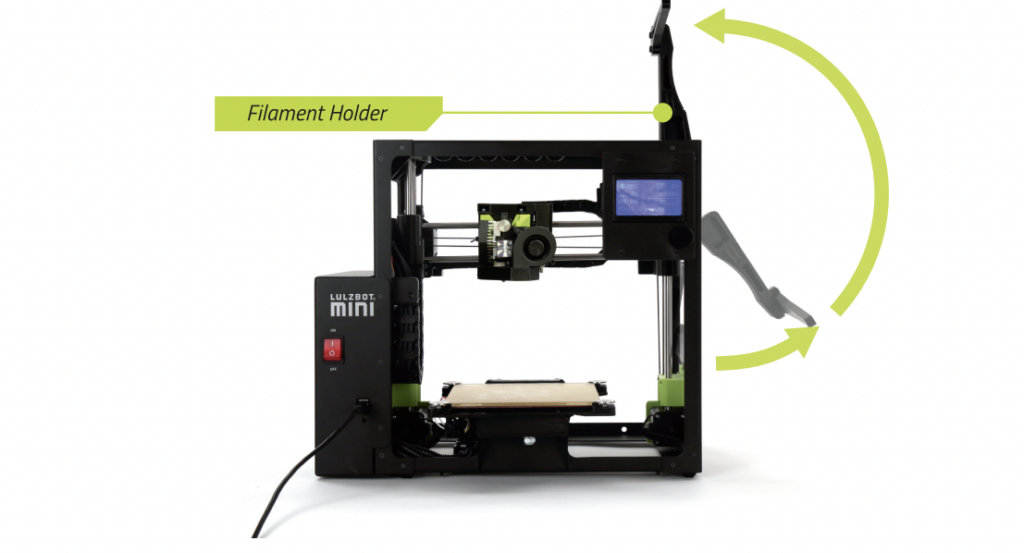
Students can opt to print their design manually by selecting the 'connect' button within the manual control section. Conversely, they may opt to use the print via USB option as well. Once they start the print, the hot end will begin heating so it is very important that they keep their hands away because it heats to extremely hot temperatures. To make sure they don't miss anything, students can follow the steps in the LulzBot Mini Quick Start Guide. Once ready, they can load the filament into the filament holder on the top right of the 3D printer. They just rotate the filament holder, place their filament in, and then secure it so it feeds downward into the tool head.
Students should continue to follow the steps in the guide and they can also, of course, feel free to follow it every time they begin a new 3D printing project. Once their print is set up, they've removed all the plastic packaging from all parts of the printer, and the hot end of it is heated, they can start printing. In the manual control section of the software, they can press the Start Print button to get it underway. Then, they are able to monitor the print's status in the monitor section and remove the 3D design from the bed once it is done. And, as a reminder, be sure to follow the steps in the guide for much greater detail than our overview.
Other classroom tips to know.
Between print jobs, it's best for students (or teachers) to remove all traces of the filament from the previous print. This ensures better quality for future prints and helps eliminate safety or performance issues from the printer moving forward. Kids can print all sorts of things with the powerful LulzBot Mini V2, so the LulzBot Education team has created an in-depth project library for students and educators. It is home to dozens of sample projects broken down by topic and grade level. It also displays an estimate of how long each of the 3D printing projects should take. This, of course, helps students and teachers plan accordingly since many of them can take multiple hours (or even the whole school day).
We hope these 3D printing tips and tricks for the LulzBot Mini help educators efficiently integrate some 3D printing lessons and makerspace experiences into STEM instruction. If you have any questions about the LulzBot Mini, the rest of the LulzBot 3D printers, or starting up a 3D printing program in your school, please feel free to contact us anytime. You can also find our LulzBot offerings on our store (and below). Be sure to check out their LulzLessons as well to find free 3D printing lesson plans for the classroom. Follow us on Twitter and Instagram for more!