
| The 3Doodler Create+ 3D printing pen is 3Doodler’s MakerEd solution for middle and high school students, offering them increased precision, strength, durability, and control. 1. The Create+ dual drive system provides longer doodling, fewer jams, and better speed controls. |
Plastic Options
The 3Doodler Create+ pen supports three different plastic filament options for 3D printing: PLA, ABS, and FLEXY. The 3Doodler team also released their own wood filaments, which are compatible with the Create+ but not the 3Doodler Create pen. Depending on what students want to create, their choice in plastics may change. For beginners, we'd recommend the ABS filament since it is the most flexible and works best for creating with stencils. Whatever filament you’re using, however, it’s best to doodle in well-ventilated areas and never use non-3Doodler filaments with the Create+ pen.
PLA Plastic Filaments
The PLA plastic is plant-based, hard to bend, prone to snapping, and runs with minimal heat. It does have a mild smell and it's vulnerable to moisture and sunlight since it's technically classified as a bio-plastic that is biodegradable. This is often the best option when sticking doodles to metal but it can also stick to paper as well, allowing for a great variety in 3D printing projects. It even has some flexibility to allow for custom molding after extrusion and has the most variety in color options among the 3Doodler filaments, including translucent and metallic strands.
ABS Plastic Filaments
The ABS plastic is petroleum-based, runs on high heat, and hardens to a glossy finish. Since it bonds well to various materials, it's ideal in creating paper stencils and has some flexibility for bending. It’s much less vulnerable to moisture and sunlight than the PLA filament but does still have a bit of a plastic-like smell to it and falls within No. 7 for recycling purposes. This filament is great for creating stencils since children can peel it off paper and draw upwards into the air. It’s also good for welding different pieces together, though it does not allow for molding after extrusion since it hardens so quickly. If using any of the ABS filaments with the Create+ pen, students just need to learn to be more precise in their MakerEd designs for this reason.
FLEXY Filament
The FLEXY plastic also runs on high heat and it's made out of thermoplastic polyurethane. It hardens to a glossy finish as well and it's the most elastic and bendable of the filament options. Though it's not entirely suitable for paper or metal surfaces, it does bond well to glass. It is also completely odorless and, like the ABS filament, it's categorized within No. 7 for recycling purposes. This particular 3Doodler filament works best for creating moving joints or parts due to its stretchiness. It’s also helpful for making wearable items, like jewelry or a wallet, because it’s moldable after extruding. Plus, students could use it to draw upwards into the air and it sticks well to glass, paper, plastic, and textiles.
Getting Started with the 3Doodler Create+
Once kids choose a filament to use with the 3Doodler Create+, they should ensure they select the proper temperature for the plastic type they are using. When using PLA filament for their 3D design projects, the temperature should be low and, when using ABS or FLEXY, it should be higher. If they would like to adjust the temperature to speed up or slow down the pen's extrusion rate, they can use the included screwdriver to turn the temperature adjuster 90 degrees to the right to increase the heat or 90 degrees to the left if they want to decrease it. The temperature adjuster is the small hole located to the left of the on/off switch.
Also, the 3Doodler Create+ takes just about a minute to heat up. The light on its surface will turn blue when it reaches the highest heat setting and green when it's on low heat. The Create+ needs to be plugged in to a power source to work (the kits include the power cord) but the 3Doodler team also advises that students use it in 2-hour increments with half hour breaks in between once they reach that point. This ensures that they're not straining the pen too much and helps keep everyone safe as well.
Using the 3Doodler Create+ filaments
When putting in a filament strand, make sure to gently push it to ensure the pen's gears can grip it. Keep in mind that it may take a bit of time for the plastic to fully melt and begin extruding. Also, if their strand is too short to push, they can use another strand to push the first one down. Further, make sure the pen is on fast mode as you’re loading in new strands of plastic. If you’re having feeding issues with the PLA filament, try lowering the heat manually with the screwdriver as discussed above. And, if you’re having issues with the FLEXY filament, you can put the pen in slow mode. Then, try cutting the end of the strand at a 45-degree angle before you feed it in.
To set a continuous flow of plastic, students can click the button once, click it again to stop extrusion, and double click it to reverse the strand. The reverse function allows them to remove excess filament from their 3Doodler pen. Oftentimes, the pen will pulse while they're doing this, but that is completely normal. If their strand is too short, they can use the unblocking tool for removing it instead. When extruding, students can choose between fast and slow by pressing the fast or slow buttons on the pen. Fast extrusion is helpful if filling in large areas while slow extrusion is ideal when working with intricate details and drawing in the air.
Tips for three-dimensional Doodling with the 3Doodler Create+
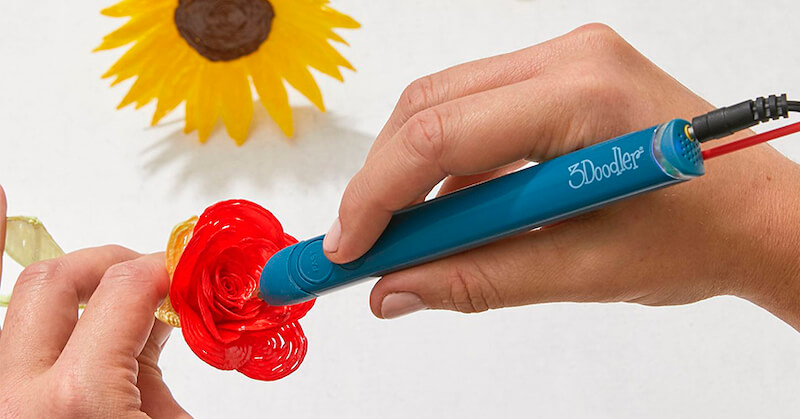
Speaking of that, while doodling, it’s actually best to press firmly on the surface as you would with a pen. This anchors the plastic to that surface rather than it hovering above the surface and extruding in random directions. When drawing in the air, be sure you anchor the plastic to the surface by holding the pen there for a moment until it makes a blob and then lift it off the surface and upward. Once you reach the desired height, hold the pen there for about three seconds so the extruded filament can harden in place.
While the pen's extruding, you may hear a crackling sound, which is also normal—this is simply moisture escaping from inside the pen. As for safety with the 3Doodler Create+, there are some important things to know as with most 3D printing devices. It's important to note that the tip of the pen can become very hot during extrusion and could cause burns. So, it's good to remind students not to touch this part of the pen at any time. Also, their designs may be a bit warm when their filament first extrudes so they need to weigh making sure they don't burn their hands with sculpting the filament right after it extrudes.
Things to Monitor While Printing
We recommend waiting five seconds before touching extruded plastic. If the light on the pen turns red at any point while doodling, this just means the temperature needs to heat up a bit and extrusion will pause for a few seconds. Also, if you are trying to connect two pieces of printed plastic, touching the tip of your Create+ to both pieces and making a connection allows for just that.
You’ll know you need to load more filament when the pen stops extruding or slows down noticeably. When this does happen, just feed in a new strand as we outlined above. Also, when you’re finished with doodling, it's very important to not leave filament inside of the pen. Students can remove any filament by utilizing the pen's reversal function. Once it is fully out, be sure to snip off the ends with clippers or scissors to prevent unnecessary jams later on and don’t put previously extruded plastic strands back into the 3Doodler pen.

Dealing with 3Doodler Create+ Jams and Clogs
If your pen does end up with a jam, this could be because plastic has wrapped around the gears. This can happen when students try reversing strands or fail to snip the edges of strands. To undo the jam, follow the instructions in your 3Doodler Create+ manual closely. With the included screwdriver, open the maintenance cover—but never force anything. Make sure no plastic is left inside the pen when you put the maintenance cover back on and make sure you line the small tabs up when replacing the cover so they don’t snap off.
To unclog plastic, be sure the pen is on and fully heated. Then, use the nozzle removal tool to unscrew the pen's nozzle in a counter-clockwise direction. Be sure to keep the tool centered to avoid any damage. After removing the clogged filament, turn the pen's reverse function on and insert the cleaning rod into the pen's tip. This will push the strand up and out and clear the clog. And, just to reiterate, snipping the melted ends off filament strands can really help avoid jams to begin with.
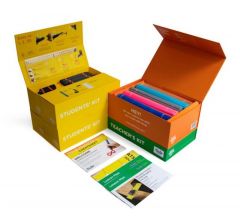
Finding the 3Doodler Create+ Classroom Kits
Some of the 3Doodler Create accessories, Create filaments, and 3Doodler 2.0 filaments remain compatible with the Create+ pen. These accessories include the Nozzle Set, Jetpack, and DoodlePad among others. If you have questions about compatibility, do not hesitate to contact our team. The nozzle set also includes different sized nozzles, such as ribbon tip, square tip, and triangle tip and the Jetpack helps allow for non-tethered doodling. The DoodlePad is fantastic for creating doodles but it's only compatible with ABS and PLA filaments, not FLEXY or Wood. Head over to our store to see all of our 3Doodler pens, filaments, and accessories. And, follow us on Twitter and Instagram for more EdTech Tips & Tricks!
| To learn more, contact the Eduporium team for help with generating a quote on 3D printing materials. |
2 Comments