We’ve been known to set up a 3D printer or two and maybe even a CNC machine at the Eduporium office. This helps us discuss different makerspace tools with teachers and enables our team to better understand how they would use these technologies in their learning environments—wherever they're teaching from. We also do this to ensure these are reputable technology tools that educators could use throughout any STEM lessons or within maker education. With that being said, though it is technically not a 3D printer or a CNC machine, one of the most unique digital manufacturing tools we offer is the Mayku FormBox.
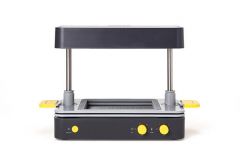
Categorized as a 3D vacuum former, the Mayku FormBox is an easy-to-use and affordable machine that students could use to create 3D objects safely and quickly. The FormBox comes with a quick start manual, a casting guide, and also a forming guide. It even includes a starter kit with three templates, 20 Mayku cast sheets, and 20 Mayku form sheets. Should you need more of those sheets, we also sell additional packs of 30 on our store. This solution also comes with the Mayku Pour material, measuring cups, lifetime access to the public portion of the Mayku Teach portal, and a 2-year warranty.
The FormBox can provide educators with a safe, fast, and affordable MakerEd tool. That’s what we look for in any piece of technology but the added simplicity of the FormBox is a plus. Students could use a number of different materials to create these 3D molds, including concrete, resin, plaster, jello, silicone, soap, foam, ice, and even chocolate! Other materials students could use include high impact polystyrene, polyethylene, terephthalate glycol, jesmonite, jesmonite pigment, concrete, and plaster. The Mayku team has tested and approved all of these personally.
After taking the former out of the box, it's pretty easy to set up and there's nothing for students to build. It comes 100 percent intact—just the power cable and vacuum hose need to be attached. The simple set-up and safety features help make the FormBox a viable MakerEd tool for students as young as eight years old (with supervision). Students as young as 12 years old should be okay to use it on their own.
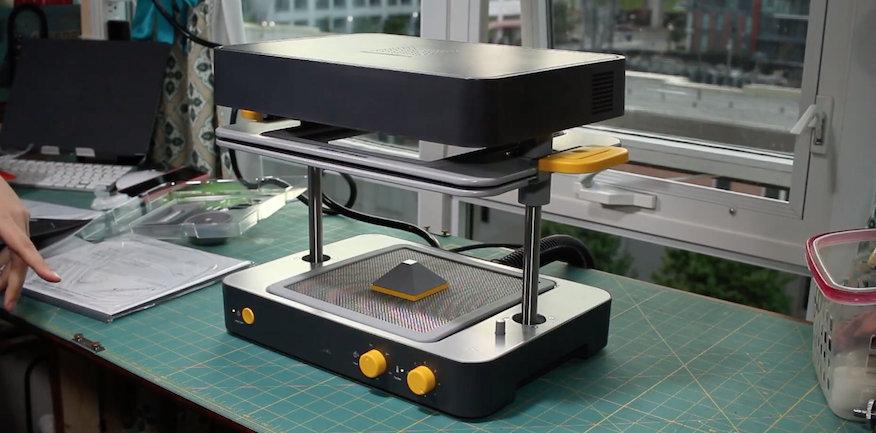
The vacuum hose that comes with the FormBox should connect right to the hose of any standard vacuum cleaner. And, using the vacuum design capabilities, students can make all sorts of objects out of a number of different materials! The FormBox should work easily with any standard vacuum cleaners that have cords under 2,000 watts. You’d be surprised how many vacuum adapters fit and work with the FormBox.
The other element that helps tie making with the FormBox together is the Mayku Teach portal. Access to a portion of the portal comes included with your purchase of the Mayku FormBox. Within the portal, students and teachers can access over 60 pre-designed FormBox projects. Once they find a project they want to try and gather the material they want to use to create their molds, it’s as easy as students creating their shape, placing it on the FormBox’s bed, pushing the levers down to form the mold, filling the molds with as much material as needed, and then sharing their creations.
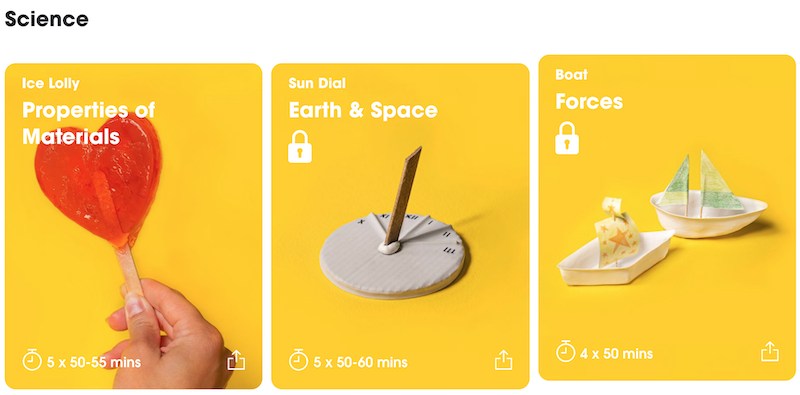
There are some other sections available to educators within the Mayku Teach platform, too. These include Creative Challenges, Creativity Keys, the FormBox Setup Guide, and also the Mayku blog. In the FormBox Projects section, students can find easy hints for getting started. This means it's certainly of interest to us. To access these projects, educators would first need to set up a Mayku Teach account. After that, the first project on the list (Ice Lolly with a focus on Properties of Materials) will be unlocked. It features six lessons and should take students 50-55 minutes to fully complete.
Clicking on that project brings users to the content for teaching and trying it. There's an introductory video to provide students with more context, the goals of the project, insights for how students can evaluate the success of their project, and prior knowledge that’s helpful for them to know. It also includes the materials list. For this particular project, students need some additional materials besides their FormBox.
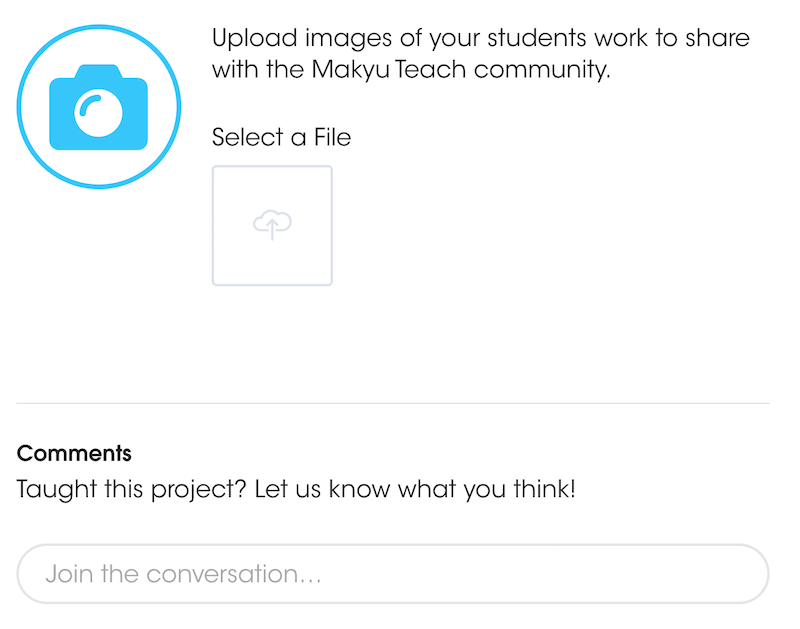
Finally, there's an upload tool for teachers to upload images of students working on their projects and the final version. This can help build community and motivate these students to share their work with a larger audience, bolstering creative confidence. There is also a field for teachers to share their thoughts with the Mayku community. After they finish teaching particular projects, they could share what worked well and what others might need to adjust.
Once users click on ‘Start Lesson,’ they will see step-by-step instructions for each project. There are also indicators for how long students should spend on each step. This helps ensure they are able to fit projects into a single class period. Once through all the steps, educators can also select the ‘Start Teaching’ button to find a Google Slides presentation for teaching key STEAM concepts with each Mayku FormBox project.
To access the rest of these FormBox projects, educators would need to sign up for the paid subscription. If that’s not feasible, however, there are still a lot of useful materials to check out in the Ice Lolly project. They could also browse the Creative Challenges section to find more project ideas for independent learning with the FormBox. Also, if you need any guidance on setting the FormBox up initially, we definitely recommend checking out their Setup section for step-by-step unboxing instructions for the Mayku FormBox.
If you’re more interested in exploring the Mayku FormBox on your own, here are some helpful hints to keep in mind. To begin, users have to place their mesh screen on the surface and then secure it into place. There are sample projects in the included booklet, which can help students get comfortable with the controls and operations of the FormBox before they try their own creative projects.
Teachers can also set the FormBox up and have it ready to use in as little as 10 minutes. Once placing in a casting sheet and clamping the machine down, they'll set the timer for the appropriate time. Turning on the timer first before the heater is important (otherwise you won’t get very far). When the light on the FormBox turns green, that means it's ready to start.
Students can use the Mayku FormBox in creative maker learning as early as third grade. It’s as simple as placing the forming material on the plate and cranking the knobs to sculpt it. There’s no resistance from the handles either, so turning them should be easy enough for kids. Using the timer knob, students can set the FormBox to determine how long they want their material to heat. They can then start the timer by pressing the timer start button. Plug both the FormBox and vacuum in to an outlet and, then, you’re ready to go.
Next, students put their model in the middle of the bed and drop the levers so the sheet covers it. Kids can then let it cool and they’ll have their own 3D objects. It's different from other hands-on STEAM experiences students have had and that makes the FormBox a unique tool for education. It’s also appealing that it’s at a pretty low price point and the fact that students can use a bunch of different (and unique) materials to form their own objects is certainly a plus.
To get a Mayku FormBox for your classroom or makerspace, visit the Eduporium store! We also offer the cast and form sheets on our store, which are fully recyclable and come in 30 packs! Be sure to check out the other 3D design tools on our store, too. And, follow us on Twitter and Instagram for all of our latest EdTech, STEM, and MakerEd updates.