
| The 3Doodler 3D Build & Play is a safe MakerEd tool for early education students to design and create three-dimensional objects.
1. The 3Doodler Build & Play runs on three AA batteries (not included), so there is no need to charge it. |
With the 3Doodler Build & Play, inventing for younger students is much more accessible. Its own take on the classic 3Doodler 3D printing pens, the Build & Play is a simplified machine that kids as young as four years old can use to create three-dimensional objects in any learning environment. Not only can students explore some very beneficial STEAM learning, the Build & Play also incorporates storytelling so they can create their own story characters and combine both literacy and STEAM development at the same time!
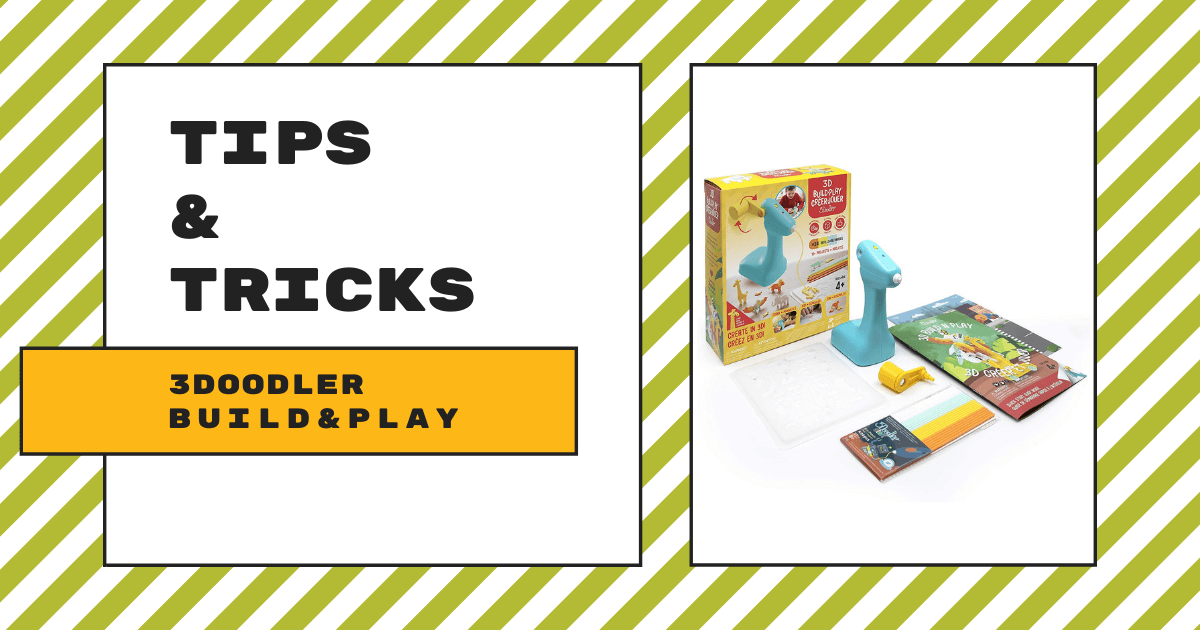
The 3Doodler Build & Play kit comes with the device itself, two story backdrops, and a themed storybook. It’s available only as a single unit on our store with no class pack option. The storybook is important when using the Build & Play since it contains cues that tell students about each of the characters they'll build. A digital manual is also available so they can see the exact steps for building each character in their stories. Throughout the activities, they can build a lion, elephant, giraffe, parrot, and alligator using the Build & Play.
The first thing to do to use the Build & Play is to put in the batteries. You must remove the compartment on the bottom of the device utilizing a Phillips head screwdriver to insert the batteries. We'd recommend using alkaline batteries and, on the inside of the device, indicators show you which direction to place them. Once your batteries are in, re-attach the battery compartment by following the same steps. Next, you can attach the lever to the frame in one of two ways: into the slot on the left side if the child using the 3Doodler Build & Play is left-handed or into the slot on the right side if the child is right-handed.

From there, kids can turn the Build & Play on by sliding the yellow switch to the on position. Once powered on, the red light will illuminate and change over to green within 30 seconds. Once it goes from red to green, the machine is ready for filament. They can insert it through the back of the Build & Play in the small, round hole. Cranking the lever will push the filament strand towards the nozzle and, if you need to recall it for any reason, cranking the lever in the opposite direction will do just that. Kids can then simply point the nozzle towards the molding tray and crank the lever until their filament comes out.
To ensure that kids create the right shapes for each animal model, the mold tray makes it super easy. They can crank their filament into the tray's grooves, which are the exact sizes and shapes for each animal. The filament will harden very quickly and kids can remove the plastic pieces for use in their builds. The manual, including the digital version, has clear instructions for which holes within the tray to fill depending on which model they’re building and which shapes they’ll need for building each animal, which makes it super easy for early learners to try inventing! With all characters constructed, kids can then incorporate them as they read through the storybook and follow their journey.

So, what else do parents and early education professionals need to know about the Build & Play tool? As soon as the filament comes out, kids can touch it and form it to the shape they need. The filament will feel a bit warm but it won't be hot and it's perfectly safe to touch. Also, there aren't any hot parts on the pen's exterior, making it safe for students of this age. As for filaments, 24 strands come in the pack and you can purchase additional filaments at any time. If you’re getting a new pack of filaments, just make sure they’re compatible with the 3Doodler Build & Play or the 3Doodler Start and not the 3Doodler Create+ or PRO.
There are also some other additional tips to keep in mind if you run into issues with the Build & Play. These are some of the most common ones, according to the 3Doodler team. If the batteries are dead and you try replacing them but your device still does not turn on, it could be as simple as the on/off switch. If it was left in the ‘on’ position, you can simply switch it off and then back on again. Also, if there is still no power, keep trying with different sets of batteries. And, if the device’s light is ever green (meaning it should be ready for extruding) but still won’t push the filament through, it’s usually helpful to remove the filament, trim the front edge a tiny bit, wait a few seconds, and try again.
Besides that, you might notice the Build & Play powering off at times. It’s designed for up to 20 minutes of continuous usage and will automatically power down when it hits that limit. If this does happen, you should be able to power it right back on but it’s best not to push it for much longer. Try finishing up any immediate projects and give it a rest for a bit. As for molding the filament, kids should wait until the plastic is fully dry and hardened before attempting to remove it from the mold tray. Otherwise, it could get squished. If kids and teachers keep all this in mind, using the 3Doodler Build & Play should be a blast!
If the Build & Play sounds like an intriguing tool for getting young students into hands-on exploration, head to our store to explore it further along with all the rest of our 3Doodler products. And, if you have questions about the 3Doodler 3D printing pens, specifically the Build & Play, the filaments, or accessories, please feel free to contact us. Be sure to follow us on Twitter and Instagram, too, and check out the rest of our blog for more EdTech Tips & Tricks!