
| The RVR is Sphero’s programmable, all-terrain robot built for customization, expansion, and original inventing. 1. The RVR is Sphero’s most technical robot yet, but can meet middle and high school students at various skill levels. |
You may be wondering what’s in the box. Besides one RVR robot, you’ll get a removable cover plate and developer plate, a removable roll cage, a USB-c charging cord, a RVR battery key, and a removable battery. The robot is outfitted with a universal, 4-pin UART expansion port as well as 5V 2.1A USB-A on-board connectivity for attaching and powering third-party hardware using the RVR’s battery. If you'd like to use the RVR with other hardware, like a Raspberry Bit, micro:bit, or Arduino, you'll need to use the Sphero SDK in order to begin.
It contains tips for getting started, how-to examples, documentation, code, content, and troubleshooting tips that are useful when pairing the RVR with external devices. In addition to the SDK, there is helpful content for getting started with the Sphero RVR available in Sphero's CS Foundations Courses (2 and 3), which can be found on our store as well.
Since the RVR incorporates unique external components, it's generally thought of as a robot for intermediate or advanced students. It supports block coding, text coding in JavaScript, and engineering applications at home or in the classroom. The RVR's battery is found in the center of the robot between its two wheels (below). It's accessible with the included key, which opens the hatch. The RVR also has numerous programmable sensors, including a color sensor, light sensor, IR, magnetometer, accelerometer, and gyroscope.
Just like the BOLT, Mini, and Sphero SPRK+, the RVR is programmable via the Sphero Edu app. The RVR is also compatible with the Sphero Play app on iOS, Android, and Kindle devices. The robot’s name (or ID number) is on the bottom of the robot (RV-XXXX) for easy connections. It's compatible with iOS, Android, and FireOS for mobile devices. The Sphero Edu desktop app is compatible with Chrome, Windows, and Mac computers as well. For students all over the world, the Sphero Edu app is available in 16 different languages. These include English, Chinese, German, French, Spanish, Korean, and a bunch more! Just remember to download the latest version of the app for the best experience.
Like with other Sphero robots, students can choose to drive the RVR or program it within one of three levels (Draw, Blocks, and Text) and there are RVR remote learning activities available too! With Draw, students can design paths for their RVR to follow. They can step up to Blocks to further customize their code with drag-and-drop programming. Finally, the Text level is for students who are ready to try text coding with JavaScript and syntax!
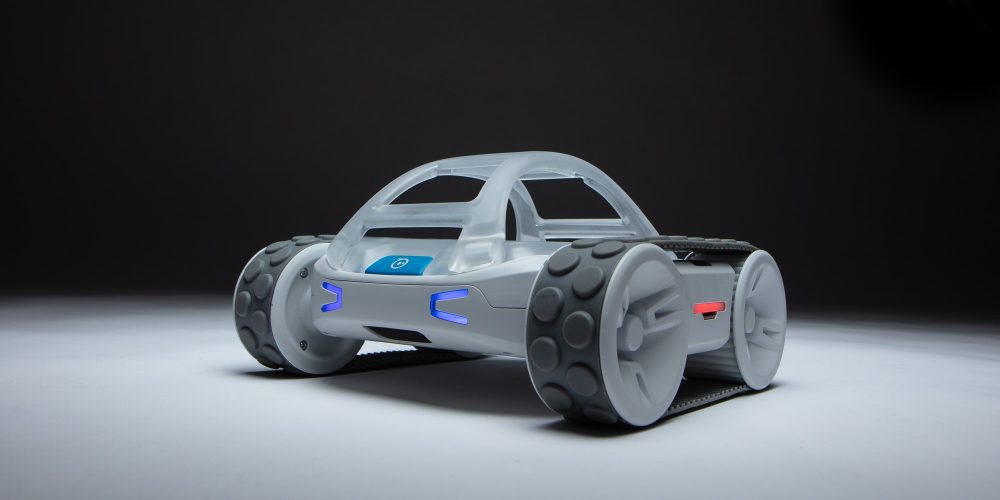
One important feature of note is that the RVR is all-terrain. Unlike its spherical predecessors, the RVR is shaped like a car and includes treads, torque, and a precision control system. This helps it tackle the most uneven of surfaces and rough terrain. It also has a power button to turn it on and off and, unlike the SPRK+, is not waterproof! Out of the box, the RVR should come charged at 50 percent. We recommended charging the battery to 100 percent before powering it on for the first time. To charge the battery, you’ll need to remove it from the robot and use the USB-C cord that’s included.
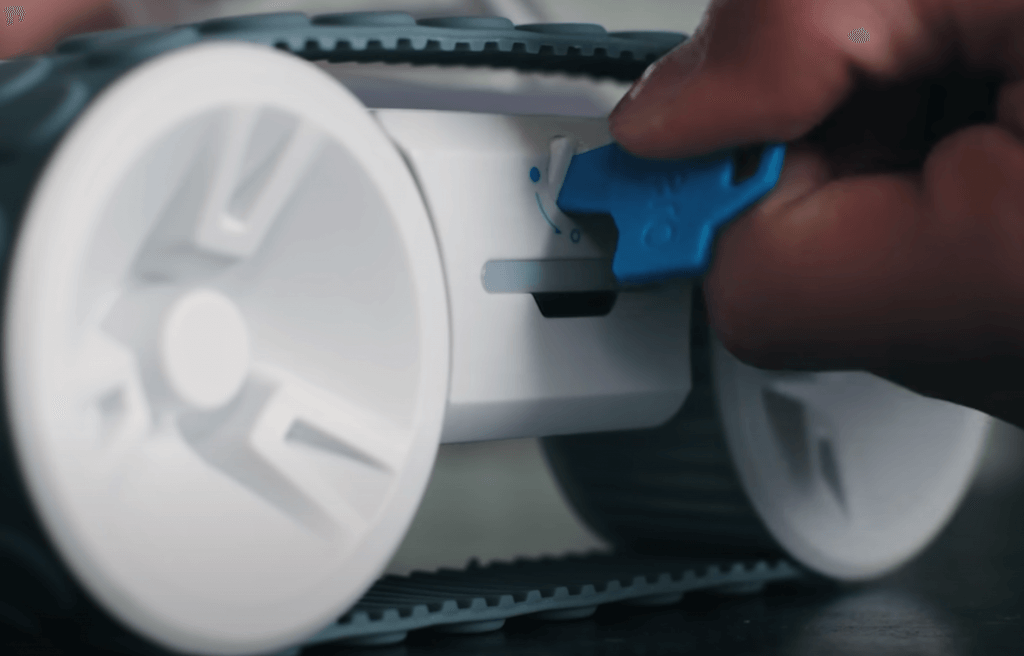
To remove the battery from the RVR, use the battery key to open the battery door. Press the blue battery release button once the door is open. Do this with the battery door facing upwards so the battery does not fall out of the robot. The Sphero RVR battery is spring loaded and will shoot out a bit when the latch is pressed, so make sure the battery opening is facing upward so the battery doesn't fall on the ground. Place the battery back into the robot when charging is complete, locking the battery door with the RVR key by turning it clockwise.
In the event you'd like one, you can also get Sphero RVR replacement batteries on our store. It can take 2-12 hours to fully charge the RVR depending on the USB charger you're using. We recommend a quick charge 3.0/USB-PD for the fastest charge time of approximately two hours. On a full charge, the RVR will run for two hours. But, this also depends on if you have additional devices connected and using up power. To prolong battery life, we recommend removing any additional devices when not in use and even removing the battery to prevent draining. Finally, any USB-C charging cable and brick can be used with the RVR.
We should also mention that the 5V power from the USB and UART as well as the main power to the RVR come from the same battery. This means the RVR can draw power from either source while plugged in without communication. The USB and UART share the same power supply, so both sources combined are limited to 2.1A as an output current. Also, warnings may pop up on the Sphero Edu app from time to time. Though they may look alarming, they're really only providing information about the RVR's functionality. The warnings include an eFuse warning, stall protection warning, temperature warning, critical temperature warning, and a motor fault warning. If it's ever necessary, follow these instructions for fixing these warnings.
To learn more about the Sphero RVR, visit our store. For classroom, makerspace, or library purchases, we have an RVR 5 Pack, too! If you have any questions about the RVR or would like to make a purchase, please let us know. Be sure to follow us on Instagram and Twitter as well for more EdTech Tips & Tricks!