
While we hope the remote and hybrid learning from 2020 is behind us, we also now know that it's possible to teach and learn outside the classroom. If anything good came out of the great remote learning experiment it's that many educators became more comfortable and familiar with using technology tools to deliver instruction virtually. Almost everyone prefers the in-person option, however, though some students certainly showed improvement with the transition to home-based learning. In the event that hybrid learning, in particular, remains a part of your instructional plans, the Meeting Owl Pro is just one of the virtual learning tools from Owl Labs that can help educators create impactful hybrid learning with an in-person feel.
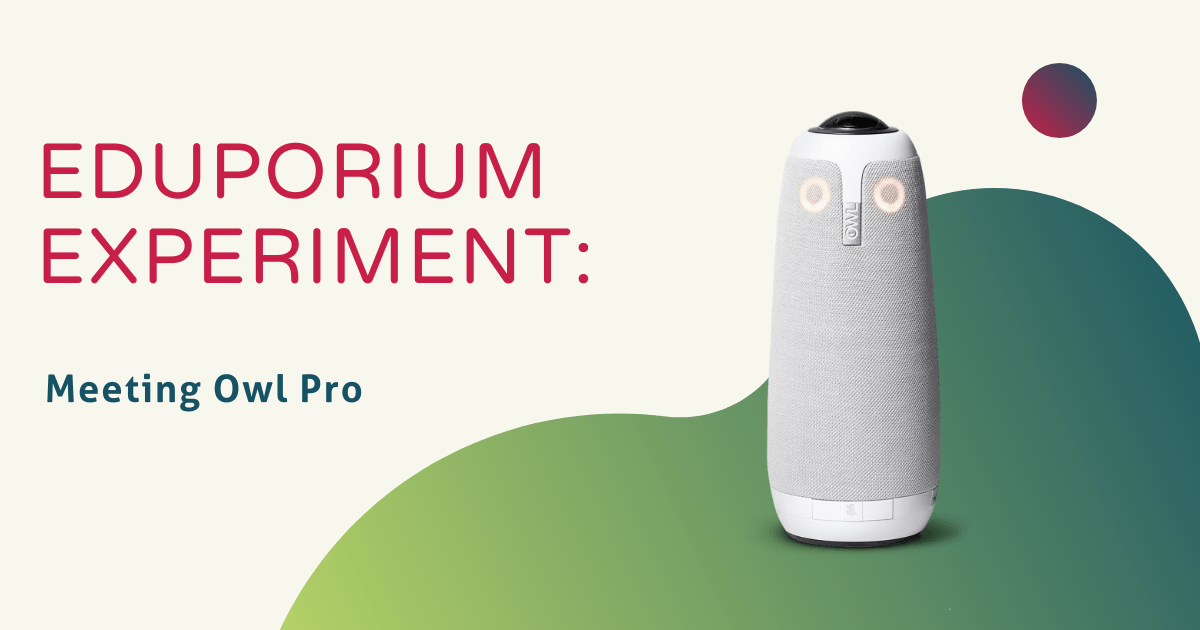
Cylindrical in shape, the Meeting Owl Pro packs plenty of versatility in its compact form. Though under 11 inches in height, it helps educators increase inclusion, keep students engaged, and ensure everyone's voice is heard. It's actually a three-in-one camera, microphone, and speaker brought together to empower educators to facilitate active learning in any environment. It's also extremely easy for educators to use since they can pair it with the free Meeting Owl mobile app or use it as a standalone tool. In either case, bringing any hybrid students fully into the classroom conversation becomes instantly possible.
Essentially, this tool helps educators create new points of view for their students. It also allows for them to create immersive educational opportunities whether they're in or out of the classroom. The secret to success with the Meeting Owl lies in its auto zooming technology (among other nuances). It's this technology, in particular, that truly helps drive that feel of in-person learning. Thanks to the auto zooming features, the Meeting Owl device is able to hone in on whoever is currently speaking and display their face for everyone to focus on. It identifies where they are in the classroom, when they begin speaking, when they finish, and when someone takes over.
The Meeting Owl is built specifically for use in averaged sized classrooms and even those on the larger side. Not only is it equipped with 360-degree visual capabilities but it can pick up audio from the entire surrounding area. Plus, despite its 18-foot audio pickup radius, eight built-in smart microphones, a 1080p camera, and tri-speaker, the Meeting Owl Pro is super easy to set up. It's completely plug-and-play (USB connection) in terms of hardware and its software allows integration with different video platforms. These include Zoom, Google Hangouts, Slack, GoToMeeting, and more.
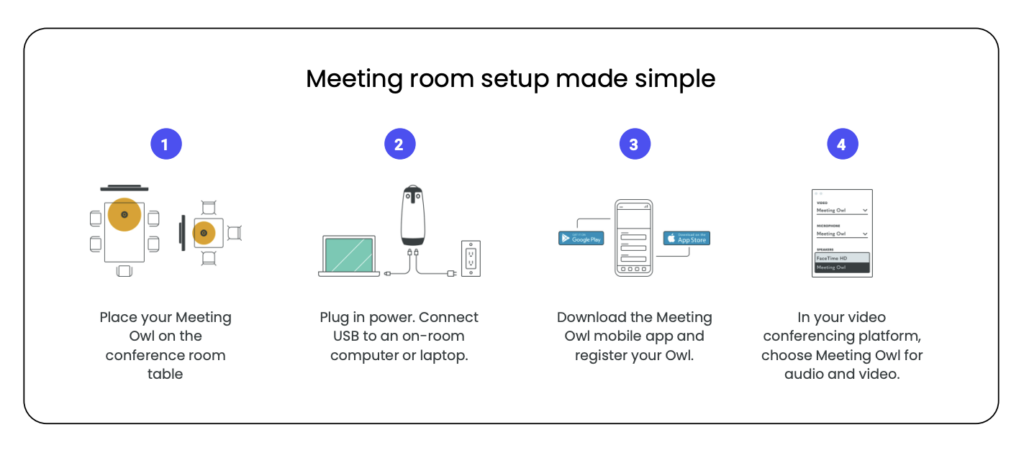
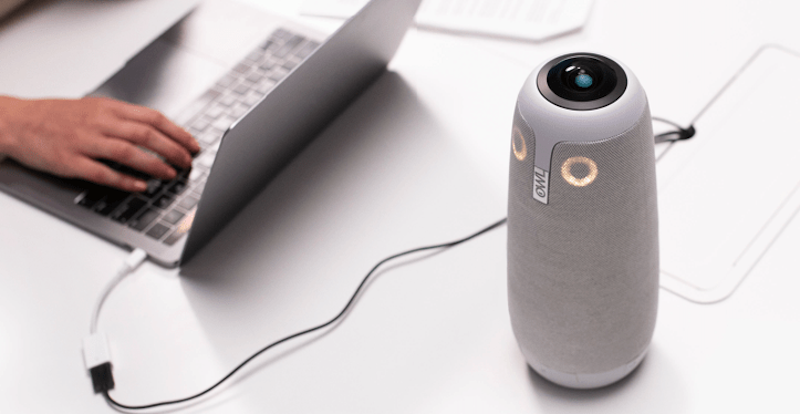
Weighing under three pounds and at just 4.4 inches tall and deep, the Meeting Owl Pro stands alone in portability. To get it set up, educators simply need to place the Meeting Owl in the center of their classroom (or wherever it would work best—usually the center). Typically, it's best to position it on an unused table or desk. Next, they'd simply connect the USB cable to a laptop or desktop and connect its power cable to power. From there, we suggest you download the Meeting Owl mobile app so you can register your device. From there, it's up to you how much you want to incorporate the app. Finally, open your video conferencing app on your computer and select the Meeting Owl for transmitting audio and video.
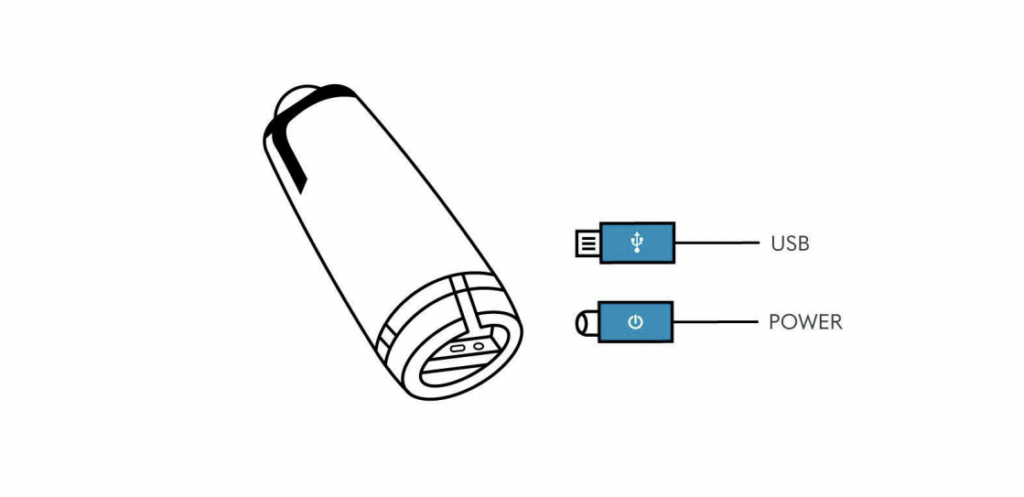
In terms of unboxing the Meeting Owl, you'll find the Meeting Owl Pro device, the USB cable, the power cable, the power supply, and a Quick Start Guide. You'll simply remove the plastic covering from the device and connect both of the cables as we mentioned earlier. You can find the Meeting Owl's USB port on its bottom side. Next, you can complete the registration process through the Meeting Owl app. It's compatible with both iOS and Android devices. With the device powered on, launch the Meeting Owl app and it should begin to scan for nearby Meeting Owl's.
You can select yours, give it any name, and follow prompts to connect it to Wi-Fi and access all features. Then, place the device at least three feet from the TV or monitor you're using. Within the Meeting Owl app, select your video conferencing software and then open the program on your computer. Click 'finish' to complete the registration process and you should be ready to begin fully using the Meeting Owl and all of its engaging features in the classroom. For the best results, place the Meeting Owl on a desk, tabletop, or a mobile cart. For added convenience, you can secure the Meeting Owl to a tripod or attach it to different surfaces using removable Velcro adhesive.
There's also the option to mount the unit to the ceiling if you have the right space and tools. This allows students in larger classrooms to better see and hear everything. In regular sized classrooms, the optimal setup is arranging student desks in a U-shape with the Meeting Owl at the front of the room in the center. As the teacher moves around in the space created by the alignment of the desks, the Meeting Owl should be able to easily follow his or her movements and project conversations in real time. This circular setup also enables it to identify each student who begins speaking and put them on screen.
It also works well with a circular desk arrangement and even clusters of desks around the classroom. This would allow students to sit close together in small groups during lectures while having opportunities to discuss key points. After you find a seating structure that works for you and your students, educators need to enter their meeting ID to begin a new meeting. Then, just select the Meeting Owl Pro as your camera, microphone, and speaker to begin. Educators can also choose to use it from a mobile device or iPad if that's their preference.
As for the different presentation modes, the two most common are referred to as Stage View and Presenter Enhance. Each make use of the Meeting Owl's unique technology to create an engaging educational experience for students in different locations. For students outside the classroom, Stage View provides them with both a view of the classroom and of the speaker(s). The classroom view includes a complete 360-degree panoramic view of the entire space. And, the default view will show remote students whoever is currently speaking but, if using the Meeting Owl app, teachers can focus on any other specific area if they'd like.
Presenter Enhance mode involves the Meeting Owl device following the speaker around a classroom. This allows them to teach more actively, more effectively engage all students, and write notes on the whiteboard, for example. Wherever they move, the Meeting Owl stays focused on them and transmits their position to all virtual students. To activate this mode, select your Meeting Owl within the app and then select Camera Controls. From there, you can enable Presenter Enhance by toggling it on. Then, moving forward, any time a student asks a question or begins speaking, the display on the monitor will split to show both the presenter and the active speaker.
While the most common and useful Meeting Owl features, what we've described here is really only scratching the surface. If educators are simply looking to better connect with and engage remote or hybrid students, these insights should help you gain enough knowledge to do the trick. If you're looking for more ways to leverage the Meeting Owl, however, rest assured, there are plenty! To learn more about the Meeting Owl and our additional Owl Labs offerings, click below to visit our store. If you have any questions, don't hesitate to contact us and follow us on Twitter and Instagram for more.