
The term “PCR” became familiar for many of us during the pandemic, but what exactly does it mean? And how can you use it in education? You chemistry and biology instructors probably already know, but for the rest of us, PCR stands for “polymerase chain reaction.” It’s a method for amplifying, or making copies of, a DNA sample, usually by using a thermal cycler (or thermocycler). Thermal cyclers can elevate or lower the temperature of DNA samples, a process that acts as a catalyst for reactions. So, today, we're exploring the miniPCR thermal cycler, related PCR projects, and its affordable and approachable biotech connections.
Along with PCR, miniPCR projects also utilize gel electrophoresis, a related procedure that helps students analyze DNA in another way. After PCR makes copies of different sections of DNA, gel electrophoresis then separates the DNA molecules by size. This allows a class of scientists-in-training to identify specific genes, compare samples, study variations linked to certain characteristics, and more. Both these methods of DNA analysis are frequently used in many STEM professions. You never know—one lab might inspire a student to become an oncologist, a forensic scientist, or an agricultural researcher.
The process of PCR
As mentioned above, thermal cycling facilitates a polymerase chain reaction (PCR). When the DNA heats up, its two strands can separate into single strands. Then, primers (short sequences of DNA that identify a target sequence in a longer strand) mark DNA fragments to copy. During the annealing step, primers bind to the DNA, highlighting that particular sequence.
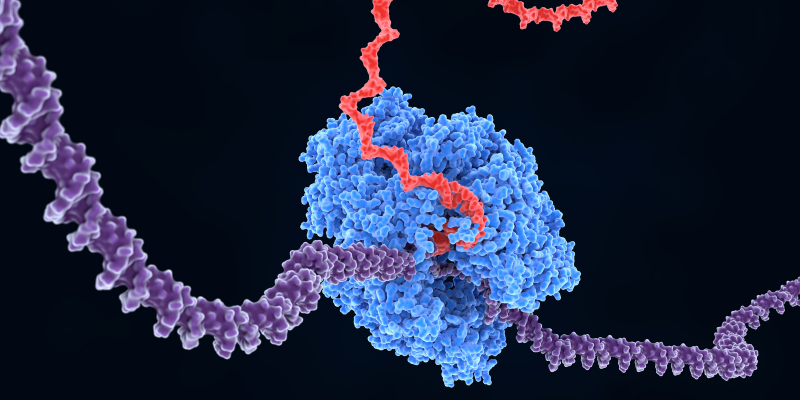
Next, the enzyme “Taq polymerase” copies the highlighted part of the DNA by using the original strands as a blueprint. Once an enzyme has synthesized two new strands, they bind to the original strands, creating a perfect copy. Thus, the initial amount of DNA has doubled, a process that scientists can repeat many times using their thermal cycler. Replicating the DNA in this way also makes it easier to study in fields like genetic research or microbiology.
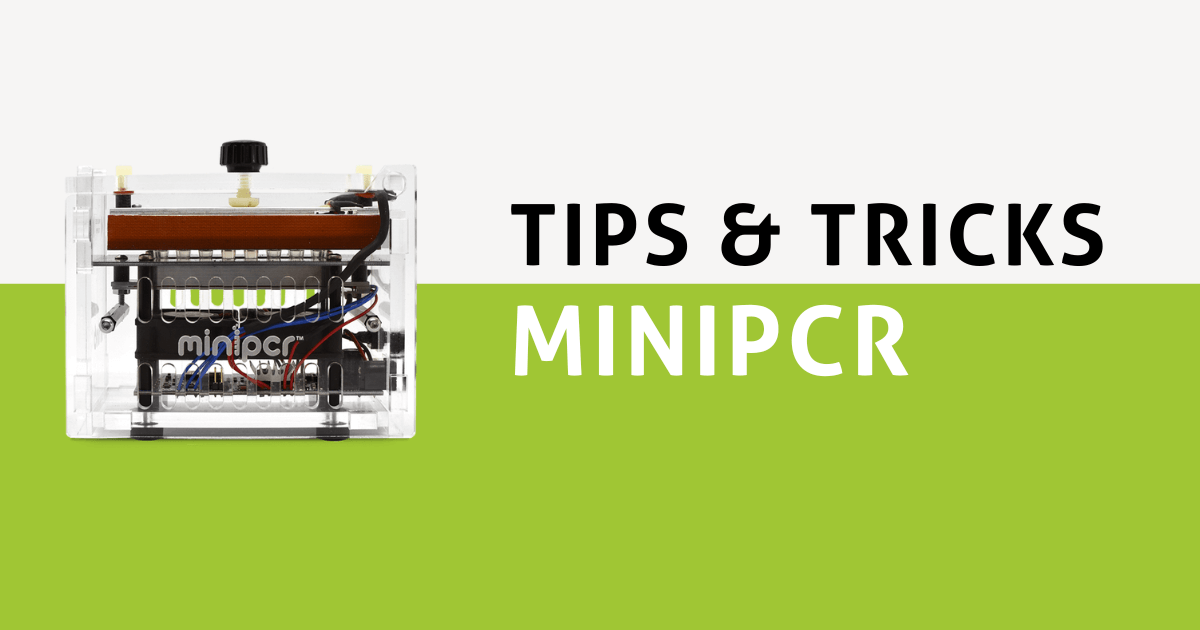
The miniPCR Thermal Cycler
Though most industrial thermal cyclers cost thousands of dollars by themselves, miniPCR thermal cyclers are a lot more affordable. Every miniPCR Classroom Pack comes with one mini thermal cycler, along with plenty of other supplies for your biology lab. The thermal cycler is a speedy machine that delivers results in only 24 minutes, making it perfect for shorter classes. At only one pound, it’s small enough to place directly on a lab bench or hold in your hand. Even at that size, its capacity makes it plenty big enough for the entire class to use. It can fit 16 samples of DNA—enough for about four lab groups.
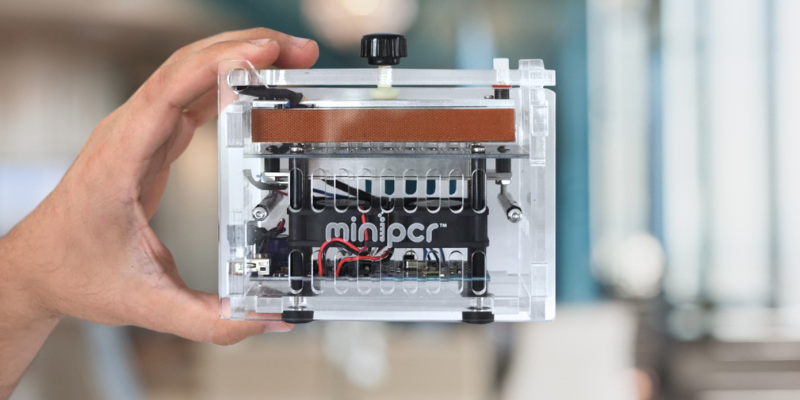
Despite its size, the miniPCR thermal cycler’s re-imagined heating and cooling technology means it’s very efficient and functional. Yet it is small enough to be perfectly portable, so you can share it among multiple STEM classes. Students could even take it out into the field for on-the-spot analysis. This drop-resistant construction will keep the cycler safe from the elements—and from rambunctious students! And because it’s transparent, students can see what’s going on inside to better understand the PCR process.
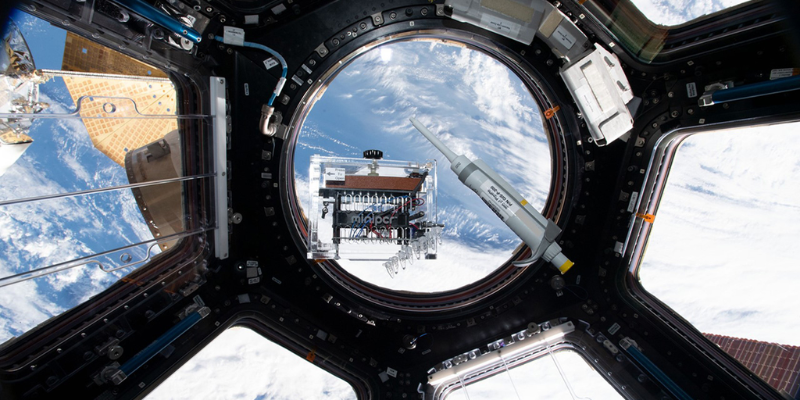
But does the small size lead to compromised performance? Not according to several third-party scientists from leading labs, who evaluated the miniPCR thermal cycler compared to industry standards. If that isn't enough, the kit is often the PCR equipment of choice on board the International Space Station! That is due to the miniPCR team designing it for maximum engagement and ease of use without affecting functionality. And, students can control it entirely through a simple app.
The miniPCR App
Downloading and connecting the app
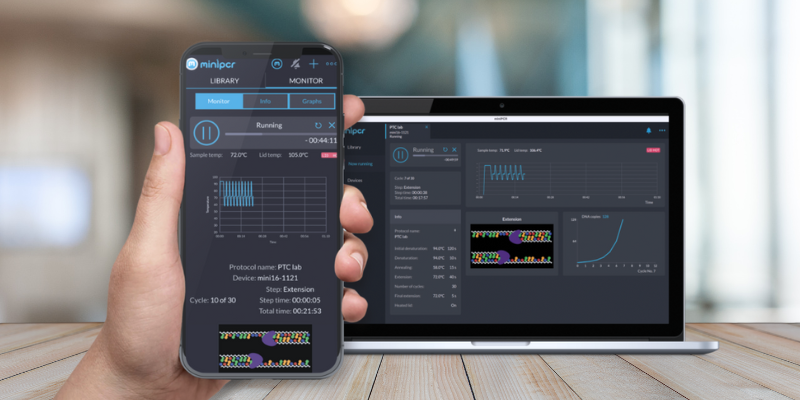
The thermal cycler has an LED screen for tracking the project’s progress, but the miniPCR app offers even more functionality. The computer version is compatible with Windows, Mac, Linux, and many Chromebook devices, while its mobile version's iOS- and Android-compatible. To program the thermal cycler, connect it to the computer via Bluetooth or USB-C cable while using the miniPCR app. Or, kids can connect it to the mobile app with Bluetooth. Once disconnected, the miniPCR device continues to run its programs, which teachers and students can monitor using the LED screen.
The first step of programming the thermal cycler is to turn it on and navigate to the “Devices” tab on the computer or mobile app. On the computer, the “Devices” tab is on the left of the screen. On mobile, kids can access their devices by tapping the small “M” at the top of their screens. Then, select the “Connect” button, which is represented by a white Bluetooth symbol. Your thermal cycler’s blue LED will flash while searching for a Bluetooth connection, and it will stop flashing and remain on once connected. In the app, the name of the device will also turn green to indicate a successful connection. You can then change the name for easier identification.
Creating a program
To program your thermal cycler, click on the “Library” tab within the app. You will see four options for these programs (also called protocols): PCR, Heat Block, Linear Ramp, and Flex. The PCR option is what we’ll be looking at in more detail, so we’ll return to that in a bit. The Heat Block protocol keeps the thermal cycler at a particular temperature for a certain period of time. Students may tend to use this protocol for projects like incubations. The Linear Ramp option, however, sets the cycler to start at one temperature and slowly climb to another over time. And, Flex allows kids to link multiple programs together in series, like a PCR followed by a Heat Block.

Now, let’s look at a PCR program in more detail. First, click on the plus (+) button up in the top right corner and select the PCR protocol. Enter a new name for your protocol, and, if you want, adjust parameters such as your number of cycles or even the heating and cooling times. For example, certain primers might need a higher or lower annealing temperature to amplify the correct section of DNA. Note that the app turns on the heated lid option automatically, keeping condensation from forming on the caps of the sample tubes. Once you make any necessary adjustments, you can save the program for later or save and run it immediately.
Running a miniPCR program
To run your PCR program, the power switch must be in the “On” position. If you previously downloaded the program to your thermal cycler, it does not have to be connected to the app to run your program. However, if you have not yet downloaded the program, you must select “Run” in the Library screen on the app while the thermal cycler is connected via USB or Bluetooth. Once the program starts running, though, you don’t have to maintain the USB or Bluetooth connection. As long as the power switch remains on, your program will continue to run.
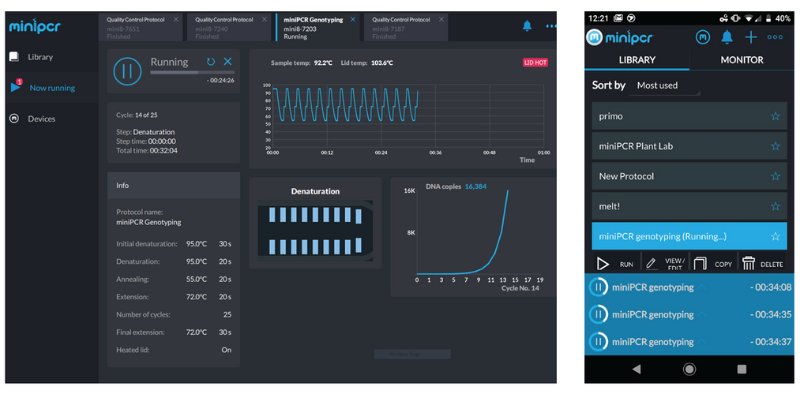
After starting a program, head back to the main screen and click on the “Now running” tab on computers or the “Monitor” tab on mobile to keep an eye on its progress. This screen shows you information like the number of DNA copies, the temperature of the samples, and how much time remains in this reaction. The temperature within the thermal cycler appears on a graph in real time, letting kids track these temperature changes and keep the reaction running smoothly. Meanwhile, an animation will play to illustrate each step in the molecular process. That way, students can more easily picture how the reaction works and come to a better understanding of the scientific concepts behind PCR.
Gel Electrophoresis
What is gel electrophoresis?
Although miniPCR kits are named after the PCR process, that is not the only method students will use in their projects. Gel electrophoresis is another common technique for analyzing DNA, and for many of the projects, both PCR and gel electrophoresis can work in tandem. While PCR replicates and amplifies DNA, the purpose of gel electrophoresis is to separate DNA or RNA molecules based on their size and charges. PCR must occur before gel electrophoresis, otherwise there will not be enough DNA for analysis. Many of your miniPCR labs, however, come with some DNA samples that have already been amplified by PCR, so kids can jump right into electrophoresis.
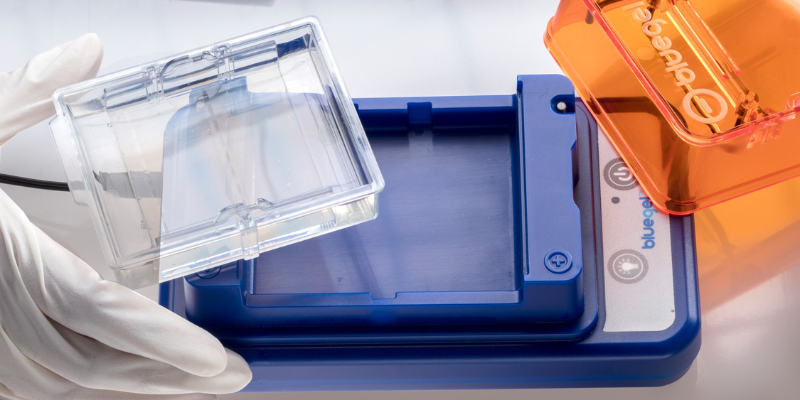
After a DNA sample is amplified with PCR, it can undergo gel electrophoresis. As the name indicates, this process is done by passing the DNA through a special porous gel. The pores in the gel act like a sieve, so the DNA molecules can travel through. However, molecules of different sizes will travel at different speeds through the gel, with bigger molecules passing more slowly than smaller ones. In illustrating this principle, you can picture a colander full of pasta and water. The water simply passes right through the holes of that colander, but the pasta is too big to go through and stays where it is. Similarly, small strands of DNA travel farther through the gel than larger strands.
How gel electrophoresis works
How do scientists induce the movement of the molecules through the gel in the first place? This is where electrophoresis will come in. An electrical current is applied to the gel, causing one end of the gel to have the positive charge and one end to have a negative charge. Like a magnet, molecules are attracted to the opposite charge from their own. Positively charged molecules will travel, or migrate, towards the negative charge, and negatively charged molecules migrate toward the positive charge. Since DNA has a negative charge, the positive end of the gel draws all of the molecules in that direction.
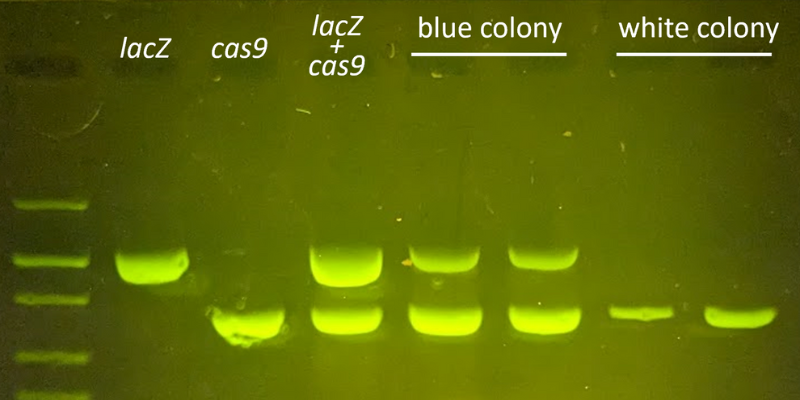
Once the molecules have been distributed throughout the gel, students can then compare them to DNA samples with a known distribution pattern. Dye is applied to the DNA, making the different strands show up as bands of varying sizes within your gel (above). Then, by comparing these bands to those found on their control sample, children can identify the presence or absence of certain genes. In one miniPCR lab, for example, kids must diagnose sickle cell disease by detecting particular genes in a baby’s DNA.
Using miniPCR kits in education
Once your miniPCR thermal cycler and gel electrophoresis materials are up and running, you are free to do all sorts of experiments in the classroom and beyond. The kits are each very accessible for students in high school and college, empowering them to perform complex experiments without super high learning curves. Teaching with the miniPCR materials engages kids’ senses and interests by providing them with real-world connections. With these projects, they’re not just learning for a test, they’re learning for the future.
PCR Projects
These miniPCR Labs include enough materials for completing several projects with a class of up to 32 students. Students can use PCR techniques to detect GMOs in some of their favorite foods—a real-life biotechnology project that's particularly pertinent for future careers in agriculture, food manufacturing, and environmental science. In another project, they will identify bacterial strains in a shipment of space food bound for Mars. The Missy Baker project challenges children to use PCR to test whether the DNA evidence from the cars of two suspects matches the missing subject, Missy Baker. Since their fictional subject has cystic fibrosis, students can use their knowledge of genetics to analyze whether that DNA could be a match. Lessons like this one might even spark passions for forensics, medicine, or biotech, leading students to more potential career options.

The possibilities for PCR labs don’t end there. Students can discover their unique circadian rhythm through PCR, identifying whether they are a morning person or a night owl just by examining their DNA. Remember how primers will mark a section of DNA for replication? One particular section has been closely associated with sleep preferences. Although many factors influence circadian rhythm, this specific gene, Per3, seems to influence a preference for morning or evening activity. During this lab, students can practice techniques like micropipetting and DNA extraction while learning more about themselves!
Labs for any occasion
These miniPCR labs are also scalable, so teachers can tailor them to entry-level or advanced classes. The Antibiotic Resistance lab, for example, comes with its own DNA samples to control the outcome of the lab. However, for a more advanced project, students could take their own soil samples to test. Whether they're using the provided samples or not, the lab will prepare them to study relevant topics like infectious disease and environmental science—especially because the lab is based on the common real-life issue of antibiotic resistance. In the lab, one farm has given rise to an antibiotic-resistant bacterium. Students will use PCR to determine whether the bacteria have spread to neighboring areas. The case study introduces each student to the concept of using molecular analysis to monitor the environment, a troubling yet relevant necessity.
Gel electrophoresis projects
The kits also include DNA samples that are already prepared for gel electrophoresis, so children don’t have to put them through the PCR process first. Using these samples, kids can practice the specific skills they'll need for gel electrophoresis and move on to the analysis phase of biotechnology. Along with the sickle cell lab we’ve already mentioned, they also have a conservation lab in which children utilize gel electrophoresis for determining whether scientists could have re-discovered a species of lemur previously believed to have gone extinct. They might also determine the father of a litter of puppies or identify the shark responsible for a series of attacks off the Australian coast.
In one particularly relevant lab, children can use gel electrophoresis to determine if patients complaining of viral symptoms have seasonal flu or are infected with a new virus. Or, students can step into the real-world scenario of a crime scene. Could the suspect J.M. actually have commited this crime? Analyzing new DNA evidence through gel electrophoresis will reveal the truth.
How miniPCR experiences prepare students for the future
These miniPCR kits bridge the gap between theory and practice, transforming complex scientific concepts into tangible STEM experiences. With real portability, affordability, and user-friendly design, each kit helps democratize access to molecular biology experiences. They also help equip students with essential skills in DNA extraction and analysis, preparing them for future endeavors in STEM fields. From detecting GMOs in food to solving fictional crimes, these miniPCR labs provide diverse and scalable projects that truly cater to students of various learning levels.
Beyond technical skills, these labs help kids cultivate critical thinking, problem-solving, and collaboration skills, all while sparking new excitement for science based on wonder and discovery. By engaging students with hands-on experimentation, each miniPCR lab helps them foster a much deeper understanding of DNA analysis and the diverse applications in agriculture, forensics, environmental science, and beyond. To begin using these materials in your classroom, set up a consultation with us or check out our store. Also, don’t forget to follow us on Twitter (X) and Instagram for tips and tricks about other top STEM tools. Or, sign up for our newsletter to get articles like this one right in your inbox.