

The Skoog 2.0 is a music-making tool that kids can use in all sorts of creative ways. It helps create tactile experiences as they produce unique sounds based on how they touch each side of the structure. It is also soft and somewhat squishy, mimicking the top of a drum in its texture but the Skoog helps create learning experiences that are a whole lot more engaging and inclusive. Its universal design enables accessible and expressive music making for children. Plus, it’s compatible with a variety of mobile apps and even some other STEAM tools. So, for this week’s Tips & Tricks post, follow along as we get into the Skoog 2.0!
There are a few mobile apps students could use with the Skoog and, eventually, to try new ways of coding. The Skoog 2.0 is compatible with iOS devices—mainly iPads, but iPhones and iPod touch models are also possible. It requires a paired device that is Bluetooth-compatible and supports Bluetooth Low Energy. That full list of compatible iPads includes the iPad 3rd Generation, iPad 4th Generation, iPad Air, iPad Air 2, iPad mini, iPad mini 2, iPad mini 3, and iPad Pro. Whatever device you do choose to use, the iOS software must be version 11 or later.
At 15 cm high, 13 cm wide, and 13 cm long, the cube-shaped Skoog can fit right in students’ hands. With purchasing a Skoog 2.0, you’ll get the Skoog itself, a micro USB cable for charging, and a guide. Much of this information is in the Skoog guide but, if you don’t have one yet, we’ll outline the basics. The first thing to do is download the Skoog app from your app store. You’ll notice it's available on Mac devices as well but, for this post, we’ll focus on iOS devices.
To start using the Skoog 2.0, be sure it has charged by leaving it connected to a power source via the USB cable for an hour or two (the longer you charge it, the more battery it will have). To wake it up, simply press the button on its bottom side one time. This should make its light turn green and pressing the same button again should activate its Bluetooth functionality, making that blue light blink. Kids can then pair their Skoog 2.0 with your device using the Settings app or through the Skoog app. Either way should do the trick.
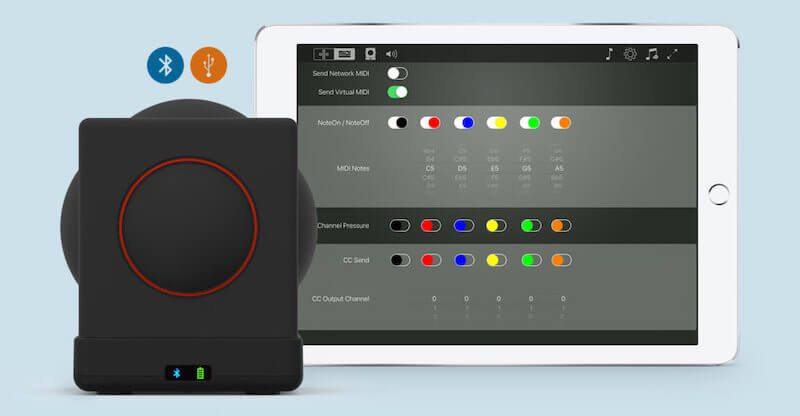
The Skoog apps look different on an iPad versus on iPhones, which you can see in the image above. Their iPhone app is a bit more basic than the iPad app and doesn’t offer quite the same aesthetic interface. With the iPhone app, however, kids can see which Skoog they connect to, view the instruments menu, view and edit scales, discover available MIDI devices they could use, calibrate the Skoog, access the settings menu, and more. The iPhone app includes all of these functions as well as access to the Apple Swift Playgrounds environment. Plus, it offers guided access for enhanced inclusion, access to the Songbook, and access to their device’s music library.
You can see the Skoog layout on the screen with each color corresponding to one of its sides. Then, there are the icons on top (the Skoog symbol, the music note, the guitar, and the settings tab). Within that notes section, you can adjust the notes and pitches you assign to the different sides of the Skoog and also use it to create highly customized sounds in the process. Then, when tapping or drumming on that specific side, you will hear the unique sound you created. This allows students to select the note, scale (major or minor), and octave assigned to each side of the Skoog.
Students can also change the notes manually using the color-coded rollers to select the exact note they’d like. The octave of each note is indicated by the number. With the iPhone app, users can adjust the octave level using the plus or minus signs beside the displayed number. Then, we have the instruments tab, which is represented by the guitar icon. Within this tab, kids can choose from various instruments for the sounds they want their Skoog to produce. Some of the most common instruments are the classic synth, modulus, dubstep bass, and flute with others available as well.
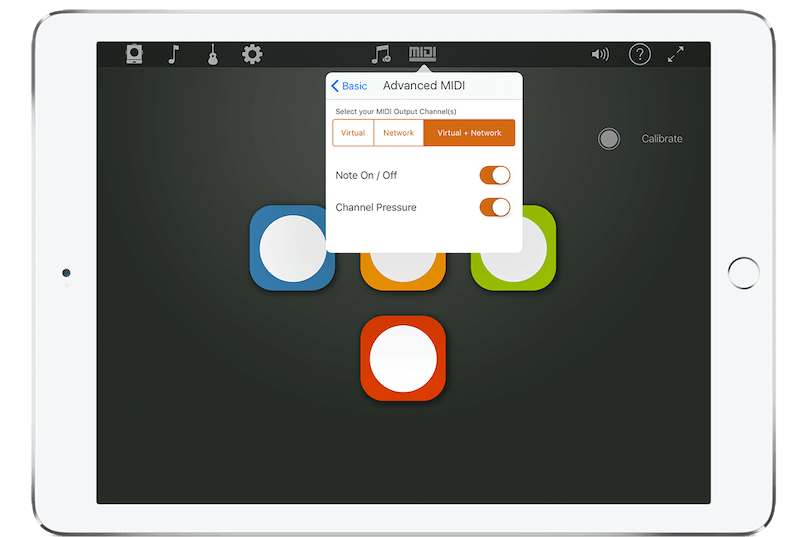
Finally, in the settings tab, students can control the sensitivity of their Skoog (how much force they need to use to activate sounds) and they can choose from a low, medium, or high amount of sensitivity. They could also control the activation threshold and turn off certain sides of the Skoog if they'd like. The music icon on the other side of the screen gives them access to the music library on their device to use for creating music or they can use the Songbook to learn to play certain songs! The last two icons within the center group are the MIDI and Swift icons. That's how you connect the Skoog to MIDI devices or program sounds in Swift.
There's so much students can do with the Skoog, making it tough to fit everything into one post. We’ll end by touching on some of the other things that are possible with the Skoog 2.0, like mentioning how students could connect it to GarageBand to expand the range of sounds they have available. They can also practice coding with the Skoog, bringing music to life using code they create in Swift Playgrounds. There is also the Skratch app, which allows them to make and share music by scratching like a DJ or recording sounds from nature. See, there really is a whole lot students can try with the Skoog.
To learn more about how students can create and program with the Skoog, explore the rest of our content. You can also find the Skoog 2.0 on our store and, if you have any additional questions about it, feel free to contact our team. Be sure to follow us on Twitter and Instagram and like us on Facebook to see all the latest EdTech information we share.