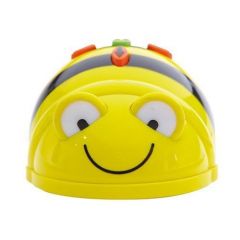
The Bee-Bot coding robot isn't just any Early Ed STEAM tool. On its own, the Bee-Bot provides students with opportunities to jump in to screen-free coding as early as Pre-K thanks to its built-in directional buttons. This feature makes it ideal for beginner coders, providing them with a tangible tool for creating simple programs and learning key introductory concepts. To help them advance their skills once they're a little older, however, the online Bee-Bot Emulator empowers them to use the Bee-Bot in a completely digital way—without the need for the physical robot.
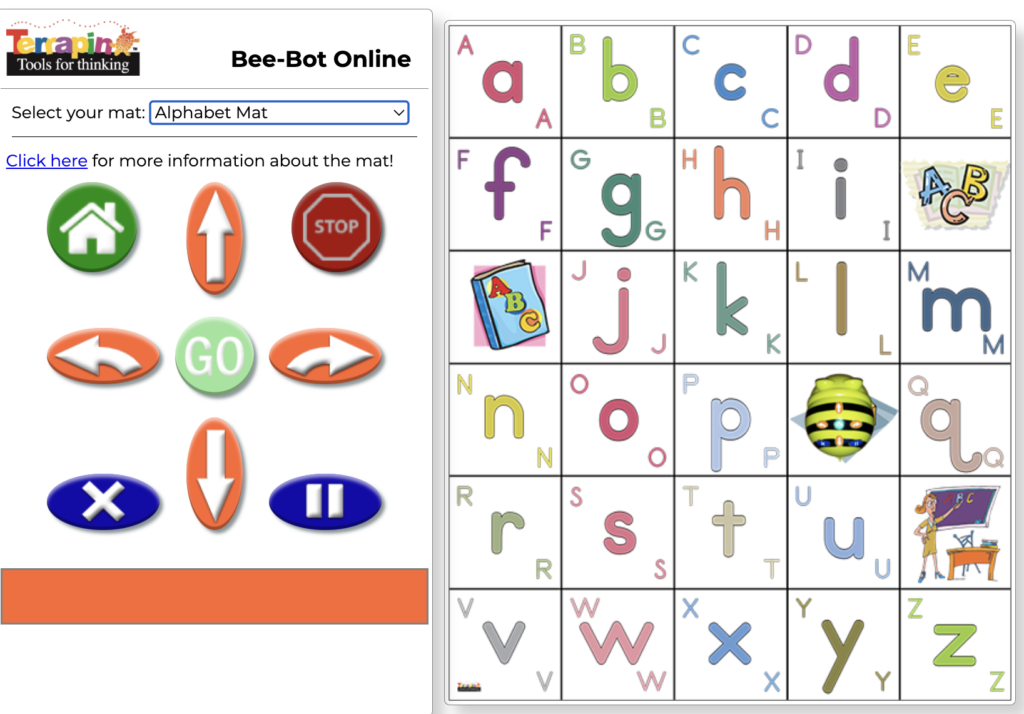
Coding with the Bee-Bot Emulator is exactly like programming a physical Bee-Bot, though it's completely separate from the Bee-Bot app. It even displays the directional buttons in the same way and plays the same sounds to create familiarity and continuity for students in the early grades. Students can access the Bee-Bot Emulator online without any downloads or installations. All students have to do is head to the platform and begin coding with the on-screen Bee-Bot. Once they enter the digital environment, they'll see three main sections: the Bee-Bot command buttons at the top left, a Bee-Bot coding mat at the top right, and instructions at the bottom.
Getting to know the Bee-Bot Emulator.
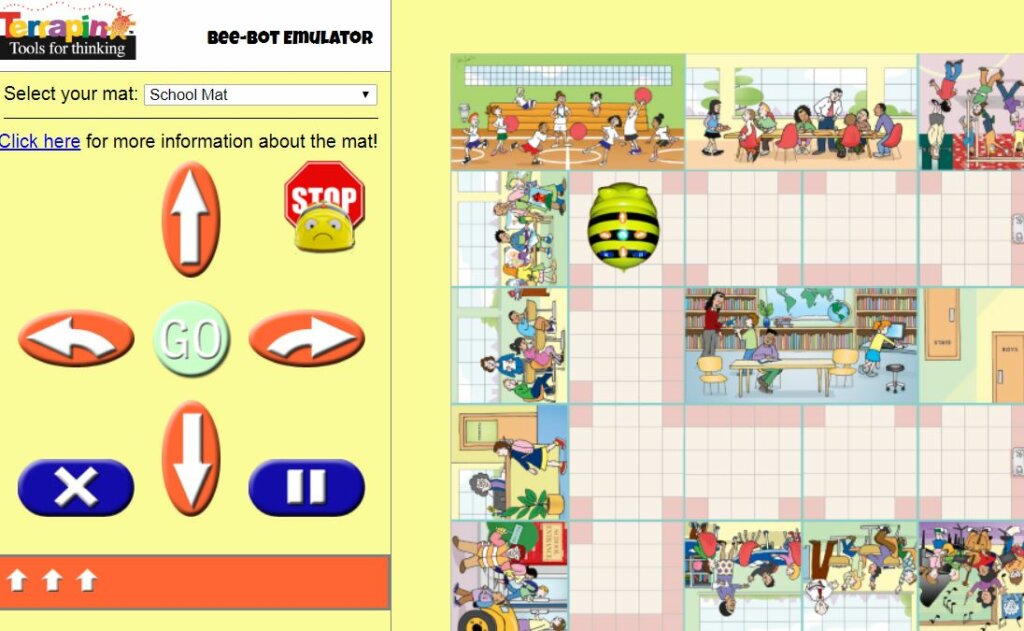
The coding environment is very straightforward, which makes it perfect for early education students to explore Bee-Bot Emulator activities on their own or with help from a teacher. You'll notice that the on-screen Bee-Bot first appears on top of one of the Bee-Bot Card Mats. It will default to the Alphabet Mat, which shows uppercase and lowercase letters and helps young kids learn to read. They can, however, also choose from 11 other mat options, like the Old West mat, the Number Line, and the tried-and-true CVC Words mat. Make sure to point out where the Bee-Bot is on the mat when kids first open it up. It should appear on the extra square between the P and the Q.
Depending on the subject, teachers can select the mat that is most appropriate. The variety of mats also presents an opportunity to use the Bee-Bot in cross-curricular learning. Even in early grades, teachers can combine coding concepts with other critical knowledge areas, like math, phonics, and geography. Even just programming Bee-Bot to move to different sections on the Alphabet Mat or Number Line will reinforce kids' knowledge of letters and numbers. With repetition, kids will create connections between these areas and develop interdisciplinary thinking.
The buttons and programming options.
Once you choose a mat, it's simple to press the on-screen directional buttons to program the virtual Bee-Bot. At first glance, the four orange directional buttons may all seem the same, but there is one subtle but important difference between them. If you look closely, the up and down arrows are straight while the left and right arrows are slightly curved. The up and down buttons move the Bee-Bot forward or backwards by one block. The right and left buttons, however, are commands that make the Bee-Bot turn toward various directions while on the same square. Essentially, the Bee-Bot (virtual or physical) cannot move to its right or left. It can only move forward and, if it needs to turn right or left, it needs separate commands to rotate.
Although coding with the Tuff-Bot (or its online Emulator) allows kids to program more complex turns, the introductory Bee-Bot keeps things simple. Thus, to make their Bee-Bot move forward, turn right, and then continue to move forward, students would need to include the forward command, the right turn command, and another forward command. Students should catch on to this difference fairly quickly, but educators should explain it beforehand as well.
As for the other buttons in the interface, clicking the blue X deletes the entire program students have built. This is similar to the physical Bee-Bot since it does not store programs. Essentially, they are one-time-use entities and students must start from scratch if they remove what they've already created. There's also the green home button. This returns the virtual Bee-Bot to the square between the P and Q—just as when kids open the Emulator.
How to create Bee-Bot programs.
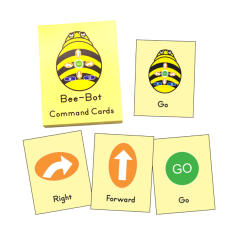
First, have kids practice what they can do with each button so that they know how to build a program. Then, students can click on the various directional buttons to create a combination of movements they want for their programs. They'll see each step populate in the field below. In fact, the visual representation of code is one added benefit students get from the Bee-Bot Emulator. When coding with the physical Bee-Bot, they can't see all the elements of their programs laid out for them before they run it—that is, unless they're also using the Bee-Bot Command Cards.
Each time students add a command when building their Bee-Bot program, they'll hear a sound from their computer. For example, if they want to move their Bee-Bot three steps forward, they'll click the forward (up) button three times. In addition to seeing the commands display below the buttons, the sound indicates that they have successfully added that command. Students can include 40 steps in Bee-Bot Emulator programs, which is less than with the actual Bee-Bot or Blue-Bot robots.
To successfully get the Bee-Bot from point A to point B, students must consider how many steps (squares) it needs to travel and how many times it will need to rotate. One rotation block gets the Bee-Bot to turn 45 degrees, so fully reversing direction would require two consecutive rotation blocks. In addition to the directional and rotation buttons, they can also include pauses in these programs. Students can select the pause button (blue) and use it at any point. It simply gets their robot to pause momentarily before continuing on to the next step.
Once students build a program, they can run it by pressing the Go button in the center of the interface. As the program runs on their computer screens, students can follow along in the programming field as a black box appears over the step that the Bee-Bot is currently executing. They can also use the Stop button to end their program at any time. Once the program completes, it will beep three times to signal the end. Students can also drag the on-screen Bee-Bot to whichever square they'd like before running a program.
The Blue-Bot, Tuff-Bot, and Pro-Bot Emulators
Like the Bee-Bot, Terrapin's other robots also come in a virtual version. All four Terrapin robots have tangible directional buttons in their physical versions and corresponding arrows in their virtual versions. Although the Bee-Bot is most recognizable robot, Blue-Bot greatly resembles Bee-Bot in design and programming functions. However, Blue-Bot's external plastic is transparent so kids can see what's going on inside. The Blue-Bot also has Bluetooth capabilities, as does Tuff-Bot, and both the Blue-Bot and Tuff-Bot Emulators include a Bluetooth button. If clicked, the Bluetooth button will connect to a robot in the vicinity, which will follow commands entered in the emulator. That way, students can easily use both the virtual and physical robots in the same lesson.
Leading Bee-Bot activities with the Emulator.
Using the Terrapin Emulators is pretty straightforward, especially the Bee-Bot Emulator, which is viable as early as Pre-K. Programming Bee-Bot helps students develop crucial intellectual skills, like sequencing, estimation, and problem solving, without the need for a physical robot. We recommend trying out the different Bee-Bot mats within the emulator to give students some different experiences. Whether you prefer trying the emulator and then switching to the physical Bee-Bot or vice versa, the connections are excellent. If you have any questions about this Bee-Bot Emulator, other Terrapin Robots, or accessories, please contact our team anytime. Visit the Terrapin section of our store to create a quote for Bee-Bot or Blue-Bot robots and follow us on Twitter and Instagram for more.