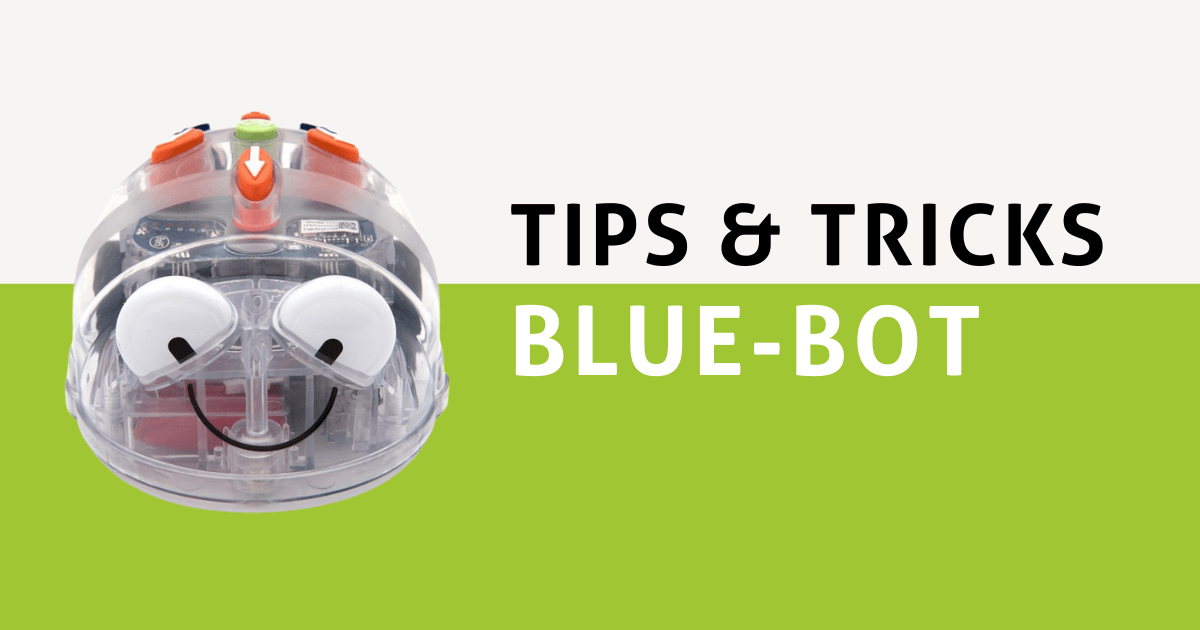
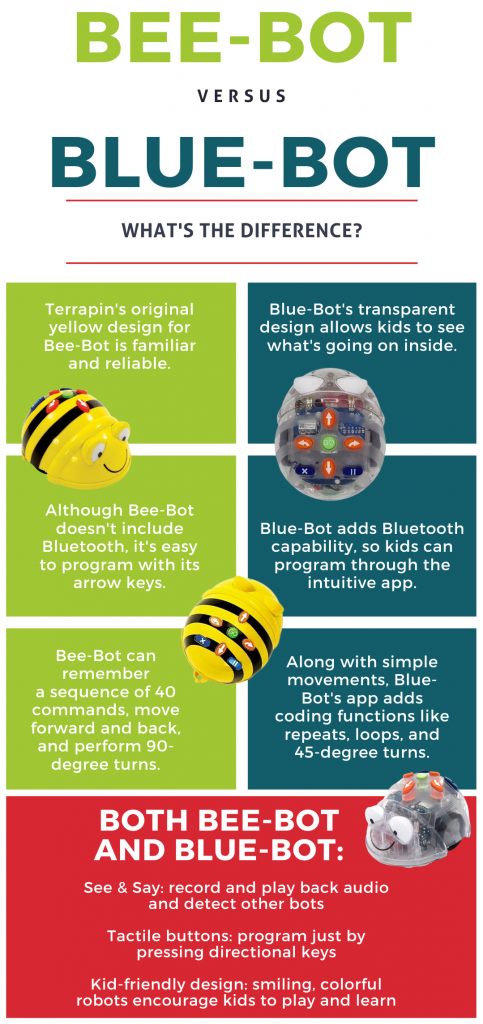
The Blue-Bot is a unique programmable robot designed for introducing coding to students in early education. Although Blue-Bot is similar in size and shape to the Bee-Bot coding robot, it has one important difference. As you may have guessed from its name, Blue-Bot is Bluetooth-enabled, so students can explore age-appropriate coding on a connected device. Using the Blue-Bot app, which is accessible on iOS or Android devices, kids can take the next leap in their STEM development by using drag-and-drop blocks to complete step-by-step programming challenges, code precise 45-degree turns, explore increasingly complex algorithms, and more.
Students can also choose to explore screen-free coding with their Blue-Bot. Using the Blue-Bot without a screen is very similar to coding with the Bee-Bot—with a couple of twists. The Blue-Bot has seven buttons on its top, just like the Bee-Bot does. Kids can start by pressing the X button to clear any programs currently stored on their Blue-Bot. Then, they can begin building programs of up to 200 commands simply by pressing the robot's directional buttons. Whether your students will use Blue-Bot for screen-free coding or for practicing their block coding, here's what you should know for teaching with the Blue-Bot and Blue-Bot app.
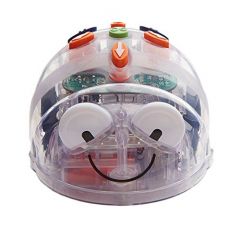
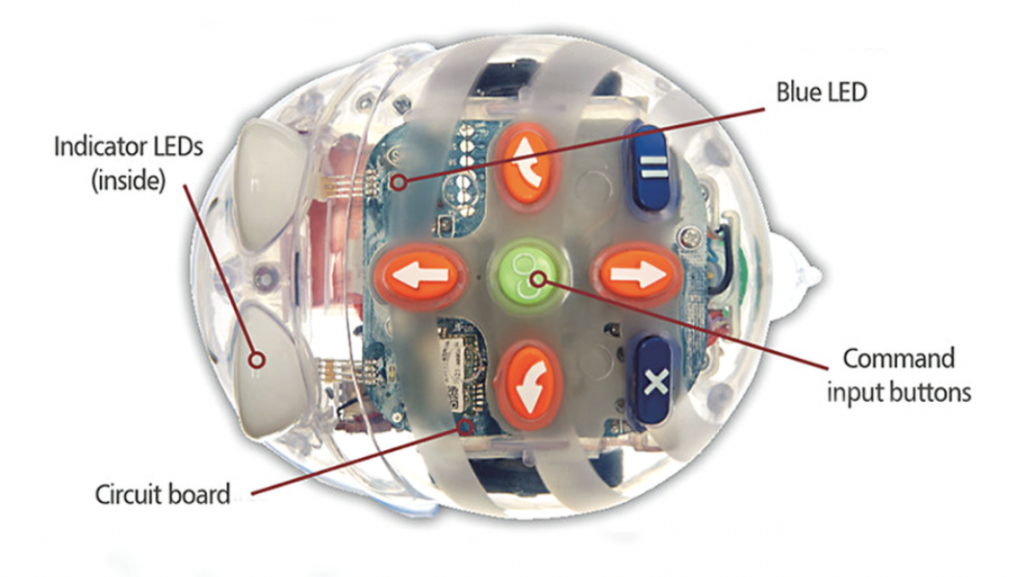
The buttons on the Blue-Bot Robot.
Students will mainly use the directional buttons on Blue-Bot's back to tell the robot to go left, right, forwards, and backwards. However, they will also encounter non-directional buttons: The Clear, Pause, and Go buttons. As mentioned, the Clear button wipes out any pre-built programs currently stored on a Blue-Bot, since it can only save one program at a time. Students can use the Pause button as part of their programs to incorporate brief stops for the Blue-Bot along the way. And, as you might guess, kids press the Go button after completing their program. The Go button tells the robot to begin running the program, completing each element while driving around.
By pressing these buttons in any logical order, students can easily create Blue-Bot programs. When kids first turn their Blue-Bot on, its memory is completely cleared, so they can start writing programs right away. As they begin to create programs, it's important to remind kids what each command does. For example, the forward and backward commands get Blue-Bot to move 150 millimeters in the corresponding direction. The turn commands prompt Blue-Bot to rotate by 90 degrees. It will not, however, automatically continue to move in the direction that it is turning towards. So, students need to make sure they add a movement command after each turn command. Once they're ready, they can run their Blue-Bot programs by pressing the Go button.
Incorporating the Blue-Bot coding app.
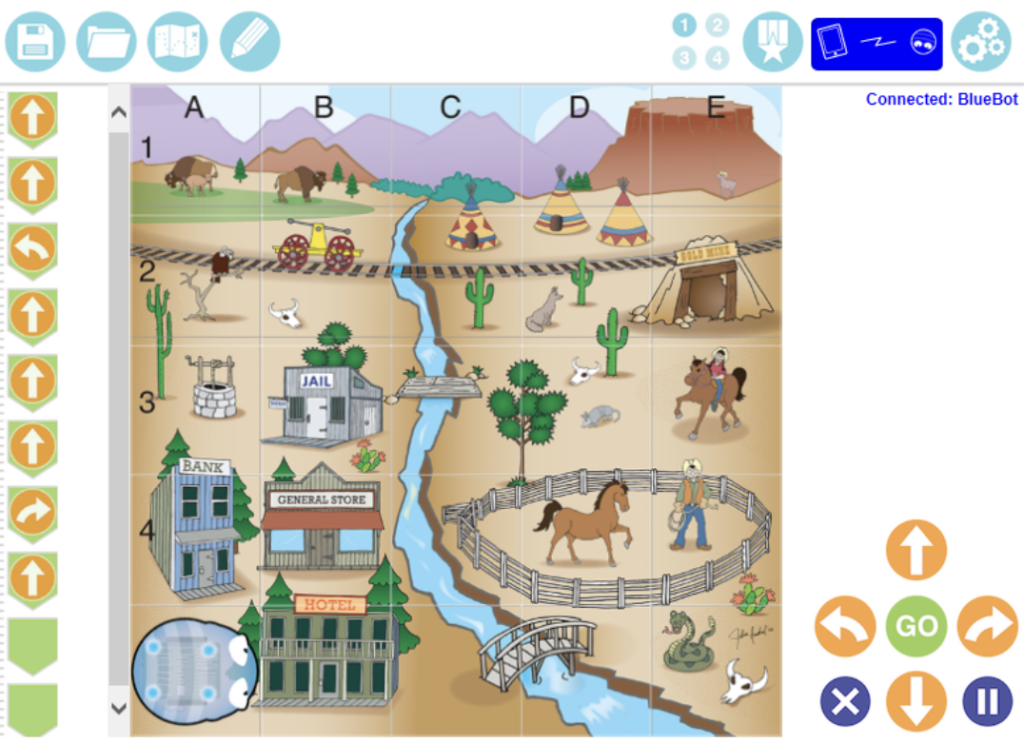
There are many benefits to screen-free coding with the Blue-Bot, but adding in the Blue-Bot app can continue to prepare students for more complex programming in the future. Once students master tactile coding using the Blue-Bot's buttons, they can start to explore more deeply using the app. After they download and launch the Blue-Bot app and pair it with their Blue-Bot, students will have access to all of the app's features. Their first job is to choose a digital mat for their robot to navigate. These mimic the physical Terrapin Card Mats and also add stability and structure to these coding experiences.
Blue-Bot app modes: Explore mode
The Blue-Bot app includes two different modes: Explore mode and Challenge mode. In Explore mode, students can set and complete their own activities. Students can build step-by-step Blue-Bot programs using the now-familiar directional commands. As they drag and drop each command into their program, they can use repeat blocks to create loops and other sequences. Students can also use more precise directional commands with the 45-degree turn blocks, as well as the previously available 90-degree turn blocks. Once they finish their programs in Explore mode, kids can place their on-screen Blue-Bot on the mat, press the Go button, and begin.
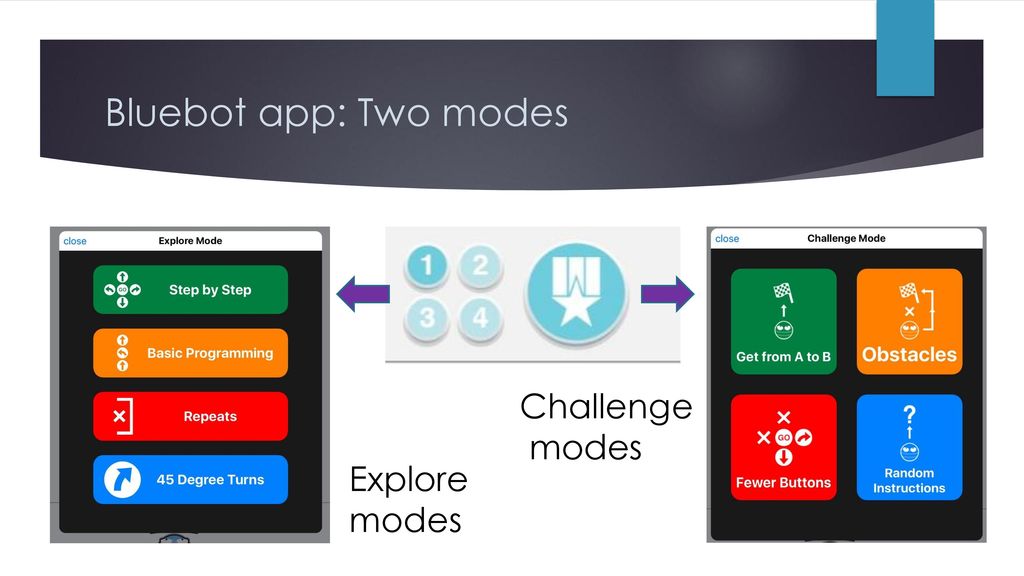
Challenge mode
In Challenge mode, however, students must contend with some restrictions as they work to design creative solutions. They must solve a range of different problems in order to progress through activities. For example, there are three difficulty levels in each coding challenge. Students can choose their preferred degree of difficulty by selecting one of these three options before beginning each challenge. Also, there are four different types of challenges: getting the Blue-Bot from A to B, traversing obstacles, having access to fewer commands, and receiving random instructions. In the first type, students will see their virtual Blue-Bot placed somewhere on the mat and see a finish line somewhere else on the screen. All they need is a program that gets the Blue-Bot from point A to point B using any command combinations.
Obstacle challenges also involve getting Blue-Bot to a goal location—but this time, kids have to succeed while traversing various on-screen obstacles. The fewer buttons challenges means that kids lose access to one or two command buttons as they create their programs. They may not be able to use the forward movement command, for example, meaning they'll need to find a creative way to get their Blue-Bot to its destination. Finally, with the random instructions challenges, students will see a sample program and must determine where the Blue-Bot will end up based on the command sequence.
The menus and other helpful features.
Students can access the sections within the Blue-Bot app from the main menu. The menu stretches across the screen and each section is identified by white icons on a light blue background. From left to right, the save button allows them to save their programs while working on them and the load button allows them to open a saved program. Next, the mats section houses the various Blue-Bot coding mats that students can use within the app. They can select any classic Blue-Bot mat for their projects or choose to upload a photograph of their own mat.
Moving along the bar, students can choose difficulty levels for Explore mode or utilize their Blue-Bot in Challenge mode. They can also confirm if their bot is paired with their device by referring to the connection status section. If their robot disconnects, they'll notice an alert and they can reconnect it before continuing. Finally, the settings section is on the far right. Students can toggle the available buttons within this section and make it easier or more difficult to complete the projects. They can also choose which buttons to show or hide at any time, helping to create customized coding lessons.
Additional Blue-Bot settings in the mobile app.
Besides the command buttons, students can also use the settings section for connecting, disconnecting, or renaming their Blue-Bot. To connect or disconnect from any nearby Blue-Bot, children can simply toggle the slide switches to choose their device. While connected, they can tap on a robot's existing name to edit it. Also, students can adjust the interface colors within the app, which improves accessibility for anyone with specific visual needs. Finally, they can access the Blue-Bot See & Say features within the settings section. This enables them to make recordings for each button, allowing them to say the word 'forward,' for example, when they want to add a forward command to their programs.
The Blue-Bot is compatible with Bluetooth-enabled iOS and Android devices as well as Windows and Mac computers. It uses a rechargeable battery and a charger comes with both the single units and the Blue-Bot Hive Bundle. If using Blue-Bot all day, educators can preserve battery life by disconnecting it from the power source once full. It is fully charged when its LED eye indicators are solid green. If they are solid red, the Blue-Bot is charging. If they're flashing red, that means the battery is low and needs charging. Finally, if the eye indicators are solid blue, this means the Blue-Bot is connected to a device via Bluetooth.
The benefits of coding with Blue-Bot.
When coding with the Blue-Bot and Blue-Bot app, K-3 students get valuable experience with creating simple programs, debugging programs, reading programs, and using repetition to create more efficient code. More importantly, Blue-Bot lessons align with the latest educational standards, making it easy for teachers to incorporate Blue-Bot into the classroom. Through these STEM experiences, kids will understand basic algorithms, create and debug programs, implement logic and reasoning, solve problems by breaking them down into smaller parts, and learn exciting new coding elements.
The Blue-Bot helps students as young as six years old understand key coding basics and practice creative problem solving. We hope these insights provide early elementary teachers with added reassurance and excitement for Blue-Bot lessons. If you have any further questions about this educational robot, please feel free to contact us anytime. To learn more about the Blue-Bot Robot, the Classroom Hive, and various accessories, visit the Terrapin section of our store. Check out the rest of our blog for more Tips & Tricks and follow us on Twitter and Instagram for more.