
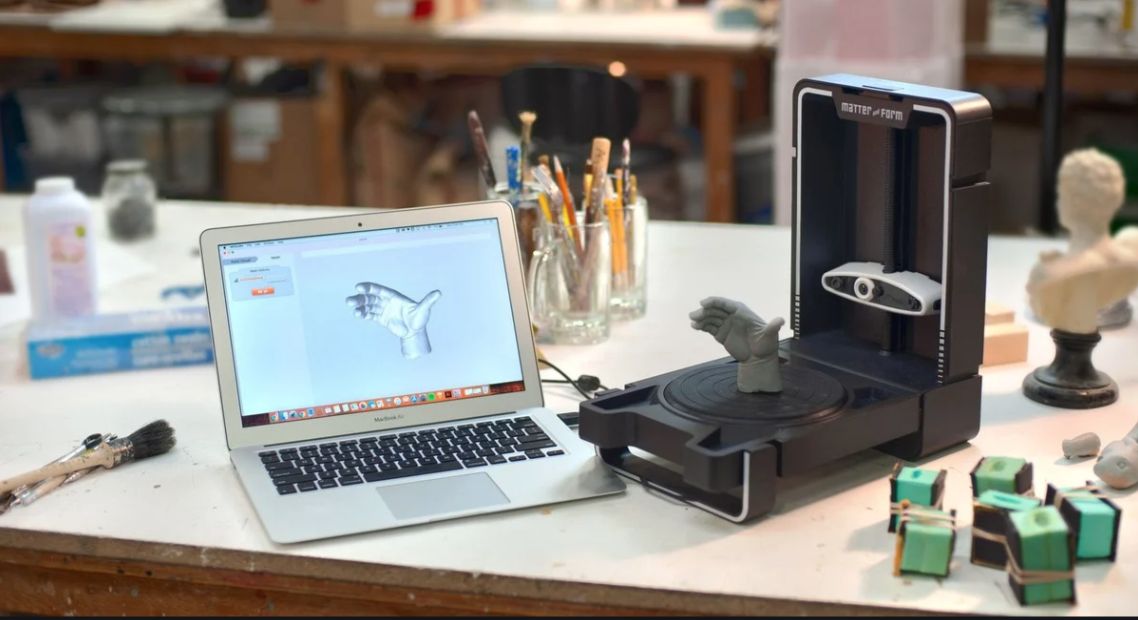
| The Matter and Form 3D Scanner features a built-in a laser that measures physical objects and turns them into digital 3D models for fabrication on almost any 3D printer. 1. The device performs astounding 65-second scans with an accuracy level of within .1 millimeter. |
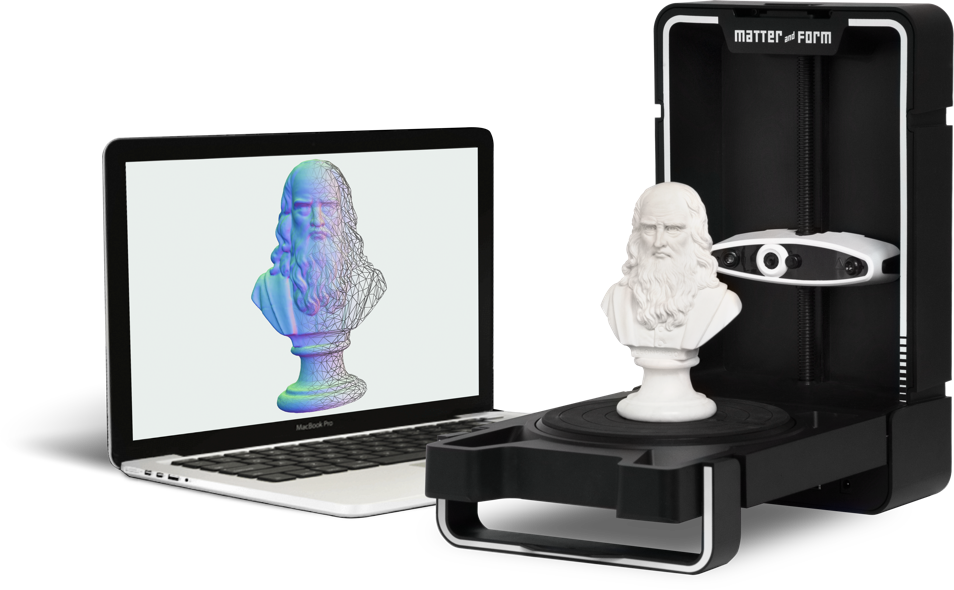
The Matter and Form 3D scanner measures physical objects and turns them into 3D models that students can print from any 3D printer. It's a laser-based scanner that shines a laser right at an object and captures thousands of data points that are returned from that object, including its surface detail, distance from your camera, texture, and color. It pairs with a software program called +Quickscan, which comes included with the purchase of a Matter and Form scanner. This technology conducts 65-second scans and provides real-time feedback on those scans. It also captures geometric shapes and instantly displays them on students' computer screens. This allows students to attain quick and rewarding results as they experiment with tons of different possibilities and export their creations as part of new and exciting design projects.
This 3D scanner has the potential to breathe new life into unused 3D printers while helping kids to explore creative problem-solving experiences that incorporate art, math, engineering, and more. Students could try anything from contemporary design elements and technology instruction to some real-world applications of 3D printed parts. Also, the Matter and Form 3D scanner is compatible with just about any 3D printer. The versatility helps you create a seamless workflow for students in a classroom or makerspace environment, giving them the ability to simply scan, mesh, and then export their creation to any connected 3D printer.
In the Matter and Form box, you will find the scanner, a USB B cable, an AC power adapter, four power adapter plugs, the calibration card, a user manual, an information booklet, and a small plastic toy to get started with. The scanner features a removable plug for attaching a tripod mount to keep objects on the turntable in place. It also has a sleek, foldable design, so it doesn’t take up much space. Despite its true uniqueness and potential to transform learning opportunities, the scanner's small frame helps to make it easy for educators to implement in classrooms of different sizes.
Speaking of small size, the Matter and Form machine weighs under four pounds. It is 13.5 inches in height, and 8.25 inches wide, making it a very viable option in many makerspaces. When open, it’s 13.5 inches in length and when folded, it only takes up about 3.5 inches of space. It can scan objects up to 6.6 pounds in weight, 9.8 inches in height, and seven inches in diameter. Besides that, these scanners are all compatible with Windows 7, 8.1, and 10 as well as macOS 10.11 and up. If you and your students use different laptop or desktop devices in the classroom, keep this compatibility in mind.
Another helpful component to the Matter and Form system is the MFStudio software. It was designed over five years with help from both backers and the makers who use it. Using this technology, children and their teachers can access one-on-one tutorials and manuals that help to extend their knowledge of creating with the Matter and Form scanner. The software is compatible only with Mac devices running macOS 10.11 and up, however, but there is a comparable alternative for use with Windows machines known as MFScan. Kids can find instructional videos on using both the software and their scanner, access an in-depth manual, and explore some of the do's and don'ts for inventing with this machine. And, it helps kids to progress through projects with complete control as they develop their resourcefulness and create exactly what they need.
Once you’ve unboxed your 3D scanner, you'll then need to connect it to your computer. These instructions come in your manual and involve using the included cable to connect the computer directly to the scanner. After that, you just need to plug the scanner into a power source. Next, you'll need to download the design software that's appropriate for the device you're using. After that, you can unfold the scanner by releasing and lowering that turntable bed. Be sure to turn the handle a full 90 degrees until the bed clicks into place as a scanner leg. The MF logo at the front of the scanner is the power button. You can simply press it and open up the software for it to detect the presence of the scanner.
Calibration is another important element for using this machine. It's important to calibrate any brand-new Matter and Form scanners from time to time to get the best scans. If you are ever moving your scanner or changing the lighting drastically, be sure to calibrate it as well. The MFStudio software also provides alerts when it is time to update the software, but educators could also choose to do it at any time they'd like. To do so, simply place the calibration box or card on the scanning bed and click calibrate. If you hear a short grinding noise, that's normal. The turntable will turn left and right, collecting data with its lasers. Each step in the calibration process should take no more than 30 minutes.
Lighting is real important when it comes to scanning as well. Scanning should always take place in well-lit conditions. This includes diffuse, white light from fluorescent tubes, incandescent, halogen, or natural light. Users should avoid spotlighting on the object, uneven lighting, bright, direct sunlight, no lighting, or lighting that changes during scans. In order to get the best results, white light is key but makers should avoid using incandescent light as a source if at all possible. This can often add an unwanted yellowish tint to prints.
The material and surface of the object you are scanning are also each important. Objects that will require preparation before scanning include those with any shiny surfaces and objects such as metal, jewels, and mirrors that reflect the laser away from the object. Objects that are translucent, such as glass, or clear will let the laser pass right through the surface and objects that are too dark tend to absorb the laser's light. In addition, since the 3D scanner works by capturing data as its laser hits the object's surface, it will not work if the laser can't pick up the object. These objects require pre-treatment with matte paint (light grey is often best) or baby powder. It's best to avoid objects that are too shiny, objects that are translucent, and objects that are too dark.
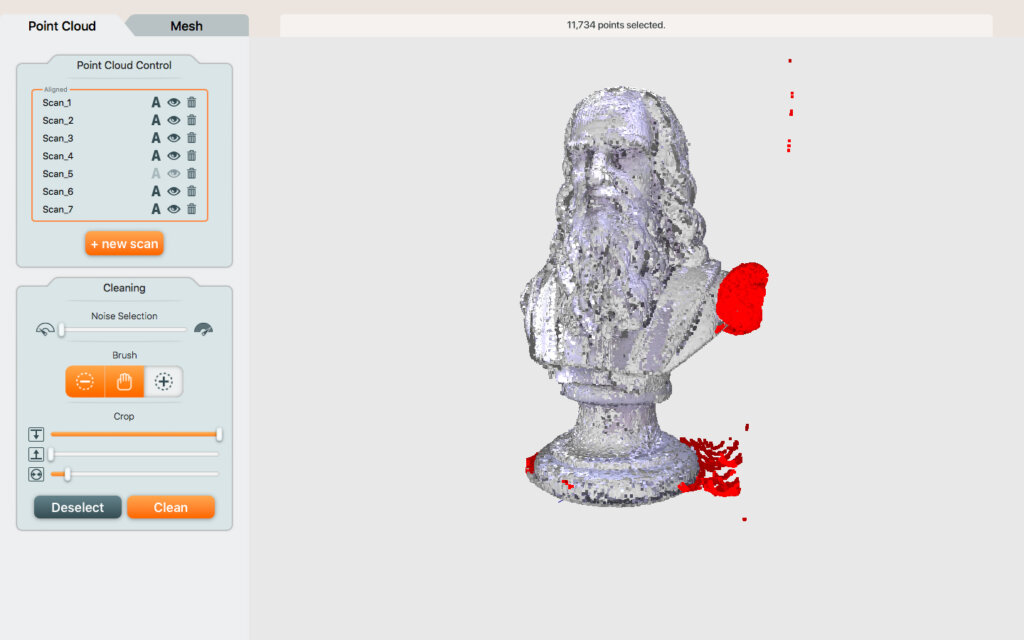
To create a new scan using the MFStudio software, it's as easy as clicking on the button that reads +new scan. Students can then choose between starting a +Quickscan or a regular scan. Regular scans take 10-15 minutes per pass as the machine utilizes two lasers to capture the geometric and tactile features of the objects being scanned. The +Quickscan option, however, enables students to complete scans in only 1-2 minutes. This technology is available for purchase within the MFStudio platform. With it, the students can choose to use either Laser 1 or Laser 2 (closer to the camera). Using Laser 2 will typically provide greater coverage of the object they're scanning but may result in decreased accuracy.
Once they start creating designs, students will also want to optimize their geometry settings. This menu is located at the top of the Scan Setup sidebar within MFStudio. Students can toggle the slider to control the camera's exposure and select the setting that's best for the object they're scanning. To find ideal exposure levels, they should settle on a value when that green overlay displays as a sharp line. This means it doesn't have a lot of noise, which will create a more defined and optimal end result. For all regular scans, students can also use high contrast scanning for the best results with objects of multiple colors.
Students could also set their ideal texture settings when using the Matter and Form scanner. This helps the machine capture color information from the photos it takes while scanning. If students want to capture textures, they can check the box that says 'Capture' in the Texture Settings section of MFStudio. They can adjust the slider until finding the proper exposure level, making the object's colors appear in a realistic way. This helps them get an exposure level that highlights the object's true colors without risking overexposure. If using the regular scan option, your scanner captures textures while completing the scan. In +Quickscan mode, they're captured during an additional bed rotation.
If you already have a Matter and Form 3D Scanner in your school or are looking for insight on whether it's the right tool for your students, we hope this blog gave you some helpful tips for moving forward! You can find the Matter and Form 3D Scanner on our store by clicking below! Also, check out the user manual for the in-depth information on inventing with the Matter and Form platform. If you have questions about this 3D scanner or you'd like to make a purchase, please let us know! Be sure to follow us on Instagram and Twitter as well for more EdTech Tips & Tricks!
I'm hoping you have some tips and tricks on creating my own calibration card as my students lost ours. It costs $20 for a new one but over $20 for shipping from China. This seems ridiculous. Any help would be appreciated. Thank you!
Greg
Make two 5x6 checkerboards (1cm squares, black top corner). Laser print if you can. I also recommend cardstock (heavy paper) to prevent warping. Cut a piece of foamboard (available in dollar store next to poster board) to 9cmx15cm. Glue/paste (you might have a gluestick in your 3D printer kit).
3D print a foamboard/foamcore stand. Free STL files are available, and they're easy to customize by just stretching the model in the slicing software if you don't have model software. I suppose a binder-clip could work in a pinch.
As long as your squares are tight, it should work. Remember, you're using a hand-set card and stand that's hand-placed toward the middle (calib scan 1) and hand-placed again a little forward (calib scan 2).
You might want to also check the the toy section of the dollar store if you need a replacement frog or duck, too.