
| The GiggleBot Robot is a micro:bit-powered, preassembled robot that students can program in many different coding languages. 1. The GiggleBot is very much buildable, runs on three AA batteries, and it's even LEGO-compatible. |
Students can take their micro:bit and coding skills up a level with the GiggleBot! The GiggleBot is the main piece of this micro:bit-powered robot construction kit, and boasts a wide variety of programmable features, including a brightness sensor, LEDs, motors, and a line follower. Kids assemble it in as little as five minutes and includes everything you need—you just connect the batteries, micro:bit, and wheels and you’re ready to start coding! It also has LEGO compatibility and a drawing feature, allowing children to expand on their bot with building blocks and draw designs by adding a marker in the slot. The GiggleBot is available as a Base Kit (no micro:bit), Starter Kit (with a micro:bit), and Classroom Kit (12 micro:bits).
To get started, we recommend you watch the assembly video (above), which shows kids how to connect the batteries, micro:bit, and wheels to the robot. Depending on the kit you have, you might need to add in your own batteries and micro:bit. The video includes helpful tips, including where to find the on/off switch, eye LEDs, brightness light sensors, servo controllers, rainbow LEDs, and the hole for drawing pictures. On the underside of the robot, you’ll find the line followers, ports for adding other sensors, motors, the battery holder, and caster wheel in the back. Also, be mindful when attaching the wheels—you may need to rotate it until the shape matches the motor. The micro:bit slides in the slot on top with the LEDs facing forward.
Once your GiggleBot is assembled, the next helpful video you can watch is the walk around video. This will show you the main features of the GiggleBot, including some more helpful tips! For example, the eye LEDs at the front of the bot signify its battery level—if blue, the batteries are strong enough to run the bot and, if red, they have low power. This video also shows where each of the LEGO ports are located on the GiggleBot, so you can add in building blocks, and where you can insert a marker or pen to drag on paper for drawing designs from your program.
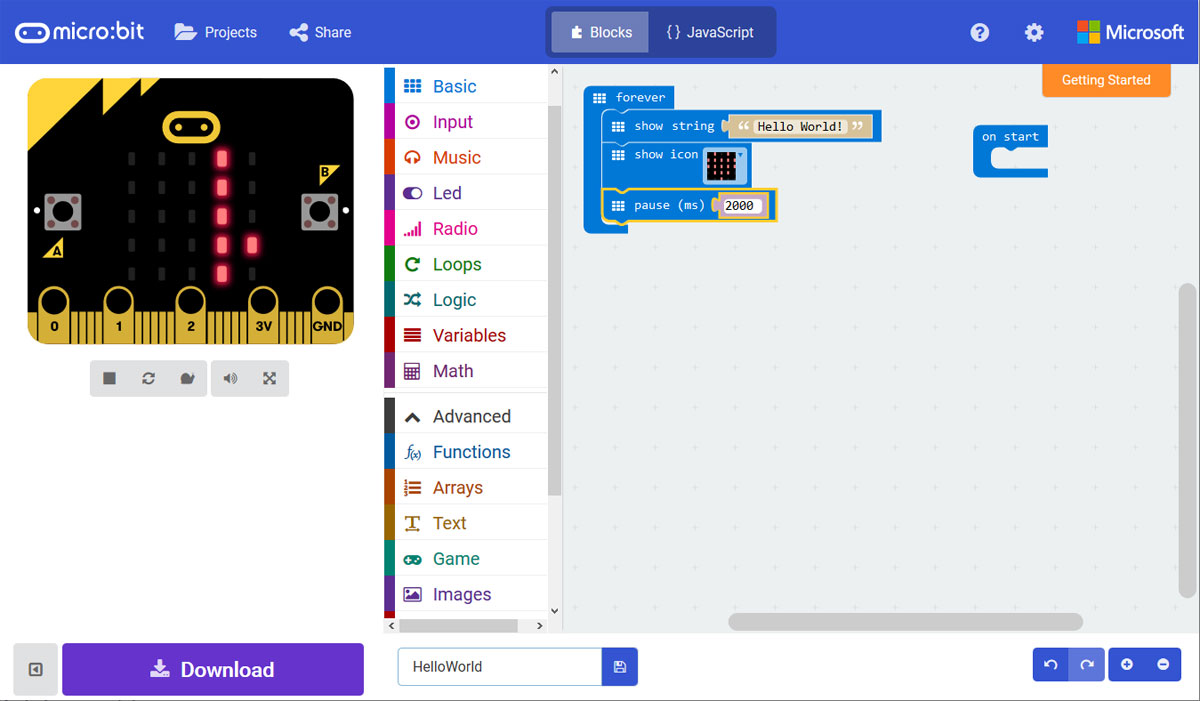
Now, it is time to try some programming! There's four options for programming environments, providing for skill progression opportunities and allowing teachers to meet children at different levels. The four options are MakeCode, EduBlocks, micropython, and JavaScript. MakeCode and EduBlocks are easily accessible from any browser connected to the Internet and only require adding the GiggleBot extension. JavaScript is accessible in the MakeCode platform and helps kids switch back and forth between the languages super easily. Micropython takes more effort to set up since it requires some downloads or installs before coding.
When integrating the GiggleBot in teaching and learning, we'd recommend making use of their free online resources that are available. These include mission lessons, challenges, and coding cards. These mission lessons feature project-based connections and you could use them in teaching coding and computational thinking. Some fun ones include the Scaredy Cat, which reacts when it gets close to other objects and the Car Designer, which tasks students with adding car features to the GiggleBot, such as headlights, blinkers, and a backup light.
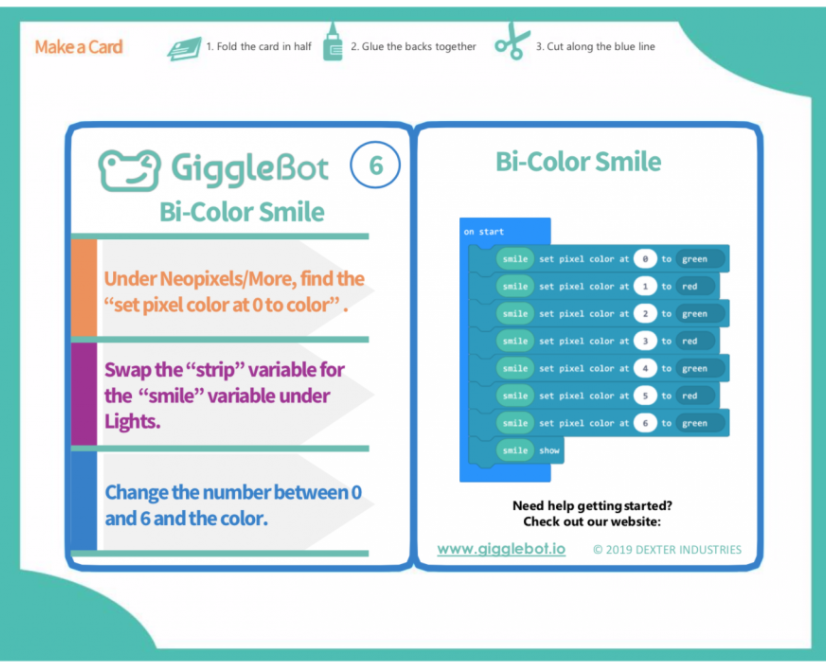
The learning challenges help kids learn about robotics and coding with MakeCode and micropython as they program with their GiggleBot. Lastly, the coding cards help students start out with GiggleBot coding. There are 20 activities in total and they are all available as a PDF for download and printing. Once printed, educators can cut and fold them as cards. Each are short activities for introducing students to the motors, line follower, and other sensors that are commonly associated with the MakeCode language.
Whether you’re already using the GiggleBot or are looking for insight on whether it is the right tool for your classroom, we hope this blog gave you some helpful ideas for moving forward! If you have some questions about the GiggleBot, or other Dexter Industries products, please reach out to us. We are happy to provide you with a quote and help you place an order for your school! And, follow us on Instagram and Twitter as well for more EdTech Tips & Tricks!