
Thanks to its on-board LED matrix, lightning quick movements, and classroom versatility, the Sphero BOLT Robot provides students with a high-speed option for practicing programming.
|
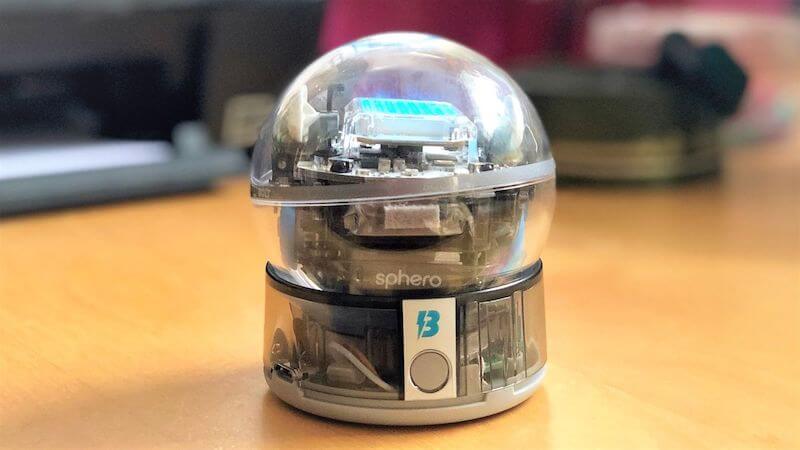
With the reliability and versatility each of the Sphero robots provide, it should come as no surprise that the BOLT is one of the most trusted robotics tools in all of education. Completely spherical in shape and also transparent, the BOLT creates plenty of programming potential and unique wrinkles for coding education. This is mainly due to the built-in, programmable LED matrix directly beneath its clear shell. It's strategically placed there so students could see how it's working while it displays messages they create or images they program using the Sphero Edu app. This opportunity to see inside helps inspire more students to celebrate technology and act on that STEAM excitement.
When using the Sphero BOLT, the first thing teachers or students should do is download the Sphero Edu app. It's compatible with iOS, Android, Microsoft, and Kindle devices and there's also a Chrome extension available as well. Once downloaded, students can open it and click the “Quick Start” option if using an iOS or Android device. Chromebook users can download the Android client to begin. If students need to create a Sphero account, there's the option to do that as well.
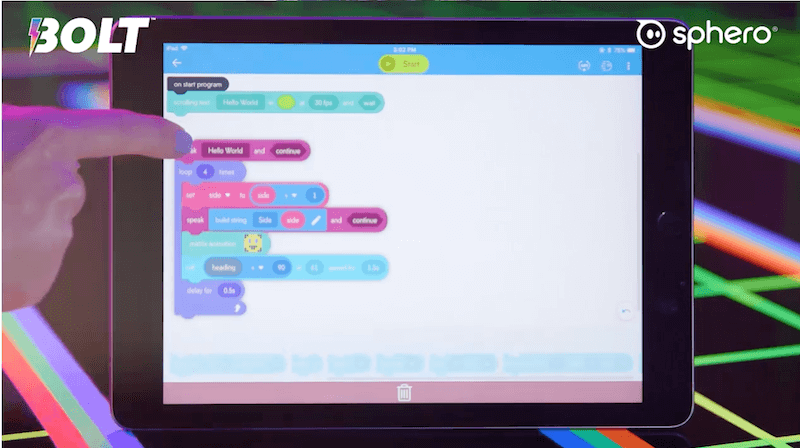
Kids can try programming their BOLT to do many different things. To start, there's programming it to move, programming its LED lights, programming its sounds, and adding loops to run programs for longer periods of time. In order to program the BOLT, students can access the various programming blocks in the Sphero Edu app. The blocks in the movement section allow students to program the BOLT to move. These blocks affect its motion, spins, and stops and students can customize its speed, duration, and potential delays.
Next, we have programming the BOLT's lights and sounds. Within these block categories, kids can access the blocks for controlling the robot's internal LED lights, patterns and messages on its LED matrix, and the various sounds it can produce. There are many different light blocks, in particular, allowing students to truly create programs unique to them. Among the parameters associated with the light blocks and Sphero BOLT programming, students can control the colors, patterns, and intensity of their BOLT's lights. As for sounds, they can work in many options there as well. These include animal sounds, alien sounds, and a lot more.
Next, we have programming loops with the BOLT. Once students master some of the beginner aspects of coding with the BOLT, students can take things a little bit further with a truly relevant next-level element of programming: loops. In the Sphero Edu app, there's a block category called Controls. Using these blocks, kids can get a taste of refactoring their programs by utilizing loops. Essentially, this exposes them to basic debugging—improving their programs to make them more efficient without changing their outcomes. They can place any commands they'd like in the loop blocks and specify the exact number of times they want it to repeat when the program runs.
As for the programming blocks within the Sphero Edu app, there are seven types to choose from. The first three are operators (math statements for modifying or creating values), comparators (for comparing values and creating conditional logic), and sensors (read-only values that are streamed out of the BOLT's various sensors). Then, there are the communications control blocks, which allow the BOLT to send and receive IR signals. Finally, we have the event blocks, which store embedded conditional logic in predefined functions, variable blocks, which are values for limiting redundancies in logic, and functions, which can help organize some of the more complex programming logic.
Now that we have background on the coding side, let's cover some of the other areas, including charging. If the robot needs a charge, it could take a little bit until it’s fully ready. The BOLT comes with an inductive charging cradle that plugs into a USB port. It can take up to three hours to fully charge and, if it’s blinking blue, that means it's currently charging. When the blue light's blinking stops, it’s fully charged. Then, kids can try pairing the BOLT with a device by opening the Sphero Edu app. There’s also the option that says ‘Connect Robot’ and selecting ‘Sphero BOLT’ from that list will start the process. They then need to hold their device next to their BOLT until it is detectable.
Moving on from charging, the BOLT—as we've said—has some cool technology under the shell. It features IR communication capabilities, live sensors, a magnetometer, and more. It's also completely waterproof, so students can really get creative with their STEAM experiments. Knowing it’s waterproof also provides some peace of mind for teachers, especially if they ever end up integrating it across multiple classrooms. Finally, the BOLT’s LED matrix can display animations, like characters, vector graphics, sensor data, and more.
When it comes to coding with the BOLT, the Sphero Edu app is the recommended option for students. It features various levels of programming challenges for students with different skill levels. These challenges also tie into different subjects, allowing students to use the BOLT in science, math, art, reading, and more. The progressive levels of the Sphero Edu app begin with Draw coding. This involves tracing paths for their BOLT with their finger on their device screen and watching it follow that path. They can use this feature to practice learning shapes, math concepts, like area and perimeter, and spelling.
Following Draw mode, students could try block coding with the Beginning Block, Intermediate Block, and Advanced Block coding levels using all the block types we discussed earlier. They’ll get to explore a variety of coding lessons on topics, like technology, engineering, atoms, loops, and physics. They can also use the blocks while they learn about loops, sensors, and comments in the Intermediate level and try out functions, variables, comparators, and if-then statements in the activities within the Advanced level. Then, there's the Block-Text Transition level, which includes opportunities to try JavaScript syntax, punctuation, conditionals, and asynchronous programming!
The final level of coding in their Sphero Edu app is the Beginning Text level. This is the first opportunity for students to write out JavaScript code by typing programs as opposed to using blocks. There's technology, engineering, and math lessons in the Beginning Text level and students can start learning a lot of important computer science concepts, like JavaScript movements, lights, and sounds. From the time they begin with the block coding until they progress through the final challenge of text coding, the Sphero Edu content can help clarify coding intricacies and indirectly help kids develop soft skills and a stronger growth mindset.
As for getting connected to the Sphero Edu app, when pairing the robot via Bluetooth, students will see all available robots they could pair with their devices. Educators can also edit the names of the robots to help differentiate between them. These names would also scroll across the LED matrix on each individual BOLT. Once everyone's on the same page, teachers can help students find activities, use the app, themselves, or monitor their progress. Kids can also check activities off after completing them, allowing them to document their progress when learning with the BOLT.
Once fully charged, the BOLT should last for up to four consecutive hours. The BOLT Power Pack is also available and can charge up to 15 BOLT’s at a time. Though ideal for classroom use, the Power Packs are also portable, allowing for easy transport between rooms. It's also important to note that kids shouldn't try to charge any robots other than the BOLT using the BOLT charging cradle. It's specially designed for BOLT Robots since it has a more powerful battery and requires a stronger charge.
7 Modes of the Sphero BOLT
You might not have realized, but the BOLT actually has seven different operating modes. These include Off, Sleep, Cradle Removal, Play, Charging, Firmware Update, and Accidental Disconnect. When first unboxing your BOLT, it is in Off mode. This means you cannot pair it with your device until you put it into Sleep mode on the charging cradle.
If you plan to not use your BOLT for at least four weeks, we recommend keeping it in Off mode to preserve its battery life. To do this, fully charge the BOLT, connect it to the Sphero Edu app, tap its name, and select turn robot off. Or, you can put the BOLT on the charging cradle and press and hold the button on the cradle while lifting it off the cradle. To check if the BOLT Robot is off, see if the robot is listed as a pairing option in the Sphero Edu app—if not, it is off!
You can wake the BOLT up and put it into Sleep mode simply by placing it on the cradle. This makes it so that it's discoverable by its apps. Cradle Removal mode refers to removing your BOLT from the cradle and seeing the Sphero information scroll on the matrix. Play mode refers to any time the BOLT is connected to a Sphero app. Students can exit play mode by closing out of the app or transitioning their robot into Sleep mode. Charging mode refers to the BOLT being plugged in and on the cradle while its blue LED is blinking. Firmware Update mode refers to seeing a firmware update message show up when connecting the BOLT to an app. While undergoing an update, the BOLT’s LED’s will blink orange for 30 seconds.
The BOLT must remain connected to a device while it updates, so keep devices close to your robot. You’ll know the update didn’t complete if the BOLT’s LED’s blink red. In this case, re-connect it to the device and complete these updates. Another mode—Accidental Disconnect mode—refers to the robot disconnecting from the device. In this case, the BOLT’s LED’s will turn purple but you’re still able to connect to your robot. The BOLT will remain in this mode for five minutes and will then convert to Sleep mode. Lastly, Connecting mode refers to cases when the robot is connecting to a compatible device and app.
Knowing how to connect, charge, and teach with the BOLT helps you understand what it's doing and how to capitalize. If you’d like to grab a BOLT Robot and explore its potential, visit the Eduporium store. Follow us on Twitter and Instagram for more EdTech Tips & Tricks!
| Click here to contact the Eduporium team for our current educational robotics recommendations. |
4 Comments