
We’re continually thankful and excited about our relationship with Bare Conductive. Although we’re from different continents (they’re headquartered in London!), we love what their products enable for creative education. At the heart of their educational offerings, which are perfect for makerspaces, is their conductive paint. Yes, you read that correctly. They produce paint that is conductive—as in electricity can flow through it like a power cord. Anyway, Electric Paint is awesome for makerspace activities, enabling all sorts of creative projects that combine the elements of technology, art, and creative thinking into one hands-on experience—and the Touch Board helps make it even better.
There are two main different components of Bare Conductive’s STEAM tools: their Electric Paint, which comes in small cans or by the liter, and their Touch Board, which includes sensors and paint to help students turn a surface, object, or space into a sensor. The best part about both Electric Paint and the Touch Board is that both are accessible for students who have never used tech tools like them before. Essentially, they require hardly any learning curve and students can learn about them on the fly as they use the paint and other elements in their projects!
The Touch Board in particular also incorporates elements of programming, making this affordable STEAM tool more versatile. Since we just wrapped up with all the Halloween festivities, we thought we’d explore an appropriate project with the Touch Board. We happened to have a small enough pumpkin in the office that, since Halloween was almost a week ago, we figured it was perfect timing. Essentially, students (or any makers) can turn certain objects into MP3 players using Bare’s tools. By adding the pumpkin into the equation, students can use the Touch Board to play both sounds and sound effects—with the sides of the pumpkin offering extra sound!
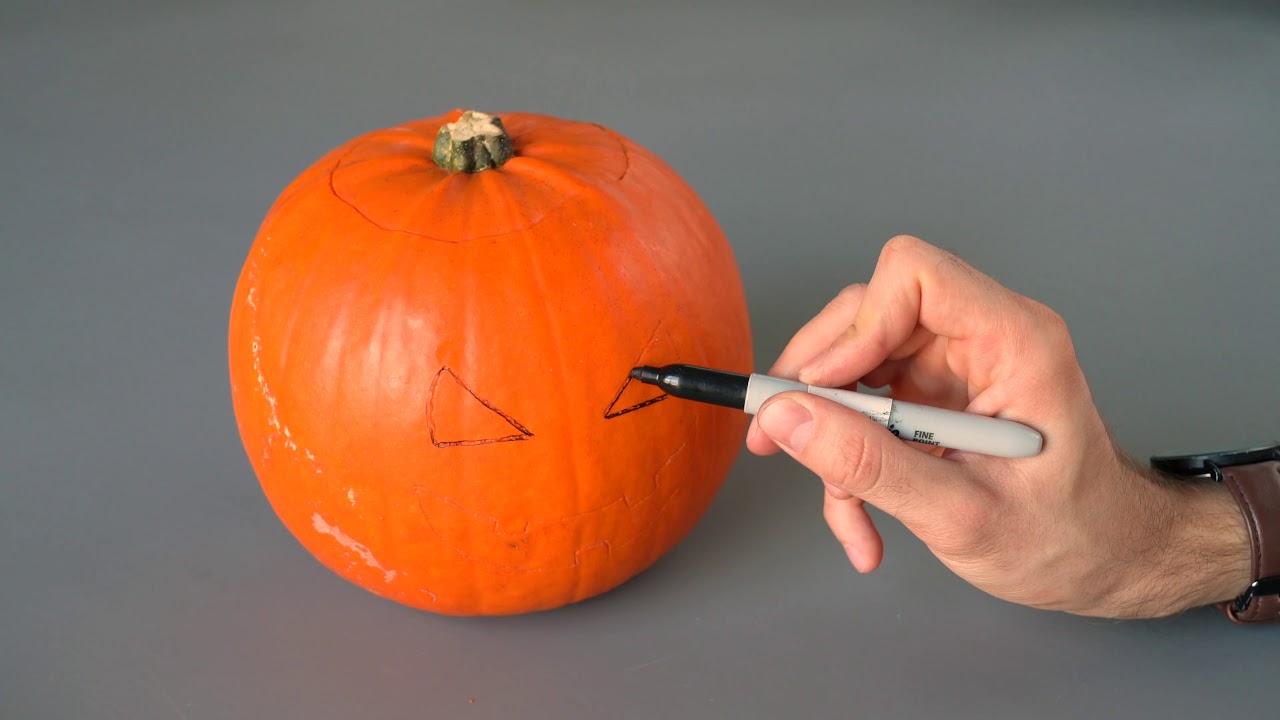
Basically, if you’ve ever carved a pumpkin, this isn’t all that much different. Having cutouts for the eyes and mouth (and nose, if you want) isn’t necessary, however, since this project involves using marker to draw on the eyes and the mouth. For this particular project, you would also need some nails and other materials that come in the Touch Board Starter Kit. You would also need something to take the top off—like you normally would, but you can use simple pumpkin carving tools or a knife—whatever is safest for your setting.
Like normal, carve a small hole in the back of the pumpkin so that you can stick some things inside it. The nails will be stuck in the inside of the pumpkin and serve as the materials that contact the paint. After sticking them in, you can then take some paint and go over the eyes and mouth that you drew. Covering the nails with the paint is ideal, too. Then, while the paint is drying, this is valuable time for taking care of some of the other parts of the project—namely uploading the MP3.
From there, a lot of the steps involve transferring an MP3 file to the SD card within the Touch Board. Luckily, there are detailed instructions on Bare Conductive’s website as well as video tutorials. After completing Step 2, remove the SD card and keep an eye on the detailed instructions if that helps. Be sure to connect the clips to the correct diodes on the Touch Board to power the pumpkin and, simply by touching it, the sound should project.
If you’d like to learn more about Bare Conductive, the paint, and the Touch Board, be sure to check out their site for the step-by-step breakdown. After that, check out our store for each of Bare Conductive’s STEAM tools. And, as always, if you have any questions about this project, Bare Conductive, or how to integrate these types of tools in the classroom or makerspace, be sure to let us know and follow us on Twitter and Instagram!