
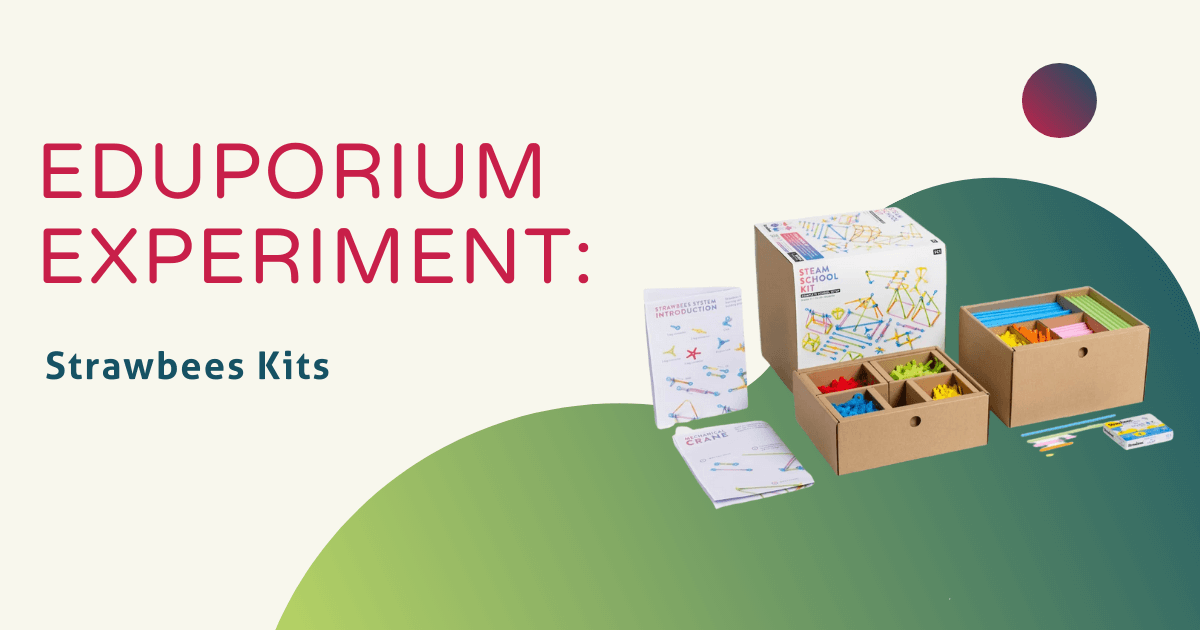
Our friends at Strawbees have created reusable, hands-on experimentation tools in the form of straws, enabling students to build both simple and complex structures in the classroom. Over the past couple of years, the Strawbees kits have become one of the more popular makerspace solutions in schools. Not only are they easy to use and affordable, students can also repurpose the building straws in new projects to cut down on waste. Some kits even include tech components, like circuit boards, servo motors, LEDs, light sensors, and more to help teachers and students find creative ways to combine MakerEd, coding, and creativity in the classroom.
The Strawbees classroom kits are valuable in various learning environments, allowing students to explore creative design through trial and error. Students can learn about everything from shapes and geometry, to successfully constructing bridges, building scientific models, or recreating historical structures. In our various opportunities to try tinkering with the Strawbees materials, we've explored how elementary students might create projects. Ans, it's easy to see how these STEM resources can help spark their creativity and help students think like engineers. While there are specialized kits, students can build many of the most popular Strawbees projects, like the mechanical crane or mechanical claw, using a lot of the most common pieces.
Get to know some of the Strawbees kits.
The Strawbees Imagination Kit, for example, provides a perfect introduction to constructing with straws. The kit includes 150 straws, 250 assorted connectors, 105 creativity cards, and an Activity Book. If you're unfamiliar with Strawbees, you’ll definitely want to explore the Activity Book, which includes basic suggestions for building with the straws and tutorials for making some basic shapes. Beyond that, some of the more specialized Strawbees STEAM solutions include the Creature Creator Kit, Inventor Kit, Scientist Kit, and Robotic Inventions for the micro:bit Kit. Educators can also utilize the standalone Pocketful of Ideas project cards in over 100 open-ended activities for designing and building.
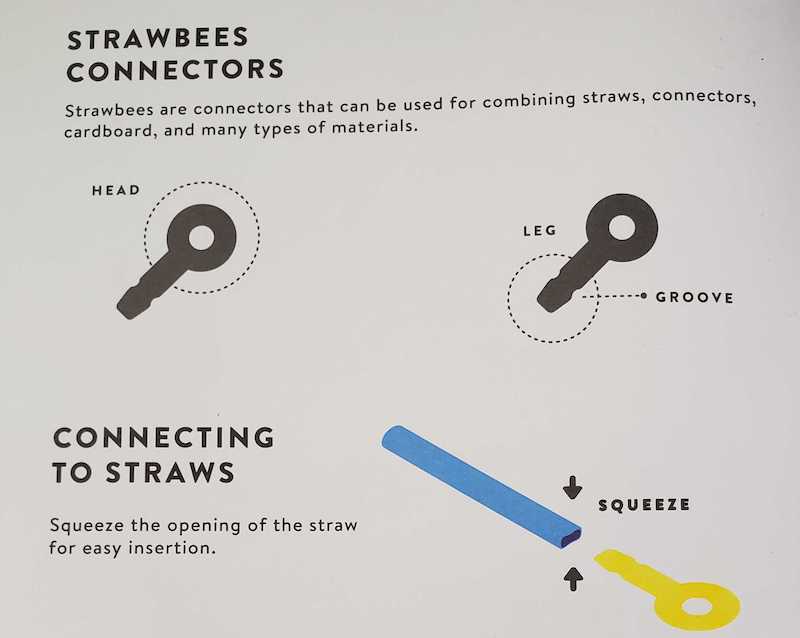
Whichever kit (or kits) they have in the classroom, the first step in helping students explore construction with Strawbees is teaching them how to properly use the connectors. There are four different types of connectors in most Strawbees kits (1-leg, 2-leg, 3-leg, and 5-leg). The term 'leg' signifies how long each connector is with one being the shortest and five being the longest. The connectors all come in a plastic bag and they're also represented by different colors. For example, the 1-leg connectors are blue, 2-leg connectors are yellow, 3-leg connectors are green, and 4-leg connectors are pink. We recommend splitting them up to minimize how long it takes students take to find the connectors they need. Plus, this also helps keep the Strawbees materials more organized.
Students can use the connectors to simply attach the straws but they can also use them to create joint-like movements if they include more than one at a time. When creating the more complex connections with more than one connector, students will need to slide the leg of one connector through the head of another. When doing this, they must apply some force to get it through, which is okay since the straws are sturdy. They should also feel a click when they've pushed the connector all the way through. Whether building small 3D sculptures or tall towers, the straws are plenty durable and help students stretch their creativity.
Makerspace projects and Strawbees Classroom.
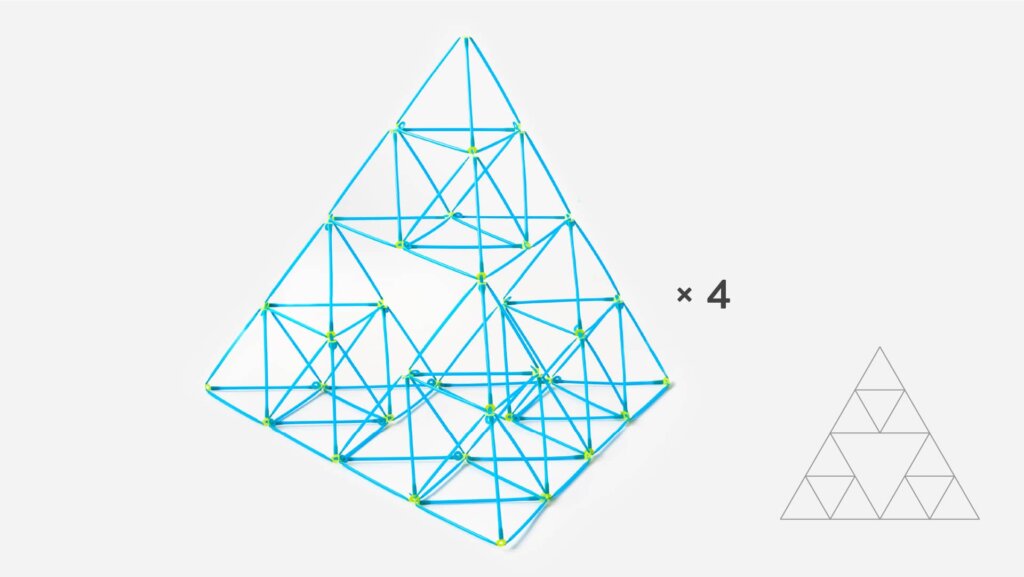
Once students understand the basics of using the connectors, they can try building simple structures, like the Strawbees pyramid. The activity guides show the basic blueprints for each project as well as the pieces students need. For this one, they'd need six straws and four of the 3-leg connectors. The straws are pretty long, so students could also choose to cut them in half when creating their structures. We like the fact that, even if they do cut them, students could still reuse them in the future. Also, remember that educators can access plenty of Strawbees project guides, classroom tips, and other educational resources within the Strawbees Classroom platform.
Strawbees Classroom is now free for educators to help students of all ages and abilities learn to think like inventors, progress in their STEAM development, and explore the opportunities associated with hands-on learning. Also, teachers can learn more about incorporating the Strawbees resources in all areas of an elementary curriculum—not just in STEAM or makerspace learning. Within Strawbees Classroom, they'll find ready-to-use lessons, curriculum-aligned STEAM assessments, and tips for integrating the proven Strawbees hands-on learning methodology.
Getting started with STEAM projects.
When attaching the straw to the connector, students need to squeeze the opening of the straw. This makes it a lot easier to insert the connector into the straw. Once they have the skeleton of their structure, they just need to bend the straws to make the pyramid (or whatever else they'd like to try building). Also, they will notice that the straws and the connector legs may bend at times—and that’s okay. After connecting the straws, however, they'll hopefully have a perfect structure. And, if not, students can modify it further until getting what they envisioned thanks to the flexibility of the straws. The activity books also include detailed guides for creating structures, like cubes, animals, and the popular mechanical arm. The best part is students can learn skills and strategies for building Strawbees projects using all their unique classroom kits.
Once students have the basics of creating with the Strawbees pieces down, the design possibilities are endless. Using the connectors and the micro:bit V2 once ready, there are many open-ended scenarios for students to flex their creativity. They can incorporate the micro:bit in their Strawbees inventions thanks to the Strawbees micro:bit clip, which comes in the Robotic Inventions for micro:bit kits. Once adding the micro:bit to Strawbees designs, students can program them and make their structures move using the servo motor. This requires some more precise engineering and design thinking but, following the guides and relying on the ease of the Strawbees Code platform, they can create programs in a flow, block, or text environment!
Find the Strawbees kits on our store.
With the Strawbees system and hands-on materials, students have plenty of opportunities to turn their ideas into physical 3D models. Plus, in adding the digital opportunities, they can explore key STEAM disciplines, like electronic construction and physical computing, as well. Also, teachers can align Strawbees learning opportunities with the latest education standards, including the NGSS and SDGs. If you'd like to explore the Strawbees solutions further, be sure to check out all their offerings on our store! If you have any questions, feel free to contact our team at anytime. And, follow us on Twitter and Instagram as well as Facebook for all of the latest EdTech info!