

Last November, one of our grant winners used his grant funds on equipment for his journalism students’ sports podcast. Josh Jennings of Great Falls High School hopes that his new Padcaster Base Station and G-Pod will help these high schoolers create an even better product, boosting their sound quality and adding a video component to the production. Josh’s journalism students partnered with the athletics department at their school to report on school-wide sports news. Through this interdisciplinary collaboration, they’ll learn how to tell great stories while becoming familiar with tech that will prepare them for future careers. This project brought our attention to the potential for audiovisual production as a channel for STEM learning.
If you work in education, you’ve probably experienced difficulties in keeping students’ attention recently. They’re watching TikTok in class, chatting or texting among themselves, and definitely not taking notes on your lesson. It’s been hard for teachers and students alike to adjust to in-person learning again after the pandemic, and one major side effect has been increased distractibility in students. The rise of AI models hasn’t helped, as distracted students now have an easier route to reducing their efforts. To combat these challenges, teachers have been trying all sorts of solutions, from stricter discipline to student-led learning. Because of Josh’s project, though, we’ve got a theory that audiovisual elements might be the key to recapturing student attention. Let’s dive right in.
What is audiovisual production, anyway?
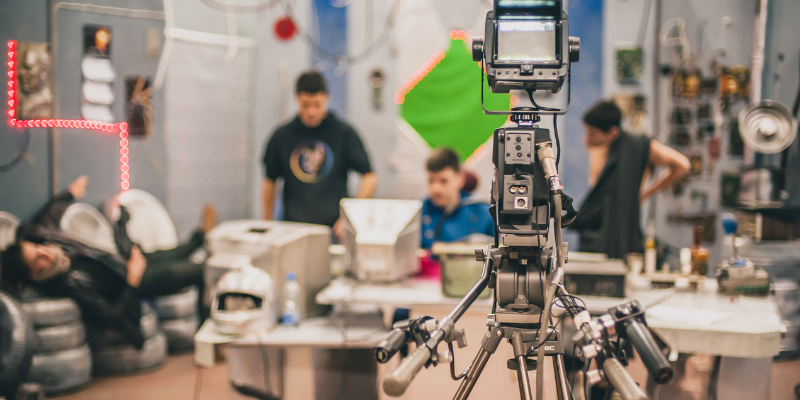
Audiovisual (AV) production is the process of creating audiovisual content or technology, such as sound mixing for concerts, producing a TV show, or, like Josh’s students, recording a podcast. For many school-aged kids, their only first-hand experience in AV production is creating a TikTok. In the United States, for example, 25% of TikTok users are between the ages of 10 and 19, making the middle and high school demographic the largest on the app. TikTok also has more Gen-Z users than Instagram, demonstrating kids’ shift in interest from image-based media to audiovisual media, like videos.

But audiovisual production is more than just setting down your phone and recording a TikTok. Many more elements are involved in the AV production process. Before any actual recording occurs, creators enter a planning stage in which they outline goals, prepare necessary scripts and equipment, and even make a storyboard. Recording system testing and installation may take place at this stage as well. Once their plan is complete, AV creators record audio and/or video, then move on to the editing process. Editing usually involves cutting unusable sections of audio or adding video effects. Finally, creators present the finished product, either at a live event or by releasing it to the public.
How can teachers bring audiovisual production into the classroom?
Just like professional AV creators, teachers and students can follow the same four-step process in making their own AV content. They’ll start with planning, then move on to creating, editing, and presenting the final product. For some classes, it might work better for the teacher to make a video for students to watch, but other classes may want to make videos themselves—it all depends on your subject matter, available equipment, and time. Whether you’re recording review material for an upcoming test or assigning students a multimedia final project, you can use AV production to enhance your class in all sorts of ways.
Educators who want somewhere concrete to start can check out this free introductory course from PBS Learning Media that provides tools for facilitating student video production. If you already have ideas, though, you can jump right in by reading our guide below. We’ll go over each step, including suggestions for projects and equipment to make your production go off without a glitch.
Phase One: Planning
TikTok users collectively post over 700 million videos a month. That’s a huge number! It also means you can make a video on just about anything. Picking a topic is the first step in AV production. If you’re an educator, you’ll probably focus on your lesson, either by recording a lecture or by creating an illustration. For a history lesson on the Roman Empire, for example, you probably can’t take a field trip to Italy. But you can create a video slideshow of the Colosseum, complete with your own historical narration in the background.
If you’ve given your students a video production assignment instead, though, they might not know where to start. We recommend that you provide a rubric with examples. Perhaps your Literature class will record reflections on the text or act out a scene in one of Shakespeare’s plays. A civics class might put on a mock interview with a politician. STEM classes could even use audiovisual equipment to keep track of ongoing experiments, such as bacteria in a Petri dish, or start a podcast on recent scientific achievements. Check out this video from a student explaining how to create an electric quiz board!
Teacher Courtney Sears outlines different videos her students created, such as responses to a prompt or reflections on class material. Students also created tutorials for skills they learned, like “how to code robotics.” Some students even made “learning product” videos summarizing what they learned over the semester. For Courtney, video assignments show students the benefits of learning beyond scoring well on a test. Just as kids use videos outside of class to “gather and share information,” so they can use in-class videos to express their thoughts, help their classmates understand material, and connect lessons to their interests
Phase Two: Creating
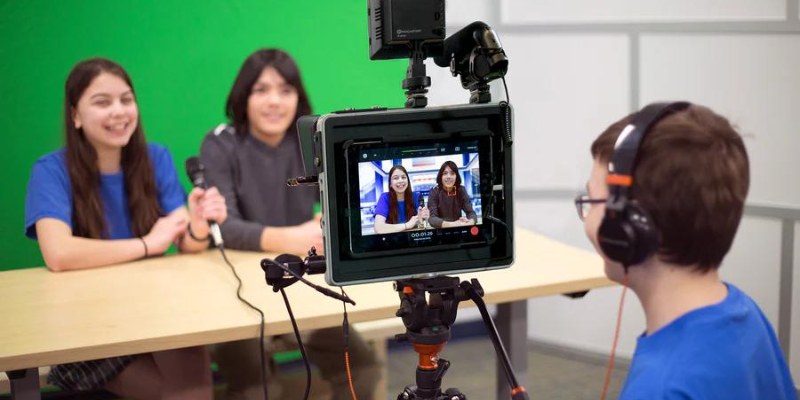
Once you’ve got a plan for your audiovisual production, the next step is to record it. Don’t get discouraged by a lack of equipment. Many captivating videos have been recorded on something as simple as a cell phone! One of our favorite options is Flip (previously Flipgrid). On the Flip app, students can record video responses to topics posted by the teacher. Students as young as second grade can easily start making Flip videos on a computer or tablet.
Edpuzzle is another accessible resource for incorporating video learning. Teachers can choose from millions of pre-recorded videos on platforms like YouTube or TED, or they can record their own. Then, they can add interactive questions for students to answer as they watch. Edpuzzle also integrates with several other educational platforms, including Google Classroom, Canvas, Schoology, and Blackboard.
If you want to take your students’ productions to the next level, though, we’ve got a few ideas. The PCS Edventures Video Production kit hones students’ technical abilities in filming and editing through its detailed 12-hour curriculum. Equipped with a tablet, students learn storyboarding, framing, editing, and more in scaffolded activities that build on the previous day. The kit also provides information on film history, from the first silent films to modern documentaries. At the end, students present their final product at a classroom film festival and show off their STEM skills!
While the Video Production kit guides students through the production process, Padcaster equipment gives them more freedom. Padcaster Studio, the most comprehensive Padcaster kit, provides a tablet case, microphones, two powerful lenses, a green screen, tripods, a teleprompter, lighting accessories, and headsets, among other supplies. The equipment turns a simple iPad or other tablet into a professional-level filmmaking tool. With so much additional functionality, students’ audiovisual productions will soar in quality.
Phase Three: Editing
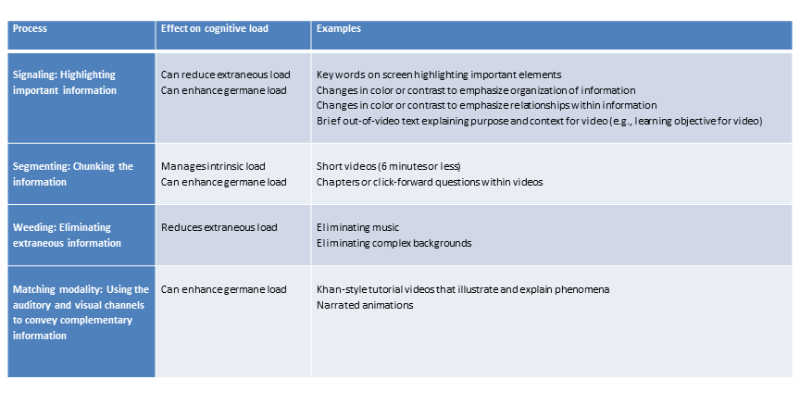
When creating a video to increase student retention, it’s important to be aware of how students will process the information. This helpful guide explains how best to edit a video to maximize learning based on cognitive processing principles. Educators can use signaling—on-screen text and symbols—to indicate important information to the viewer. Highlighting key words or phrases makes it easier for students to grasp the most important points. Editing should also weed out distractions like background noise or movement so that students can focus on the main ideas. Finally, segmenting information into chunks of five minutes or less helps students stay on task. One study found that students watched 100% of videos under six minutes long. However, students dropped off when the video reached nine minutes or more.
Editing should also focus on ensuring accessibility in videos. Adding captions is essential for including Deaf students, students with auditory processing disabilities, and neurodiverse students, among others. The editing stage may also include re-recording muffled audio if necessary—another way to increase accessibility. Writing out descriptions of scenes can make it accessible for blind and visually impaired students as well. For podcasts, providing a transcript contributes to ease of access for students with certain types of disabilities or people who simply prefer to read instead of listen.
Free audio and video editing tools
But what tools do classrooms need to effectively record and edit AV productions? Audacity is a trusted free audio editor that I personally have been using for well over a decade. It’s a comprehensive tool that podcasters can easily incorporate into their productions, and it even has an online-only version for students that can’t download software. GarageBand and Spotify for Podcasters are also effective resources for audio-only productions.
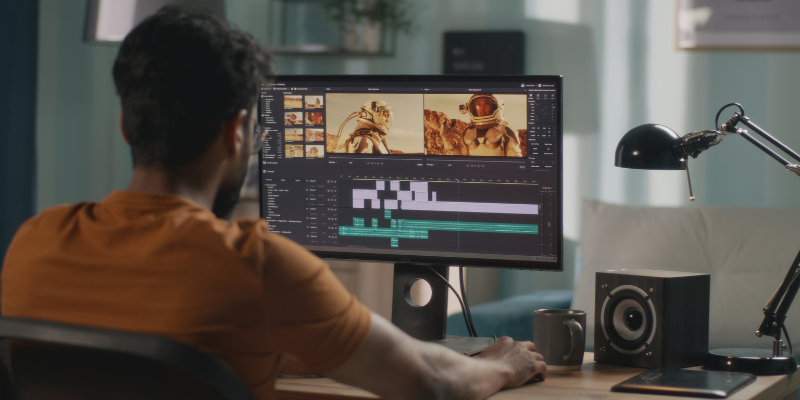
In terms of video, there are a few different ways to go. If you’re using a smartphone to record and edit video, you’ve probably already heard of CapCut. It’s a free app that allows you to cut and trim videos, add visual effects, and incorporate music. Although it’s primarily used on phones, it also comes in a software version available for download on computers. For Mac users, iMovie comes pre-installed and includes a wide variety of editing options, including stabilization, transition effects, and the ability to speed up or slow down clips. The popular graphic design website Canva also includes video editing, though it has limited capability, especially in the free version. Schools with a higher budget might pursue paid editors like Filmora or Adobe Premiere Pro on PC or LumaFusion for iPads (after a Padcaster filming session, of course).
Phase Four: Presenting
Presenting your finished product is one of the most rewarding steps of the audiovisual production process! Students could upload a podcast to Apple Podcasts, like Josh’s students, or use Spotify’s podcast hosting system. Spotify also has a comprehensive list of all its podcast hosting partners, so if your class uses one of these tools, it’s easy to import the podcast to Spotify as well. As for videos, students can easily upload them to YouTube, Vimeo, Facebook, TikTok, or other social media sites. Just be sure to set the video to private so students stay safe online. Here are instructions on setting your video to private and sharing the exclusive link without making it publicly available.
But distributing an audiovisual production online is not the only way to get it out there. Students could show their final product to the class or host an event for parents or other students to experience their project. Maybe they could even make a blog or website on which to host their presentations and those of future students!
Less exciting than presenting the work is the process of grading it. Nevertheless, you’ll want to give students a score on the rubric that you handed out earlier in the Planning stage. We suggest grading them on clarity and delivery, organization, creativity and originality, and visual or audio quality, among other criteria.
What are the benefits of classroom video productions?
Of course, teachers aren’t going to go through all four phases of audiovisual production without knowing how the process contributes to student learning. But audiovisual content has so many benefits that it’s almost impossible to fit them all in one article. One of the most significant is the role of AV production in long-term learning. Studies show that students who learn material and then re-teach it in a video lecture outperform students who only learn the material for a test. Besides increased comprehension, students also receive the benefits of greater equity in classroom representation and improved SEL skills from collaborative making—not to mention a wealth of career benefits.
Videos increase student attention and performance
As you may remember, lowered attention spans were the reason we looked into audiovisual production in the first place. And our theory was proven correct—audio and video are proven to increase student engagement and retention. In one 2020 study, 79% of surveyed students reported that an interactive video made them “completely engaged” in learning the course. While watching the video, pop-up elements required students to interact by answering multiple choice questions, dragging the correct word into a sentence, and more. After completing the tasks, nearly 70% of students reported that they felt their individual performance in the class had improved—just from watching and interacting with a video!
When making a video themselves, students also report increased knowledge and engagement, according to a 2020 study on active learning through video production. The study indicated that student-created videos not only improved engagement but also “contributed to an increase in students’ perceived STEM content knowledge.” The video production process also improved their confidence in their ability to effectively understand and apply STEM knowledge. Another 2019 study found that 89.6% of students self-reported higher satisfaction with the class when creating videos, leading to a concomitant increase in engagement. Thus, whether watching videos or recording them, students see improved learning outcomes when AV production is incorporated into the classroom.
Video production offers an opportunity for diversity
Increased engagement is certainly a bonus of using AV production in lessons, but it’s not the only benefit students will see. Although classroom diversity and equity—especially in STEM—have become priorities for educators in the past decade, there is still a long way to go. Audiovisual production can increase classroom equity by representing students from all backgrounds. Students who rarely see themselves represented in mainstream media can now become that representation for others. Watching other students’ videos can also increase empathy by reminding students of their peers’ perspectives. And as we discussed above, including captions and transcripts with audiovisual productions increases accessibility for many students.
SEL benefits of classroom video production
Like many STEAM projects, creating an audiovisual production necessitates teamwork and collaboration. Although students might make individual videos for some classes, a podcast usually isn’t very entertaining without at least two or three people to have a conversation. And more in-depth videos almost always require a team to write the script, hold the camera, manage audio, and more. When students work together to make their storyboard a reality, they’ll learn how to communicate their ideas and compromise to keep everyone feeling included.
One easy way to increase SEL outcomes is to have students rotate their roles in the production. Assign a project in which students make two videos. For this example, teams of social studies students will choose a relevant political topic and make a video arguing both sides. The students should work together to plan the video and write a script. In the first video, have two students defend one point of view, while two other students manage the technical aspects of the production. In the second video, they’ll switch, and the two students who didn’t get a speaking role the first time will argue the other side of the issue. That way, everyone gets a chance to practice their production skills and understand multiple perspectives on real-world debates.
Audiovisual productions also enable students to take a novel approach to emotional learning. Acting taps into emotional skills that kids may only just be developing. As they work to portray different emotions in informational videos, podcasts, songs, short films, and other AV productions, students will come to a deeper understanding of how those emotions manifest in their own minds and bodies.
Students can pursue careers in audiovisual production
As we’ve seen over the past couple of years, career and technical education (CTE) has risen in popularity as educators prepare students to enter the workforce. Helpfully, audiovisual production fits right into CTE classes. Not only will students learn hands-on tech skills, but they’ll also be exposed to related career opportunities in AV production. If they want to work in a classic office building, they can use AV skills to install digital signage or conferencing systems. Or they might tap into the wealth of audiovisual job options in the live events industry. Perhaps one of your students will mix a new Harry Styles hit or help broadcast a future Super Bowl. Even education has its AV needs, like sound systems for school auditoriums or video broadcast systems for the morning announcements.
Even if students don’t go into a dedicated AV production field, the skills they learn will still benefit them in other careers. Practical audiovisual skills come into play in many marketing roles, for example. Storyboarding expertise is necessary for journalism, game design, and other creative professions. And no matter the field, the clarity of speech students practiced in classroom AV productions will improve their communication skills across any interaction.
For more ideas on incorporating multimedia learning into your classroom, follow us on Twitter/X and Instagram. Be sure to sign up for our newsletter as well to get articles like this one right in your inbox! And don’t forget to apply for our monthly STEM grant and get your hands on some of the tools mentioned above.