
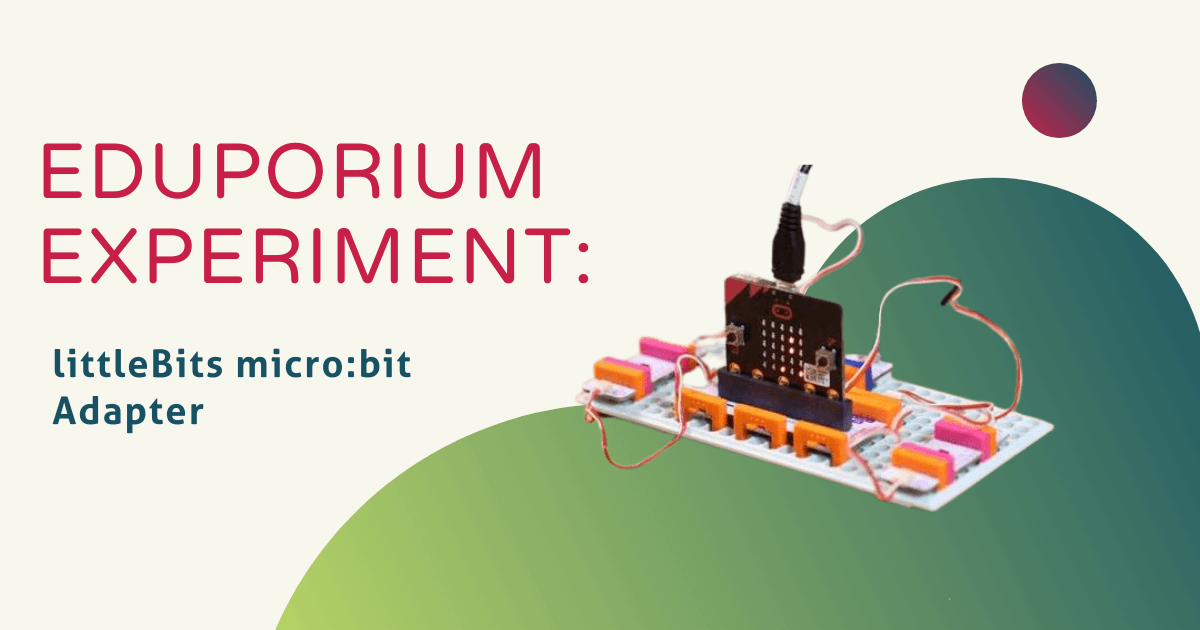
It’s one of the coolest STEAM tools we have on our store and the littleBits micro:bit Adapter has the potential to help reinvent MakerEd and coding lessons. For any educator who’s used littleBits tools in the past, their offerings became that much greater with the addition of the Code Kit. And, with this new wrinkle, students have more ways than ever to design, invent, and get coding with littleBits! The littleBits micro:bit Adapter is a Bit with a slot to connect a micro:bit board right into littleBits inventions. For this week’s Eduporium Experiment, we tried an activity from the Sphero team featuring the Sphero RVR!
There are a lot of activities students can do with the adapter, littleBits kits, and Sphero robots. In fact, you can find some of Sphero’s top suggestions in this blog post. I decided to try out the Sunflower project and see if I could successfully build a micro:bit-powered sunflower capable of seeking out the brightest spots in the room as the description says! Students can build the code entirely within the MakeCode environment with no need to use the littleBits FUSE app.
On the adapter, students can see the words 'micro:bit front.' This indicates the correct direction for placing the micro:bit into the adapter. It's also important to attach the correct pin to the adjacent Bit to establish the right point of contact. It depends on student preference, but they could build their circuit first and then their micro:bit program or vice versa. Either way is fine with us! As for the micro:bit board, both the V1 and V2 should work with the littleBits adapter.
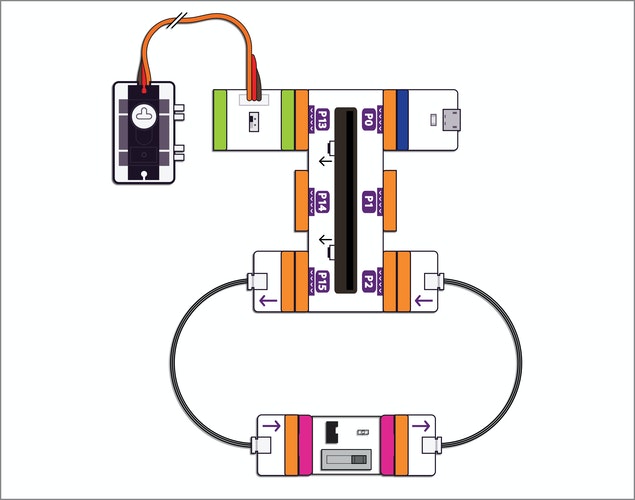
For this project, students would need the following Bits to build their circuit: A power Bit, two Bit wires, a light sensor Bit, a servo Bit, the mechanical arm, and, of course, the micro:bit Adapter. They will also need their Sphero RVR, a laptop, the MakeCode software, and the Sphero Edu app. One thing that is unique about the littleBits micro:bit Adapter is that it can power sensors that are not connected to the power Bit. In this project, the sensor will connect via the wire, so students need to write a program to activate it.
They can start by constructing their circuit using the Bits mentioned above and following the image below from Sphero. Be sure that each Bit is connected to the right spot. For example, you can see how the green servo Bit is connected to P13 on the micro:bit Adapter and the power Bit (blue) is connected to P0. These details are important in the construction of this circuit. Once the circuit is built, it's time to write a digital command that will activate the sensor. Students can open MakeCode and start a new block program (unless trying Python) with an ‘on start’ block.
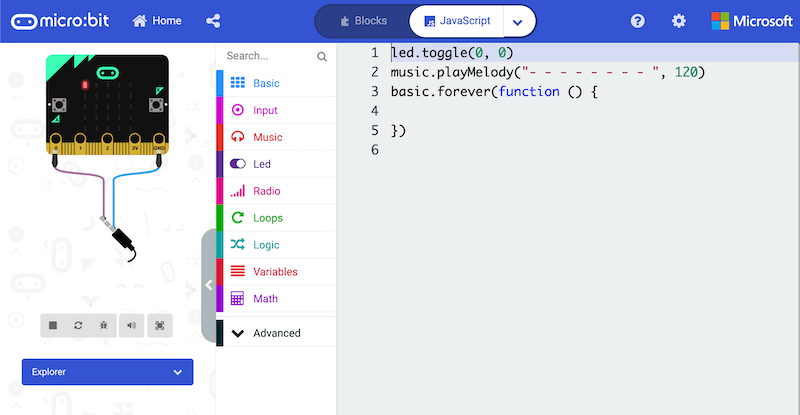
The next thing is to create four different variables by navigating to the ‘Variables’ section in MakeCode and clicking ‘Make a variable.’ Students can title their four variables heading, direction, CurrentLightValue, and LastLightValue. They should then add a red ‘digital write pin’ block, set the pin to P15, and the value to 1. You can find the ‘pins’ section within the MakeCode interface under the tab that says ‘Advanced.’ They then need to place a ‘set variable’ block directly below the digital write pin block. The ‘set variable’ block is within the ‘Variables’ section. Drag it into the program, toggle the value to ‘direction,’ and set the value to 1.
Then, students will need to set the values within their ‘forever’ code. To do so, they’ll need additional variable blocks and set the values to those in the image below. Each block is found within the ‘Variables’ or ‘Pins’ sections of MakeCode. For this part of the project, students are making use of the variables they’ve created and modifying the heading variable to get the motor to move a small amount each time their program completes a loop. Basically, the analog write block tells the motor to go to the new destination (towards light), which is stored in the heading block! Lastly, they’ll need to add a ‘pause’ block from the ‘Basic’ section. Setting the value to 500 ms tells the servo to move every 500 ms.

Next, students need an ‘if then’ block from MakeCode’s ‘Logic’ section. Place it between the ‘set’ and ‘change’ blocks. They then need to drag a comparison block in and place it where it says ‘true.’ The comparison sign should be set to ‘less than’ so that the program is able to compare different light levels as the littleBits circuit pivots. Now, drag the CurrentLightValue variable to the left of the comparison sign and the LastLightValue to the right. You then need a ‘set’ block slotted in the opening within the ‘if then’ block and set that variable to ‘direction.’ Next, add a math block, set the operation to multiply, set the left side to the ‘direction’ variable, and set the right side to -1. This will tell the servo motor to go back to where it was brighter!

The last line of code should be another ‘set’ block in between the ‘change’ and ‘analog’ blocks. But, first, we need to make a change to the ‘change’ block. Adding a ‘direction’ variable and a block to multiply it by 25 will account for directional changes. Now, we’re ready for the ‘set’ block. Be sure to add it in and set the variables to what you see below!

With the program built, now connect the micro:bit to the computer and click the download button. You can choose to design a flower, too, like the one in the picture. Once the program has downloaded, disconnect the micro:bit from the computer and place it in the littleBits micro:bit Adapter. Then, power on the RVR and pair it with the Sphero Edu app to get everything synced up. The micro:bit should begin running the code and the mechanical area should pivot left and right towards the light!
If students find success with running this program using the MakeCode block editor, they can try the next step. Switching to the Python editor will make it more challenging. The program should transfer over and students can see how their block code translates into text code. If they've practiced with text coding before, they can also try to add some new elements. If not, try having them see if they can compare what appears in the text version to what they created in the block version. They can always download their program in the text version and try running it again!
If you have any questions about this project, the littleBits micro:bit Adapter, or the Sphero RVR, feel free to contact us or anyone on the Sphero team. Be sure to check out the rest of Sphero’s offerings on our store! Let us know if you would like to place an order or request a quote as well. Follow us on Twitter and Instagram for all of the latest updates from us on EdTech, STEM, and MakerEd.
2 Comments